ChevyParts
My Garage
My Account
Cart
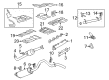
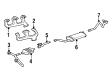
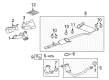
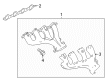
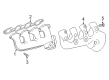
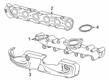
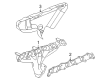
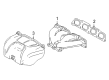
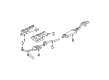
OEM GMC Exhaust Manifold
Engine Exhaust Manifold- Select Vehicle by Model
- Select Vehicle by VIN
Select Vehicle by Model
orMake
Model
Year
Select Vehicle by VIN
For the most accurate results, select vehicle by your VIN (Vehicle Identification Number).
143 Exhaust Manifolds found


GMC Exhaust Manifold Part Number: 12670220
$310.75 MSRP: $529.04You Save: $218.29 (42%)Ships in 1-2 Business DaysProduct Specifications- Other Name: Manifold, Engine Exhaust Manifold
- Replaces: 12627069


GMC Exhaust Manifold, Passenger Side Part Number: 12574320
$168.06 MSRP: $264.43You Save: $96.37 (37%)Ships in 1-3 Business DaysProduct Specifications- Other Name: Manifold, Engine Exhaust Manifold
- Position: Passenger Side

GMC Exhaust Manifold, Driver Side Part Number: 10045317
$6.75 MSRP: $12.07You Save: $5.32 (45%)Ships in 1-3 Business DaysProduct Specifications- Other Name: Manifold, Engine Exhaust Manifold; Manifold
- Position: Driver Side
- Replaced by: 19369733

GMC Exhaust Manifold Part Number: 12571100
$85.13 MSRP: $140.01You Save: $54.88 (40%)Ships in 1-2 Business DaysProduct Specifications- Other Name: Manifold, Engine Exhaust Manifold; Manifold


GMC Exhaust Manifold, Driver Side Part Number: 10238374
$188.35 MSRP: $296.35You Save: $108.00 (37%)Product Specifications- Other Name: Manifold, Engine Exhaust Manifold; Manifold
- Position: Driver Side


GMC Exhaust Manifold, Passenger Side Part Number: 12676607
$66.44 MSRP: $114.09You Save: $47.65 (42%)Ships in 1-3 Business DaysProduct Specifications- Other Name: Manifold-Exhaust (Right-Hand)
- Position: Passenger Side
- Replaced by: 12708009
GMC Exhaust Manifold, Passenger Side Part Number: 10238373
$210.27 MSRP: $330.84You Save: $120.57 (37%)Ships in 1-3 Business DaysProduct Specifications- Other Name: Manifold, Engine Exhaust Manifold; Manifold
- Position: Passenger Side

GMC Exhaust Manifold, Driver Side Part Number: 12610962
$429.15 MSRP: $737.06You Save: $307.91 (42%)Ships in 1-2 Business DaysProduct Specifications- Other Name: Manifold, Engine Exhaust Manifold
- Position: Driver Side
- Replaced by: 12686303
GMC Exhaust Manifold, Driver Side Part Number: 12702899
$76.51 MSRP: $130.25You Save: $53.74 (42%)Ships in 1-2 Business DaysProduct Specifications- Other Name: Manifold, Engine Exhaust Manifold
- Position: Driver Side
- Replaced by: 12708010

GMC Exhaust Manifold, Driver Side Part Number: 12701714
$222.00 MSRP: $349.23You Save: $127.23 (37%)Product Specifications- Other Name: Manifold, Engine Exhaust Manifold
- Position: Driver Side
- Replaces: 12690201

GMC Exhaust Manifold, Driver Side Part Number: 12668117
$73.35 MSRP: $114.87You Save: $41.52 (37%)Ships in 1-3 Business DaysProduct Specifications- Other Name: Manifold, Engine Exhaust Manifold
- Position: Driver Side

GMC Exhaust Manifold, Driver Side Part Number: 12701716
$59.65 MSRP: $93.42You Save: $33.77 (37%)Ships in 1-3 Business DaysProduct Specifications- Other Name: Manifold, Engine Exhaust Manifold
- Position: Driver Side
GMC Exhaust Manifold, Passenger Side Part Number: 12668118
$79.78 MSRP: $124.95You Save: $45.17 (37%)Ships in 1-3 Business DaysProduct Specifications- Other Name: Manifold-Exhaust (Right-Hand); Manifold, Engine Exhaust Manifold
- Position: Passenger Side
- Replaced by: 12701709

GMC Exhaust Manifold Part Number: 12587310
$196.85 MSRP: $309.73You Save: $112.88 (37%)Ships in 1-3 Business DaysProduct Specifications- Other Name: Manifold, Engine Exhaust Manifold; Manifold

GMC Exhaust Manifold Part Number: 12663521
$118.16 MSRP: $185.92You Save: $67.76 (37%)Ships in 1-3 Business DaysProduct Specifications- Other Name: Manifold, Engine Exhaust Manifold
- Replaces: 12632377
GMC Exhaust Manifold, Passenger Side Part Number: 12701715
$263.74 MSRP: $394.23You Save: $130.49 (34%)Ships in 1-3 Business DaysProduct Specifications- Other Name: Manifold, Engine Exhaust Manifold
- Position: Passenger Side
- Replaces: 12690202

GMC Exhaust Manifold Part Number: 12557746
Product Specifications- Other Name: Manifold, Engine Exhaust Manifold

GMC Exhaust Manifold Part Number: 12556039
Product Specifications- Other Name: Manifold, Engine Exhaust Manifold

GMC Exhaust Manifold Part Number: 12559186
Product Specifications- Other Name: Manifold, Engine Exhaust Manifold

GMC Exhaust Manifold, Passenger Side Part Number: 10221960
Product Specifications- Other Name: Manifold, Engine Exhaust Manifold; Manifold
- Position: Passenger Side
| Page 1 of 8 |Next >
1-20 of 143 Results
GMC Exhaust Manifold
Want to cut long-term maintenance and repair costs? Choose OEM Exhaust Manifold. Those parts deliver top durability you can trust. On our site, you'll find a huge catalog of genuine GMC parts. Prices are unbeatable, so you can keep more in your pocket. Every OEM GMC Exhaust Manifold includes a manufacturer's warranty. You can also get an easy return policy that keeps buying risk free. Fast delivery, get your car on the road quickly. It's simple to search, compare, and order. Stop guessing about quality or fit. Order today and save with parts that last.
GMC Exhaust Manifold Parts Questions & Experts Answers
- Q: How to replace the right side exhaust manifold on GMC Acadia?A:The first step to replace the right side Exhaust Manifold requires the removal of the Catalytic Converter together with the Exhaust Manifold heat shield. After removing the Exhaust Manifold bolts other gaskets should be discarded. Extract both Exhaust Manifold along with its gasket for disposal from the automobile. First install one Exhaust Manifold bolt onto the Exhaust Manifold before setting a new Exhaust Manifold gasket on the Cylinder Head and bolting it in. Secure the Exhaust Manifold (together with its gasket) onto both the Catalytic Converter and the Cylinder Head while following the specified fastener instructions. Mount the Exhaust Manifold bolts starting with one component 20 n.m (15 lb ft) fastening torque. The conclusion of the replacement procedure requires reinstallation of the Exhaust Manifold heat shield together with the Catalytic Converter.
- Q: How to replace the left side exhaust manifold on GMC Yukon?A:The first step when replacing the left side Exhaust Manifold is to position the j 42640 (Steering Column Anti-Rotation Pin) into the Steering Column lower access hole. The repair process begins by taking out the left wheelhouse lining then thoroughly raising and supporting the vehicle frame. To perform this task you need to take off the Exhaust Manifold nuts from the Catalytic Converter and then lower the vehicle until you have access through the wheel opening (1500 series shown, 2500 series follows similar procedure). After twisting each boot half a turn, use your hands only to pull the Spark Plug wires away from the spark plugs before conducting the identical steps with the ignition coils. Begin by marking the upper intermediate Steering Shaft position regarding the Steering Column before uninstalling the coupling bolt and nut that secures the upper intermediate Steering Shaft from the Steering Column. You need to uninstall the Exhaust Manifold bolts and Exhaust Manifold while throwing away both the Exhaust Manifold Gasket and Catalytic Converter seal. The Exhaust Manifold heat shield requires removal of its bolts before the shield can be taken off. To install the Exhaust Manifold heat shield attach it to position first before securing its bolts at 9 nm torque (80 lb in). Apply gm p/n 12345493 threadlock gm p/n 12345493 (Canadian P/N 10953488) as a 5 mm (0.2 in) wide band on the Exhaust Manifold bolts before cleaning their threaded portions. I placed the new Catalytic Converter seal and set the new Exhaust Manifold Gasket and Exhaust Manifold against the cylinder head with complete Catalytic Converter seating. Tighten the Exhaust Manifold bolts by starting with the middle two going from center to sides before finishing at 20 nm (15 lb ft) while following the alternating pattern. .floor punch to bend the gasket tab at the Exhaust Manifold's rear then align Steering Column and upper intermediate Steering Shaft marks before installing the shaft to the column. Screw the Steering Shaft coupling bolt along with its nut to the upper intermediate Steering Shaft before tightening them to 50 nm (37 lb ft). Check the installation of Spark Plug wires to spark plugs and ignition coils before conducting a proper inspection. Fully raise and support the vehicle before installing the Catalytic Converter to Exhaust Manifold nuts and tightening them to 50 nm (37 lb ft). The technician should lower the vehicle partially before reinstalling the left wheelhouse liner followed by removing the j 42640 from the Steering Column access hole.
- Q: How to replace the right side exhaust manifold for 4.8L, 5.3L, 6.0L, and 6.2L engines on GMC Sierra 1500?A:The fundamental requirement for right side Exhaust Manifold replacement applies to all 4.8l, 5.3l, 6.0l, and 6.2l engines where the technician must remove the heated Oxygen Sensor (HO2S). Fully support the elevated vehicle before removing the nuts which secure the Catalytic Converter to the Exhaust Manifold while recognizing that the 1500 series esv model serves as an example since the 2500 series shares similar characteristics. Put the wheelhouse liner and Spark Plug Wires into a position where the boot should twist by half a turn before pulling the boot by itself. The engine block requires you to remove its oil level indicator tube bolt (419) along with the tube (420). Evacuate the Exhaust Manifold bolts before extracting the Exhaust Manifold while throwing out the Exhaust Manifold Gasket and seal. Lead removal requires operators to unfasten both the Exhaust Manifold heat shield bolts and to take away the heat shield. During installation position the Exhaust Manifold heat shield before mounting it with bolts which should be tightened to 9 nm (80 lb in). All Exhaust Manifold bolts require cleaning followed by the application of thread-lock gm p/n 12345493 (Canadian P/N 10953488) that covers the threads by 5 mm (0.2 in). Place the new Exhaust Manifold Gasket together with the Exhaust Manifold onto the cylinder head. Additionally place the Catalytic Converter seal before seating it properly. Start by tightening the Exhaust Manifold bolts to 15 nm (11 lb ft) following a pattern of center bolts first and then alternating side-to-side before reaching the final torque of 20 nm (15 lb ft) while also maintaining the same pattern. Using a flat punch bend the gasket tab which extends from its rear section around the cylinder head edge. The o-ring seal (421) should receive an inspection for damage before getting lubricated with engine oil. After that put in the oil level indicator tube (420) to the engine block while tightening the bolt (419) to 25 nm (18 lb ft). The Spark Plug Wires should be replaced on the spark plugs and ignition coils after installation through each boot by pushing in a sideways motion. After installing the correct wheelhouse liner, securely raise the vehicle once again before installing the Catalytic Converter to Exhaust Manifold nuts which you will tighten to 50 nm (37 lb ft). The installation process ends with partially lowering the vehicle towards the wheel opening for inserting the ho2s.


Related GMC Parts
 GMC EGR Valve
 GMC Muffler
 GMC Air Inject Check Valve
 GMC Catalytic Converter Gasket
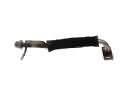 GMC EGR Tube
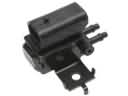 GMC EGR Vacuum Solenoid
 GMC EGR Valve Gasket
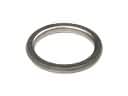 GMC Exhaust Flange Gasket
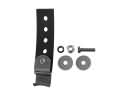 GMC Exhaust Hanger
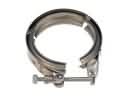 GMC Exhaust Manifold Clamp
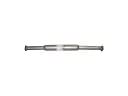 GMC Exhaust Resonator
 GMC Muffler Hanger Straps
Browse GMC Exhaust Manifold by Models
Acadia Sierra 1500 Yukon Canyon Sierra 2500 HD Terrain Envoy Sonoma Typhoon Syclone Caballero C1500 Envoy XL Envoy XUV Jimmy K1500 S15 S15 Jimmy Safari Savana 2500 Savana 3500 Sierra 2500 Sierra 3500 Yukon XL Acadia Limited C2500 C3500 G2500 K2500 K3500 P3500 Savana 1500 Yukon XL 1500 C1500 Suburban C2500 Suburban G1500 G3500 K1500 Suburban K2500 Suburban P2500 R1500 R1500 Suburban R2500 R2500 Suburban R3500 Sierra 1500 Classic Sierra 1500 HD Sierra 1500 HD Classic Sierra 1500 Limited Sierra 2500 HD Classic Sierra 3500 Classic Sierra 3500 HD V1500 V1500 Suburban V2500 V2500 Suburban V3500 Yukon XL 2500