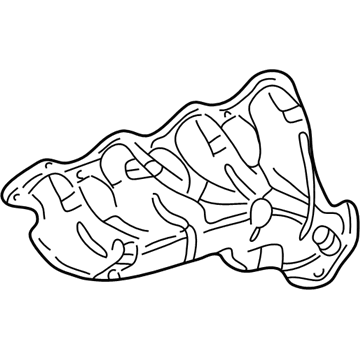
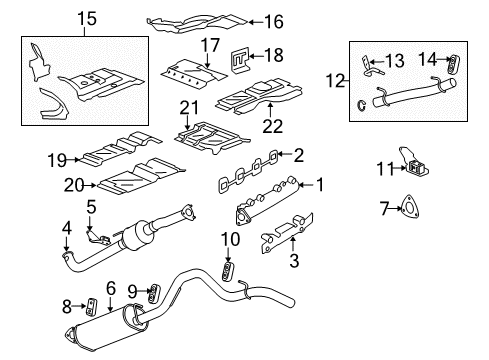
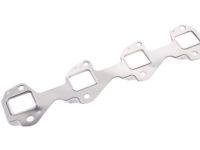
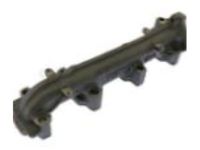
Make sure this part fits

GM 12677665
Exhaust Manifold

2000-2017 GM

Customer Questions & Expert Answers (61)
GM 12677665 Exhaust Manifold
  • Part Description
    Manifold, Engine Exhaust Manifold
  • Replaces
    12648339
  • Manufacturer
    General Motors
Make sure this part fits
$199.07 MSRP: $338.92
You Save: $139.85 (42%)
Ships in 1-2 Business Days
1
ADD TO CART
  • Related Parts
  • Product Specifications
  • Vehicle Fitment
  • Customer Questions & Expert Answers
  • Product Specifications

    BrandGenuine GM
    Manufacturer Part Number12677665
    Part DescriptionManifold, Engine Exhaust Manifold
    Other NamesManifold
    Item Dimensions9.2 x 5.3 x 25.1 inches
    Item Weight14.40 Pounds
    ConditionNew
    Fitment TypeDirect Replacement
    Replaces12648339
    ManufacturerGeneral Motors
    SKU12677665
    WarrantyThis genuine GM part is guaranteed by GM's factory warranty.
    Shipping & ReturnShipping Policy Return Policy
    Warning: California's Proposition 65
  • Vehicle Fitment

    Year Make Model Trim Engine
    2004-2014, 2002 Cadillac EscaladeBase, Hybrid, Hybrid Platinum, Luxury, Platinum, Premium8 Cyl 5.3 L GAS, 8 Cyl 6.0 L FULL HYBRID EV-FLEX (FHEV), 8 Cyl 6.0 L FULL HYBRID EV-GAS (FHEV), 8 Cyl 6.0 L GAS, 8 Cyl 6.2 L FLEX, 8 Cyl 6.2 L GAS
    2004-2014 Cadillac Escalade ESVBase, Luxury, Platinum, Premium8 Cyl 6.0 L GAS, 8 Cyl 6.2 L FLEX, 8 Cyl 6.2 L GAS
    2004-2013 Cadillac Escalade EXTBase, Luxury, Premium8 Cyl 6.0 L GAS, 8 Cyl 6.2 L FLEX, 8 Cyl 6.2 L GAS
    2007-2013 Chevrolet AvalancheBlack Diamond LS, Black Diamond LT, Black Diamond LTZ, LS, LT, LTZ8 Cyl 5.3 L FLEX, 8 Cyl 5.3 L GAS, 8 Cyl 6.0 L GAS
    2004-2006, 2002 Chevrolet Avalanche 1500Base, LS, LT, North Face, On Road Edition, Z66, Z718 Cyl 5.3 L FLEX, 8 Cyl 5.3 L GAS
    2004-2006, 2002 Chevrolet Avalanche 2500Base, LS, LT8 Cyl 8.1 L GAS
    2003-2014 Chevrolet Express 1500Base, LS, LT8 Cyl 5.3 L FLEX, 8 Cyl 5.3 L GAS
    2003-2017 Chevrolet Express 2500Base, LS, LT8 Cyl 4.8 L FLEX, 8 Cyl 4.8 L GAS, 8 Cyl 5.3 L GAS, 8 Cyl 6.0 L CNG, 8 Cyl 6.0 L FLEX, 8 Cyl 6.0 L GAS
    2003-2017 Chevrolet Express 3500Base, LS, LT8 Cyl 4.8 L FLEX, 8 Cyl 4.8 L GAS, 8 Cyl 6.0 L CNG, 8 Cyl 6.0 L FLEX, 8 Cyl 6.0 L GAS
    2004-2013, 2002 Chevrolet Silverado 1500Base, Hybrid, LS, LT, LTZ, SS, WT, XFE, Z71 Off-Road8 Cyl 4.8 L FLEX, 8 Cyl 4.8 L GAS, 8 Cyl 5.3 L FLEX, 8 Cyl 5.3 L FULL HYBRID EV-GAS (FHEV), 8 Cyl 5.3 L GAS, 8 Cyl 6.0 L FULL HYBRID EV-FLEX (FHEV), 8 Cyl 6.0 L FULL HYBRID EV-GAS (FHEV), 8 Cyl 6.0 L GAS, 8 Cyl 6.2 L FLEX
    View More
  • Customer Questions & Expert Answers

    Q:
    Is this 12677665 designed for my car? Posted by ChevyPartsGiant Specialist
    A:
    Please Select Your Vehicle model to see if part number 12677665 is suitable before ordering.
    Posted by ChevyPartsGiant Specialist
    Q:
    How to remove and install the left exhaust manifold on Cadillac Escalade EXT? Posted by Customer
    A:
    The first step to remove the left Exhaust Manifold requires Ignition Coil removal followed by Spark Plug extraction before raising and suspending the vehicle. After lowering the vehicle users can reach the Exhaust Manifold bolts as well as the manifold and gasket to remove them while discarding the components. Under rare circumstances you must detach heat shield bolts as well as shield pieces from the Exhaust Manifold. Inspect and clean the Exhaust Manifold only when the replacement is not required. You should connect heat shield along with bolts onto Exhaust Manifold unless otherwise required then torque all bolts to 9 nm (80 inch lbs.). Proper installation of Exhaust Manifold bolts will avoid emissions problems while clean threads remain present in the cylinder head Exhaust Manifold bolt holes. Avoid applying any sealant compound to the first three threads of each bolt. A 5 mm (0.2 inch) band of threadlock gm p/n 12345493 (Canadian P/N 10953488) should be applied to each Exhaust Manifold bolt thread before installing the Exhaust Manifold and new gasket with the bolts. Begin by tightening the center two bolts while alternating from side to side until they reach 15 nm (11 ft. Lbs.). Then finish up by torquing all bolts to 25 nm (18 ft. Lbs.) by following the same side-to-side pattern. If you position a flat punch on the exposed gasket at the rear of the left cylinder head then raise the vehicle you can install the Exhaust Manifold pipe nuts by torquing them to 50 nm (37 ft. Lbs.). At the end of the process you should lower the vehicle before putting the spark plugs and ignition coils back in place.
    Posted by ChevyPartsGiant Specialist
    Q:
    How to replace the left side exhaust manifold on Cadillac Escalade? Posted by Customer
    A:
    The first step when replacing the left side Exhaust Manifold involves unmounting ignition coils and spark plugs. After properly raising the vehicle for support you should remove the nuts that link the Catalytic Converter to Exhaust Manifold (image shows 1500 series yet 2500 series installation follows a similar process). Detach both Exhaust Manifold bolts followed by the Exhaust Manifold while discarding its gasket after lowering the vehicle body. Before installing the Exhaust Manifold bolts users need to inspect the threads of the bolt holes for any contaminants including threadlocking materials while avoiding the application of sealant to the initial three threads. A 5 mm (0.2 in) wide band of threadlock gm p/n 12345493 should be applied to the Exhaust Manifold bolt threads. Use equivalent threadlock material as alternative measures. Set the new Exhaust Manifold Gasket in place followed by the Exhaust Manifold on the Cylinder Head before installing the Exhaust Manifold bolts. The repair process begins by installing the center 2 Exhaust Manifold bolts to 15 n.m (11 lb ft). Continue bolting from side to side until all 6 bolts are tightened to the initial torque value. The final tightening of all bolts is performed to 20 n.m (15 lb ft) following a side-to-side alternate pattern. A flat punch can be used to fold the gasket tab that extends from the rear of the gasket along the Cylinder Head edge. Return the vehicle into position while checking that the exhaust seal fully rests inside the Catalytic Converter. Then install the Catalytic Converter to the Exhaust Manifold nuts and torque them to 50 n.m (37 lb ft). Put the vehicle back into position while reattaching both spark plugs and ignition coils.
    Posted by ChevyPartsGiant Specialist
    Q:
    How to replace the right side exhaust manifold on Cadillac Escalade? Posted by Customer
    A:
    The first step to replace the right side Exhaust Manifold requires draining the cooling system because rear air conditioning is present. In the first step you should remove the ignition coils alongside spark plugs and oil level indicator tube together with heated Oxygen Sensor (HO2S). First lower the vehicle while removing Catalytic Converter to Exhaust Manifold nuts from both parts (1500 series shown, 2500 series similar). Rear a/c is present so operators should first move the radiator surge tank outlet hose clamp at the Water Pump and extract the hose from its position at the Water Pump before repositioning it out of the way. The installation starts by loosening the heater inlet hose clamp at the Water Pump and removing both the clamp and heater inlet hose for subsequent position aside. The next step involves removing Exhaust Manifold bolts and the Exhaust Manifold with the disposal of an Exhaust Manifold Gasket while extracting the exhaust seal present on the Exhaust Manifold. Insert the exhaust seal onto the Exhaust Manifold before treating its Exhaust Manifold bolts with a 5 mm (0.2 in) wide threadlocker band using gm p/n 12345493 (Canadian P/N 10953488). First tighten two center bolts of the Exhaust Manifold to 15 n.m (11 lb ft) before progressing to side bolts in an alternating pattern until reaching 20 n.m (15 lb ft). Install the Exhaust Manifold to the Cylinder Head followed by Exhaust Manifold bolts after which press the exhaust seal onto the Exhaust Manifold using threadlock gm p/n 12345493 (Canadian P/N 10953488). A flat punch will be used to bend the gasket tab at the rear circular edge of the gasket around the Cylinder Head. The installation of the heater inlet hose requires positioning it at the Water Pump followed by clamping it down with the heater inlet hose clamp when rear a/c is used. Attach the radiator surge tank outlet hose to the Water Pump through its clamp while keeping the outlet hose in position. Uphold the vehicle before installing the Catalytic Converter to its Exhaust Manifold nuts while tightening them to 50 n.m (37 lb ft). The technician must reinstall the oil level indicator tube followed by installation of spark plugs and ignition coils after lowering the vehicle. Finally, fill the cooling system.
    Posted by ChevyPartsGiant Specialist
    Q:
    How to replace the left side exhaust manifold on Cadillac Escalade ESV? Posted by Customer
    A:
    Spare time initiates by installing the Steering Column anti-rotation pin (J 42640) at the Steering Column lower access hole. Take off the left wheelhouse liner while lifting and supporting the entire vehicle. The first step involves removing Catalytic Converter to Exhaust Manifold nuts from the 1500 series vehicle (similar procedure for 2500 series) before lowering the vehicle with a middle-position for wheel opening access. To remove Spark Plug Wires you should twist the wire boot a 1/2 turn and pull the boot only. Determine the position of the upper intermediate Steering Shaft relative to the Steering Column before extracting the bolt and the nut from the Steering Shaft's upper intermediate section for column separation. Extract the Exhaust Manifold bolts while removing its components and discard both the gasket and seal from the Exhaust Manifold and Catalytic Converter. Pulling the Exhaust Manifold heat shield requires removal of its bolts and following removal of the shield. Install the Exhaust Manifold heat shield by positioning it first then install the bolts which should be tightened to 9 n.m (80 lb in). Before installing the bolts apply gm p/n 12345493 (Canadian P/N 10953488) threadlock in a 5 mm (0.2 in) band on each bolt thread. Secure the new Catalytic Converter seal on the Exhaust Manifold while placing both parts of the new Exhaust Manifold Gasket and Exhaust Manifold into position next to the Cylinder Head to achieve correct Catalytic Converter seating. Begin by tightening the Exhaust Manifold bolts to 15 n.m (11 lb ft) according to a designated sequence and follow up with a final step of tightening them to 20 n.m (15 lb ft). A flat punch should be used to bend the gasket tab located at the Exhaust Manifold end around the Cylinder Head. Position the upper intermediate Steering Shaft right marks with Steering Column marks before installing and securing using Steering Shaft coupling bolt and the nut . Torque the bolt to 50 n.m (37 lb ft). Place the Spark Plug Wires back on their assigned locations on the spark plugs and ignition coils after ensuring each wire is properly settled into place. Placing fully raised support under the vehicle let you install the Catalytic Converter to Exhaust Manifold nuts before tightening each nut to 50 n.m (37 lb ft). Lower the vehicle partway and place the left wheelhouse liner before taking out the Steering Column anti-rotation pin (J 42640) from the Steering Column lower access hole.
    Posted by ChevyPartsGiant Specialist
    Q:
    How to replace the right exhaust manifold on 4.8L, 5.3L, and 6.0L engines on Chevrolet Avalanche 1500? Posted by Customer
    A:
    You need to begin the right Exhaust Manifold change procedure for 4.8l, 5.3l, and 6.0l engines by taking off the ignition coils along with the spark plugs. Start by elevating the vehicle and then remove the nuts on the Exhaust Manifold pipes. Lower the vehicle so you can remove the Exhaust Manifold bolts and manifold and gasket which you should discard the gasket. The Exhaust Manifold requires heat shield bolts removal to eliminate both the shield attachment parts from the Exhaust Manifold. When keeping the Exhaust Manifold you must inspect and clean it thoroughly. You should attach the heat shield along with its bolts to the Exhaust Manifold only when needed then tighten the bolts to 9 nm (80 inch lbs.). Proper bolt torque on the Exhaust Manifold will stop vehicle emission issues and ensure correct on-board diagnostics (OBD) ii system operation and check that all bolt holes have smooth threads without debris but avoid applying sealant to the first three threads on the bolt. Wrap the boundary of the Exhaust Manifold bolt threads with threadlocker gm p/n 12345493 (Canadian P/N 10953488) or equivalent material to the extent of 5 mm (0.2 inches). Install the Exhaust Manifold and new gasket before tightening the bolts starting from the middle of the two then moving to opposite sides until reaching the outside bolts. Finish the tightening at 25 nm (18 ft. Lbs.) using the same pattern. Use a flat punch to bend the Exhaust Manifold Gasket exposed edges at the front of the right cylinder head. The installation continues by raising the vehicle and installing Exhaust Manifold pipe nuts which should be tightened to 50 nm (37 ft. Lbs.) followed by vehicle lowering.
    Posted by ChevyPartsGiant Specialist
    Q:
    How to remove and install the right exhaust manifold on an 8.1L engine on Chevrolet Avalanche 2500? Posted by Customer
    A:
    The removal process of right Exhaust Manifold from an 8.1l engine starts with wheelhouse panel and oil level indicator elimination. Grasp only the boot and rotate it clockwise one-half turn until it breaks loose. After that, pull the boot separately to protect the Spark Plug wire and plug from damage. The next step requires removing the Spark Plug Wires from both spark plugs and coils before pulling out the spark plugs. Begin by raising the vehicle to support its weight and continue by removing the heat shield bolts followed by the nuts and finally remove the heat shield. Lower the vehicle after which remove the Exhaust Manifold bolts then the nuts before taking out the manifold. The installation process starts with discarding the old Exhaust Manifold Gasket while cleaning and examining the manifold surface. You must first set the new Exhaust Manifold Gasket before mounting the Exhaust Manifold. Fasten the bolt to 35 nm (26 ft. Lbs.) while the nuts should be tightened to 16 nm (12 ft. Lbs.). Raising the vehicle to a proper height, mount the heat shield before tightening bolt and nuts to 25 nm (18 ft. Lbs.). The installation requires operators to first lower the vehicle and then fit spark plugs by pushing Spark Plug Wires directly onto Spark Plug boots without depending on metal heat shield usage. After wiring the Spark Plug Wires onto spark plugs and ignition coils, you should install the oil level indicator before placing the wheelhouse panel back in position.
    Posted by ChevyPartsGiant Specialist
    Q:
    How to replace the left exhaust manifold (4.8L, 5.3L, 6.0L) on Chevrolet Express 3500? Posted by Customer
    A:
    In order to replace the left Exhaust Manifold (4.8L, 5.3L, 6.0L), first lift the car and remove the Catalytic Converter from the Exhaust Manifold. Next, remove the engine cover and unbolt the egr valve pipe to the Exhaust Manifold if so equipped. Disconnect the Spark Plug Wires and the Exhaust Manifold itself, ensuring that all the parts of the sealing surfaces are cleaned. For installation, start by installing the Exhaust Manifold, then, when bolted on the first pass, tighten the Exhaust Manifold bolts to 15 nm (11 ft. Lbs.) and to 25 nm (18 ft. Lbs.) on the second pass. Connect the egr valve pipe to the manifold, reattach the Spark Plug Wires, attach the Exhaust Pipe to the exhaust, and finally, put the engine cover back in place.
    Posted by ChevyPartsGiant Specialist
    Q:
    How to replace the left exhaust manifold on 4.8L, 5.3L, and 6.0L engines on Chevrolet Silverado 2500? Posted by Customer
    A:
    Essential tasks for left Exhaust Manifold replacement on 4.8l, 5.3l, and 6.0l engines include lifting the vehicle while supporting it followed by removing Exhaust Manifold pipe nuts. Begin by lowering the vehicle then unfasten the spark plugs followed by Exhaust Manifold bolts then remove the manifold while discarding the gasket. You should eliminate the Exhaust Manifold heat shield bolts before taking away the shield from the Exhaust Manifold. Examine and clean the Exhaust Manifold before further work. Secure the heat shield over the Exhaust Manifold then attach its bolts and secure them to 9 nm (80 inch lbs.). Clean and inspect the threads inside cylinder head Exhaust Manifold bolt hole openings before applying gm p/n 12345493 (Canadian P/N 10953488) thread lock to the first three bolt threads. Use threadlock gm p/n 12345493 (Canadian P/N 10953488) or equivalent to create a 5 mm (0.2 inch) band of product on the Exhaust Manifold bolt threads. Before assembling the Exhaust Manifold wrap a new gasket around it then use bolts which need tightening sequentially from middle to outside while alternating from side to side. Execute the initial bolt tightening to 15 nm (11 ft. Lbs.) before performing a final round of bolt tightening to 25 nm (18 ft. Lbs.) with the same alternating pattern. Use a flat punch to fold the Exhaust Manifold gasket at the rear of the left cylinder head before installing spark plugs. After raising the vehicle please add Exhaust Manifold pipe nuts but make sure they reach 50 nm torque (37 ft. Lbs.), and then lower the vehicle.
    Posted by ChevyPartsGiant Specialist
    Q:
    How to remove and install the left exhaust manifold on a 4.3L engine on Chevrolet Silverado 1500? Posted by Customer
    A:
    A 4.3l engine requires vehicle support before you can remove the left Exhaust Manifold by first taking off the Exhaust Manifold pipe nuts then lowering the vehicle. Extract each Spark Plug wire from its Spark Plug before uninstalling the Spark Plug wire retainer bolts which should be placed atop the engine. Next disconnect the engine coolant temperature (ECT) sensor electrical connector while taking out the spark plugs. Start the Exhaust Manifold and Spark Plug wire shield removal by taking off bolts/studs securing both pieces. After that remove both shields while discarding the Exhaust Manifold gaskets. Wait to begin if you need to remove Exhaust Manifold heat shield bolts then discarding the shield while cleaning all gasket-smashing areas. Place the Exhaust Manifold heat shield back onto position while installing its retaining bolts to reach 9 nm torque (80 inch lbs.). Couples of new Exhaust Manifold gaskets should be installed onto the Exhaust Manifold while making sure the gasket tabs maintain contact between the gasket and bolts. The Exhaust Manifold and plug wire shields should be installed while gm p/n 12345493 (Canadian P/N 10953488) or equivalent threadlock material is applied to old Exhaust Manifold bolts/stud threads before tightening to 30 nm (22 ft. Lbs.). Reconnect the ect sensor electrical connector followed by installing the spark plugs which must be tightened to 15 nm (11 ft lbs). Afterward install the wire harness toward the engine then secure the Spark Plug wire retainer bolts at 12 nm (106 inch lbs). Finish the installation by attaching the Spark Plug Wires to the spark plugs then raising the vehicle to install Exhaust Manifold pipe nuts before tightening them to 50 nm (37 ft. Lbs.) while avoiding vehicle descent.
    Posted by ChevyPartsGiant Specialist
    Q:
    How to replace the right side exhaust manifold on Chevrolet Tahoe? Posted by Customer
    A:
    The first step for replacing right side Exhaust Manifold requires removal of the heated Oxygen Sensor (HO2S). The vehicle requires complete support through proper lifting. The first step is to remove nuts that hold the Catalytic Converter to the Exhaust Manifold (1500 series is displayed but the procedure for 2500 series is comparable). Play the front wheel house liner from the right side before lowering the vehicle partially to access the wheel opening. Twisting each Spark Plug wire boot half an inch should allow you to pull out the boot so you can access the Spark Plug. To service ignition coils you should disconnect their Spark Plug Wires in a specific method. First remove the engine block oil level indicator tube then proceed with Exhaust Manifold bolt removal and Exhaust Manifold separation. The entire Exhaust Manifold Gasket along with its sealing component needs to be thrown away. To replace the Exhaust Manifold it is necessary to disassemble the heat shield by removing its bolts and releasing it from position. Before attaching the Exhaust Manifold heat shield install it in position then tighten the bolts to 9 nm (80 lb in). Apply threadlock gm p/n 12345493 (Canadian P/N 10953488) to the Exhaust Manifold bolts as a 5 mm (0.2 in) thick strip around the threads after cleaning their surface. At first install a new Catalytic Converter seal while positioning the new Exhaust Manifold Gasket and Exhaust Manifold to the Cylinder Head with attention to seating the Catalytic Converter seal. Install the center Exhaust Manifold bolts with 15 nm torque before working from side to side then finish them at 20 nm. The gasket tab needs to be folded with a flat punch at the Cylinder Head edge. The technician should reinstall the oil level indicator tube while carefully positioning Spark Plug Wires and ignition coils into their connectors through sideward pushing for proper seating verification of each connector boot. Raise and support the vehicle to its full height before installing the Catalytic Converter to Exhaust Manifold nuts which should be tightened up to 50 nm (37 lb ft). The procedure includes lowering the vehicle to access the wheel opening then reinstalling the right-front front wheel house liner before completing the installation with the ho2s and exhaust leak inspection.
    Posted by ChevyPartsGiant Specialist
    Q:
    How to replace the left side exhaust manifold on a 4.3L engine on Chevrolet Silverado 1500 Classic? Posted by Customer
    A:
    The replacement of the left side Exhaust Manifold on a 4.3l engine starts by lifting then supporting the vehicle while removing Exhaust Manifold pipe nuts. Start by lowering the vehicle and next disconnect the Spark Plug wires from spark plugs before you remove the Spark Plug wire retainer bolts to place wire harness on engine top. The replacement process requires both Spark Plug extraction and unplugging of the engine coolant temperature (ECT) sensor electrical connector. After removing Exhaust Manifold bolts/stud and Spark Plug wire shield bolts you can take off both components and dispose of the worn-out Exhaust Manifold Gasket. The procedure requires the displacement of heat shield bolts and shield from the Exhaust Manifold while cleaning all required gasket mating surfaces. The Exhaust Manifold heat shield needs to be installed along with its bolts to a torque specification of 9 nm (80 inch lbs.). New Exhaust Manifold gaskets should receive tabs to secure both the gaskets and bolts before placing the Exhaust Manifold with plug wire shields. The threads of used Exhaust Manifold bolts/stud should receive gm threadlock gm p/n 12345493 (Canada's P/N 10953488) before torquing them to 30 nm (22 ft. Lbs.). Follow ect sensor electrical connector installation by adding spark plugs which should be tightened to 15 nm (11 ft. Lbs.) while placing the wire harness and bolt its retainer bolts to 12 nm (106 inch lbs.). Position spark wires to spark plugs next build the vehicle then install Exhaust Manifold pipe nuts and torque them to 50 nm (37 ft. Lbs.) before lowering down the vehicle.
    Posted by ChevyPartsGiant Specialist
    Q:
    How to replace the right exhaust manifold on 4.8L, 5.3L, and 6.0L engines on Chevrolet Tahoe? Posted by Customer
    A:
    The replacement procedure for the right Exhaust Manifold on 4.8l, 5.3l, and 6.0l engines begins with Ignition Coil and Spark Plug removal followed by vehicle elevation and support. First remove Exhaust Manifold pipe nuts followed by lowering the vehicle to unlatch the Exhaust Manifold bolts and manifold with its gasket. Discard these items before moving ahead. Removing heat shield bolts along with shield components from the Exhaust Manifold becomes necessary for some repairs. Install new exhaust manifolds only if you plan to check them for cleanliness since a replacement is not needed. Use the heat shield together with its bolts to secure the Exhaust Manifold after proper bolt tightening to 9 nm (80 inch lbs.). The Exhaust Manifold bolts should receive their stated torque setting because improper installation degrades both emission performance and on-board diagnostics (OBD) ii system execution. The bolts which secure the Exhaust Manifold to the Cylinder Head must have thread-holes that are clear of dust and thread-lock compounds while excluding any sealant application from the first three threaded sections. A 5 mm (0.2 inch) wide coating of threadlock gm p/n 12345493 (Canadian P/N 10953488) or equivalent product needs to be applied to the Exhaust Manifold bolt threads. First tighten the center two bolts and then alternate between the sides when installing the Exhaust Manifold with its new gasket and bolts until they reach 15 nm (11 ft. Lbs.). Perform a final tightening phase to 25 nm (18 ft. Lbs.) by repeating the same side-to-side pattern. Use a flat punch to bend over the front part of the exposed Exhaust Manifold gasket at the right Cylinder Head. Finish by reinstalling spark plugs alongside ignition coils then raise the vehicle to put Exhaust Manifold pipe nuts in their place until they reach 50 nm (37 ft. Lbs.) torque before lowering it down.
    Posted by ChevyPartsGiant Specialist
    Q:
    How to replace the right exhaust manifold on Chevrolet Suburban 1500? Posted by Customer
    A:
    The procedure to replace the right Exhaust Manifold requires lifting and suspending the vehicle before removing Exhaust Manifold pipe nuts and lowering the vehicle. Unscrew the spark plugs then break loose bolts(1,2,3) which secure the exhaust gas recirculation(EGR) valve pipe to the Intake Manifold and Cylinder Head and Exhaust Manifold. Mild force should be used to pull the egr valve pipe off the Intake Manifold before discarding both the gasket and o-ring seal. You should first detach the crossover bolt connecting the secondary air injection (AIR) check valve pipe (crossover) to the check valves while repositioning the hose spring clamps. After that, cut the check valve pipe (crossover) from the check valves only when replacement is needed. Start by removing the right Exhaust Manifold check valve pipe nuts and pipe (with check valve) as well as gasket followed by removing Exhaust Manifold bolts, manifold and gasket which needs discarding. The exhibition of the Exhaust Manifold requires bolt removal from both heat shield and shield components. Secure the Exhaust Manifold with heat shield and its bolts when needed then torque heat shield bolts to 9 nm (80 inch lbs.). Follow the designated torque values for Exhaust Manifold bolt torque while cleaning all threads of the Cylinder Head Exhaust Manifold bolt openings from debris. Apply threadlock gm p/n 12345493 or equivalent to a 5 mm (0.2 inch) wide band that covers the Exhaust Manifold bolt threads. Then install the new gasket with the Exhaust Manifold and bolts. Start by tightening the Exhaust Manifold bolts from the center to both sides with the torque sequence of 15 nm (11 ft. Lbs.) followed by 25 nm (18 ft. Lbs.). Use a flat punch tool to bend the exposed portion of Exhaust Manifold gasket sealant situated at the front of the right Cylinder Head. Connect a new air check valve pipe gasket and the nuts and pipe with check valve to the right Exhaust Manifold before tightening the nuts to 25 nm (18 ft. Lbs.). Position the hose spring clamps while you attach the air check valve pipe (crossover) to the check valves. Tighten the crossover bolt to 50 nm (37 ft. Lbs.). Getting a new o-ring seal ready with engine oil prevents leakage before installation within the egr valve pipe. The egr pipe then needs to be installed in the secured position. Use a criss-cross method to fasten the egr valve pipe bolts until tight while torquing the egr valve pipe to Intake Manifold bolt to 10 nm (89 inch lbs.), the egr valve pipe to Cylinder Head bolts to 50 nm (37 ft. Lbs.), as well as the egr valve pipe to Exhaust Manifold bolts to 30 nm (22 ft. Lbs.). Put the spark plugs in place and elevate the vehicle afterward installing the Exhaust Manifold pipe nuts and tightening them to 50 nm (37 ft. Lbs.) before returning it to ground level.
    Posted by ChevyPartsGiant Specialist
    Q:
    How to replace the left exhaust manifold on GMC Yukon XL 1500? Posted by Customer
    A:
    First support the car before you disconnect the Exhaust Manifold pipe nuts under the left Exhaust Manifold and let the vehicle down. First remove the spark plugs and engine coolant temperature (ECT) sensor while unbolting the junction block bracket and subsequently moving the junction block. You should remove the bolt that secures the air check valve pipe crossover and position spring clamps on the crossover hose. Both check valves should remain installed on the air pipe crossover when you detach it from the check valves except in cases where check valve replacement becomes necessary. Remove the left Exhaust Manifold air check valve pipe nuts along with the pipe (contains the check valve) and its gasket to access the Exhaust Manifold bolts. Discard the gasket and remove all manifold bolts while keeping the piece and gasket of pipe components. You should disassemble the Exhaust Manifold heat shield bolts and shield when required in this process. Fix the heat shield to the Exhaust Manifold when needed then fasten its bolts to 9 nm (80 inch lbs.). To prevent exhaust problems and proper on-board diagnostics (OBD) 11 operation necessitate a specified torque value on Exhaust Manifold bolts with thread hole cleaning on the cylinder head Exhaust Manifold bolt holes. Threadlock gm p/n 12345493 or equivalent applied as a 5 mm (0.2 inch) wide band should be used on the Exhaust Manifold bolts before installing the Exhaust Manifold with a new gasket and bolts. Begin by tightening the Exhaust Manifold bolts to 15 nm (11 ft. Lbs.) from the middle bolts outwards side-to-side, followed by final tightening to 25 nm (18 ft. Lbs.) with the same alternating pattern. Using a flat punch to bend the exposed Exhaust Manifold gasket that faces the left cylinder head rear section, install the pipe with check valve and its new air check valve pipe gasket and nuts onto the left Exhaust Manifold then torque these nuts to 25 nm (18 ft. Lbs.). Secure the air check valve pipe (crossover) to the check valves then apply the air check valve pipe (crossover) hose spring clamps before bolt installation with 50 nm (37 ft-lbs) torque. Install the junction block onto the generator bracket before tightening its bracket bolts to 9 nm (80 inch lbs.). To finish the installation sequence you must install the ect sensor, spark plugs while raising the vehicle before installing the Exhaust Manifold pipe nuts by tightening them to 50 nm (37 ft. Lbs.).
    Posted by ChevyPartsGiant Specialist
    Q:
    How to replace the left exhaust manifold on 4.8L, 5.3L, and 6.0L engines on GMC Sierra 1500? Posted by Customer
    A:
    You must start by raising and supporting the vehicle before removing Exhaust Manifold pipe nuts on 4.8l, 5.3l and 6.0l engines. Start by lowering the vehicle before continuing to uninstall the spark plugs followed by Exhaust Manifold bolts and finally removing the manifold together with its gasket which requires disposal. The mechanic must take heat shield bolts and shield out from the Exhaust Manifold when needed. Begin with cleaning an inspection of the Exhaust Manifold before installing the heat shield along with its bolts to the Exhaust Manifold which needs 9 nm (80 inch lbs.) torque during bolt tightening. Threadlock gm p/n 12345493 (Canadian P/N 10953488) should be used to coat a 5 mm (0.2 inch) wide area around the Exhaust Manifold bolts while ensuring the cylinder head Exhaust Manifold bolt hole threads stay free from debris and threadlocking material and threadlock should not be applied to the initial three bolt threads. Fasten the bolts of the Exhaust Manifold with an initial 15 nm (11 ft. Lbs.) torque starting from the middle two bolts before proceeding to tighten alternating bolts from side to side all the way to the outer bolts. A final torque of 25 nm (18 ft. Lbs.) using the same sequence should be applied. A flat punch should be used to bend the exposed Exhaust Manifold gasket at the rear of the left cylinder head before spark plugs can be installed. The next step is to raise the vehicle for Exhaust Manifold pipe nut installation followed by torquing them to 50 nm (37 ft. Lbs.) until completion of the procedure by lowering the vehicle.
    Posted by ChevyPartsGiant Specialist
    Q:
    How to replace the left exhaust manifold on 4.8L, 5.3L, and 6.0L engines on GMC Yukon XL 2500? Posted by Customer
    A:
    The replacement process of the left Exhaust Manifold for 4.8l, 5.3l, and 6.0l engines begins with Ignition Coil and Spark Plug removal before vehicle elevation and support. Begin by taking out the Exhaust Manifold pipe nuts followed by lowering the vehicle to reach the Exhaust Manifold bolts and manifold alongside its gasket which needs removal before disposal. The installer will detach the Exhaust Manifold heat shield bolts and shield when required. You must inspect the Exhaust Manifold and clean it before reuse when keeping the existing manifold. During installation tighten the bolts of the Exhaust Manifold by torquing them to 9 nm (80 inch lbs.) after correctly reattaching the heat shield and its bolts to the Exhaust Manifold. Vehicle emissions together with the on-board diagnostics (OBD) ii system performance depend on precise torque adjustment of Exhaust Manifold bolts during installation. There should be no debris or threadlocking material present inside the Exhaust Manifold bolt hole threads of the cylinder head. Avoid using sealant on the first three bolt threads. Apply threadlocking band gm p/n 12345493 (equivalent to Canadian P/N 10953488) with a 5 mm (0.2 inch) width at the bolts' threads of the Exhaust Manifold. The Exhaust Manifold should be installed with fresh gasket and bolts according to this procedure: start by tightening the center bolts to 15 nm (11 ft. Lbs.), then move to the side-to-side alternation and finish with a final stage of 25 nm (18 ft. Lbs.). Use a flat punch to bend the exposed Exhaust Manifold Gasket edge located at the rear of the left cylinder head. Reposition the vehicle to install Exhaust Manifold pipe nuts that should be tightened to 50 nm (37 ft. Lbs.) after which you should lower the vehicle and replace the spark plugs and ignition coils.
    Posted by ChevyPartsGiant Specialist
    Q:
    How to replace the left side exhaust manifold on GMC Yukon? Posted by Customer
    A:
    The first step when replacing the left side Exhaust Manifold is to position the j 42640 (Steering Column Anti-Rotation Pin) into the Steering Column lower access hole. The repair process begins by taking out the left wheelhouse lining then thoroughly raising and supporting the vehicle frame. To perform this task you need to take off the Exhaust Manifold nuts from the Catalytic Converter and then lower the vehicle until you have access through the wheel opening (1500 series shown, 2500 series follows similar procedure). After twisting each boot half a turn, use your hands only to pull the Spark Plug wires away from the spark plugs before conducting the identical steps with the ignition coils. Begin by marking the upper intermediate Steering Shaft position regarding the Steering Column before uninstalling the coupling bolt and nut that secures the upper intermediate Steering Shaft from the Steering Column. You need to uninstall the Exhaust Manifold bolts and Exhaust Manifold while throwing away both the Exhaust Manifold Gasket and Catalytic Converter seal. The Exhaust Manifold heat shield requires removal of its bolts before the shield can be taken off. To install the Exhaust Manifold heat shield attach it to position first before securing its bolts at 9 nm torque (80 lb in). Apply gm p/n 12345493 threadlock gm p/n 12345493 (Canadian P/N 10953488) as a 5 mm (0.2 in) wide band on the Exhaust Manifold bolts before cleaning their threaded portions. I placed the new Catalytic Converter seal and set the new Exhaust Manifold Gasket and Exhaust Manifold against the cylinder head with complete Catalytic Converter seating. Tighten the Exhaust Manifold bolts by starting with the middle two going from center to sides before finishing at 20 nm (15 lb ft) while following the alternating pattern. .floor punch to bend the gasket tab at the Exhaust Manifold's rear then align Steering Column and upper intermediate Steering Shaft marks before installing the shaft to the column. Screw the Steering Shaft coupling bolt along with its nut to the upper intermediate Steering Shaft before tightening them to 50 nm (37 lb ft). Check the installation of Spark Plug wires to spark plugs and ignition coils before conducting a proper inspection. Fully raise and support the vehicle before installing the Catalytic Converter to Exhaust Manifold nuts and tightening them to 50 nm (37 lb ft). The technician should lower the vehicle partially before reinstalling the left wheelhouse liner followed by removing the j 42640 from the Steering Column access hole.
    Posted by ChevyPartsGiant Specialist
    Q:
    How to replace the right side exhaust manifold on GMC Yukon? Posted by Customer
    A:
    The heated Oxygen Sensor (HO2S) needs removal before starting the replacement of the right side Exhaust Manifold. Lift the vehicle until it reaches maximum height using proper support tools. For both the 1500 and 2500 series vehicles remove nuts connecting the Catalytic Converter to the Exhaust Manifold from their mounting positions. The right side wheel house liner should be removed with the vehicle at a partial downward position to enable access through the wheel opening. Twist and pull the wire boot of spark plugs by half a turn while pulling only on the boot to remove them from the plugs. The process requires both removing the Spark Plug Wires from ignition coils using the same approach. Extract the oil level indicator tubing which is attached to the engine block. Begin by removing both Exhaust Manifold bolts followed by taking out the Exhaust Manifold while getting rid of the Exhaust Manifold Gasket and seal. The removal of the Exhaust Manifold heat shield begins with unbolting the shield then destroying the Exhaust Manifold bolts. Secure the Exhaust Manifold heat shield by fastening its bolts to 9 nm (80 lb in) torque. The threads of the Exhaust Manifold bolts should be cleaned before applying threadlock gm p/n 12345493 (Canadian P/N 10953488) in a 5 mm (0.2 in) wide band. Seat a new Catalytic Converter seal before placing the new Exhaust Manifold Gasket together with Exhaust Manifold onto the Cylinder Head avoiding displacement of the Catalytic Converter seal. Begin by tightening the Exhaust Manifold bolts at 15 nm (11 lb ft) while shifting from the middle two components first towards the outer sides subsequently reaching 20 nm (15 lb ft) at each bolt. A flat punch should be used to create a bend in the gasket tab near the Cylinder Head perimeter. After replacing the oil level indicator tube and placing Spark Plug Wires to ignition coils and spark plugs check the installation. Raise the vehicle to full height while supporting it and install the Catalytic Converter to Exhaust Manifold nuts before applying torque to 50 nm (37 lb ft). Lower the vehicle slightly while accessing the wheel opening before reinstalling the front wheel house liner on the right front position and installing the ho2s while checking for exhaust leaks in the system.
    Posted by ChevyPartsGiant Specialist
    Q:
    How to remove and install the left exhaust manifold on an 8.1L engine on GMC Sierra 3500? Posted by Customer
    A:
    The first step when removing the left Exhaust Manifold on an 8.1l engine involves taking out the wheelhouse panel while untwisting Spark Plug boot half a turn to release it before selectively pulling the boot without touching the wire. The first step involves removing both the Spark Plug Wires from the spark plugs and ignition coils before extracting the spark plugs. Begin by lifting and supporting the vehicle before you uninstall the bolts and nuts on the left Exhaust Manifold heat shield and remove it from position. Initiate the operation by lowering the Exhaust Manifold to detach all nuts and bolts of the Exhaust Manifold before completely removing it. Remove the old Exhaust Manifold Gasket before cleaning the Exhaust Manifold to inspect its condition. When installing the Exhaust Manifold it requires a new gasket and proper bolting down where the bolt reaches 35 nm (26 ft. Lbs.) and the nuts secure at 16 nm (12 ft. Lbs.). From this position the car should be raised so workers can apply the Exhaust Manifold heat shield and bolt it into place with a torque of 25 nm (18 ft. Lbs.). Put the vehicle back into position before you attach the spark plugs and connect Spark Plug Wires to their respective ignition coils and spark plugs. Install the boot of the Spark Plug Wires completely by pushing against the exposed terminal area but without touching it with the metal heat shield. Finally, reinstall the wheelhouse panel.
    Posted by ChevyPartsGiant Specialist
    Q:
    What is the tightening procedure for the exhaust manifold bolts for the 2008 Cadillac Escalade ESV? Posted by Customer
    A:
    Tighten them first to 15 N.m (11 lb ft) starting with the center two bolts and alternating side-to-side, then to a final pass of 20 N.m (15 lb ft) using the same pattern.
    Posted by ChevyPartsGiant Specialist
    See expert answers on similar Exhaust Manifold
    Q:
    What should be done after raising the 2002 Cadillac Escalade? Posted by Customer
    A:
    Remove the exhaust manifold pipe nuts and lower the vehicle to access the exhaust manifold bolts, manifold, and gasket, which should be removed and discarded.
    Posted by ChevyPartsGiant Specialist
    See expert answers on similar Exhaust Manifold
    Q:
    What is the final step in the process for the 2006 Chevrolet Avalanche 2500? Posted by Customer
    A:
    Connect the spark plug wires to the spark plugs and ignition coils, and reinstall the wheelhouse panel.
    Posted by ChevyPartsGiant Specialist
    See expert answers on similar Exhaust Manifold
    Q:
    How do you start the installation process for the 2006 Chevrolet Express 1500? Posted by Customer
    A:
    Start by placing the exhaust manifold gasket, then install the exhaust manifold.
    Posted by ChevyPartsGiant Specialist
    See expert answers on similar Exhaust Manifold
    Q:
    What should be done with the exhaust manifold studs for the 2010 Chevrolet Express 2500? Posted by Customer
    A:
    Remove the exhaust manifold studs.
    Posted by ChevyPartsGiant Specialist
    See expert answers on similar Exhaust Manifold
    Q:
    What is the final step in the process for the 2008 Chevrolet Express 2500? Posted by Customer
    A:
    Finally, install the engine cover.
    Posted by ChevyPartsGiant Specialist
    See expert answers on similar Exhaust Manifold
    Q:
    What needs to be disconnected next for the 2005 Chevrolet Express 2500? Posted by Customer
    A:
    The spark plug wires from the spark plugs.
    Posted by ChevyPartsGiant Specialist
    See expert answers on similar Exhaust Manifold
    Q:
    What should be removed after the catalytic converter for the 2008 Chevrolet Express 3500? Posted by Customer
    A:
    Take off the engine cover and the oil level indicator tube.
    Posted by ChevyPartsGiant Specialist
    See expert answers on similar Exhaust Manifold
    Q:
    What is the first step in servicing the exhaust manifold for the 2006 Chevrolet Express 1500? Posted by Customer
    A:
    Begin by cleaning the exhaust manifold and heat shield in solvent, then dry the exhaust manifold with compressed air.
    Posted by ChevyPartsGiant Specialist
    See expert answers on similar Exhaust Manifold
    Q:
    What is the first step for installation for the 2009 Chevrolet Express 3500? Posted by Customer
    A:
    Install the heat shield (603) and bolts (604) and tighten to 9 Nm (80 lb in).
    Posted by ChevyPartsGiant Specialist
    See expert answers on similar Exhaust Manifold
    Q:
    What should be connected after installing the exhaust manifold for the 2010 Chevrolet Express 3500? Posted by Customer
    A:
    Connect the EGR pipe to the manifold, if equipped, and reinstall the spark plug wires.
    Posted by ChevyPartsGiant Specialist
    See expert answers on similar Exhaust Manifold
    Q:
    What should be reinstalled after tightening the exhaust manifold bolts for the 2009 Chevrolet Express 2500? Posted by Customer
    A:
    Reinstall the oil level indicator tube and the spark plug wires.
    Posted by ChevyPartsGiant Specialist
    See expert answers on similar Exhaust Manifold
    Q:
    What should be done after the initial tightening of the exhaust manifold bolts for the 2004 Chevrolet Silverado 2500? Posted by Customer
    A:
    Perform a final tightening pass to 25 Nm (18 ft. lbs.) using the same pattern.
    Posted by ChevyPartsGiant Specialist
    See expert answers on similar Exhaust Manifold
    Q:
    What should be done with the spark plug wires for the 2010 Chevrolet Silverado 1500? Posted by Customer
    A:
    If necessary, reposition the spark plug wires out of the way before removing the exhaust manifold bolts.
    Posted by ChevyPartsGiant Specialist
    See expert answers on similar Exhaust Manifold
    Q:
    What is the next step after removing the pipe nuts for the 2006 Chevrolet Silverado 3500? Posted by Customer
    A:
    Lower the vehicle.
    Posted by ChevyPartsGiant Specialist
    See expert answers on similar Exhaust Manifold
    Q:
    What is the next step after installing the exhaust manifold for the 2006 Chevrolet Silverado 3500? Posted by Customer
    A:
    Install the spark plugs.
    Posted by ChevyPartsGiant Specialist
    See expert answers on similar Exhaust Manifold
    Q:
    What is the first step to replace the left exhaust manifold on a 4.3L engine for the 2005 Chevrolet Silverado 1500? Posted by Customer
    A:
    Raise and support the vehicle, then remove the exhaust manifold pipe nuts.
    Posted by ChevyPartsGiant Specialist
    See expert answers on similar Exhaust Manifold
    Q:
    What should be done after reinstalling the heat shield for the 2008 Chevrolet Silverado 1500? Posted by Customer
    A:
    Raise and support the vehicle again.
    Posted by ChevyPartsGiant Specialist
    See expert answers on similar Exhaust Manifold
    Q:
    What is the next step after positioning the wire harness for the 2004 Chevrolet Silverado 1500? Posted by Customer
    A:
    Remove the spark plugs and disconnect the Engine Coolant Temperature (ECT) sensor electrical connector.
    Posted by ChevyPartsGiant Specialist
    See expert answers on similar Exhaust Manifold
    Q:
    What should be done with the exhaust manifold gasket for the 2002 Chevrolet Tahoe? Posted by Customer
    A:
    Using a flat punch, bend over the exposed edge of the exhaust manifold gasket at the front of the right cylinder head.
    Posted by ChevyPartsGiant Specialist
    See expert answers on similar Exhaust Manifold
    Q:
    What type of threadlock should be applied to the exhaust manifold bolts for the 2007 Chevrolet Silverado 3500 Classic? Posted by Customer
    A:
    Apply a 5 mm (0.2 inch) wide band of threadlock GM P/N 12345493 (Canadian P/N 10953488) or equivalent.
    Posted by ChevyPartsGiant Specialist
    See expert answers on similar Exhaust Manifold
    Q:
    What should be placed between the manifold and the cylinder head for the 2009 Chevrolet Silverado 1500? Posted by Customer
    A:
    Place the NEW exhaust manifold gaskets.
    Posted by ChevyPartsGiant Specialist
    See expert answers on similar Exhaust Manifold
    Q:
    What should be done after securing the manifold for the 2003 Chevrolet Express 3500? Posted by Customer
    A:
    Reinstall the oil level indicator tube, attach the catalytic converter to the exhaust manifold, and finally, put the engine cover back in place.
    Posted by ChevyPartsGiant Specialist
    See expert answers on similar Exhaust Manifold
    Q:
    What should be done if the heat shield is needed for the 2007 Chevrolet Silverado 3500 Classic? Posted by Customer
    A:
    Install the heat shield and bolts to the exhaust manifold, tightening the bolts to 9 Nm (80 inch lbs.).
    Posted by ChevyPartsGiant Specialist
    See expert answers on similar Exhaust Manifold
    Q:
    What should be placed between the manifold and the cylinder head for the 2007 GMC Sierra 1500? Posted by Customer
    A:
    Place the NEW exhaust manifold gaskets.
    Posted by ChevyPartsGiant Specialist
    See expert answers on similar Exhaust Manifold
    Q:
    How should the new exhaust manifold gaskets be placed for the 2006 GMC Sierra 1500? Posted by Customer
    A:
    Place them on the exhaust manifold, ensuring the tabs hold the gasket and bolts in place.
    Posted by ChevyPartsGiant Specialist
    See expert answers on similar Exhaust Manifold
    Q:
    What components need to be removed from the engine block for the 2009 GMC Sierra 1500? Posted by Customer
    A:
    Remove the oil level indicator tube bolt (419) and the oil level indicator tube (420).
    Posted by ChevyPartsGiant Specialist
    See expert answers on similar Exhaust Manifold
    Q:
    What is the next step after removing the engine cover and oil level indicator tube for the 2005 GMC Savana 3500? Posted by Customer
    A:
    Take out the exhaust manifold along with its bolts and clean all sealing surfaces.
    Posted by ChevyPartsGiant Specialist
    See expert answers on similar Exhaust Manifold
    Q:
    What should be done before installing the heat shield and bolts for the 2005 GMC Sierra 1500? Posted by Customer
    A:
    Clean and inspect the exhaust manifold.
    Posted by ChevyPartsGiant Specialist
    See expert answers on similar Exhaust Manifold
    Q:
    What should be done to the sealing surfaces before installation for the 2007 GMC Savana 2500? Posted by Customer
    A:
    Clean all sealing surfaces thoroughly.
    Posted by ChevyPartsGiant Specialist
    See expert answers on similar Exhaust Manifold
    Q:
    What is the next step after reinstalling the oil level indicator tube for the 2007 GMC Sierra 3500 Classic? Posted by Customer
    A:
    Tighten the bolt (419) to 25 N.m (18 lb ft).
    Posted by ChevyPartsGiant Specialist
    See expert answers on similar Exhaust Manifold
    Q:
    What needs to be removed to access the exhaust manifold for the 2007 GMC Sierra 3500 Classic? Posted by Customer
    A:
    Remove the catalytic converter to exhaust manifold nuts and lower the vehicle partway to work through the wheel opening.
    Posted by ChevyPartsGiant Specialist
    See expert answers on similar Exhaust Manifold
    Q:
    What should be done with the old exhaust manifold gasket for the 2006 GMC Sierra 3500? Posted by Customer
    A:
    Discard the old exhaust manifold gasket and clean and inspect the manifold.
    Posted by ChevyPartsGiant Specialist
    See expert answers on similar Exhaust Manifold
    Q:
    What is the first step in the installation process for the 2008 GMC Sierra 1500? Posted by Customer
    A:
    Place a NEW exhaust manifold to catalytic converter seal into the exhaust manifold.
    Posted by ChevyPartsGiant Specialist
    See expert answers on similar Exhaust Manifold
    Q:
    What is the final step in the process for the 2006 GMC Savana 3500? Posted by Customer
    A:
    Reinstall the left engine mount.
    Posted by ChevyPartsGiant Specialist
    See expert answers on similar Exhaust Manifold
    Q:
    What is the first step to replace the left side exhaust manifold for the 2010 GMC Yukon? Posted by Customer
    A:
    Install the J 42640 (Steering Column Anti-Rotation Pin) into the steering column lower access hole.
    Posted by ChevyPartsGiant Specialist
    See expert answers on similar Exhaust Manifold
    Q:
    What is the torque specification for the exhaust manifold bolts and stud for the 2010 GMC Sierra 1500? Posted by Customer
    A:
    Tighten them to 30 Nm (22 lb ft).
    Posted by ChevyPartsGiant Specialist
    See expert answers on similar Exhaust Manifold
    Q:
    What is the tightening procedure for the exhaust manifold bolts for the 2009 GMC Sierra 1500? Posted by Customer
    A:
    Tighten them first to 15 Nm (11 lb ft) starting with the center bolts and alternating side-to-side, then to a final pass of 20 Nm (15 lb ft) using the same pattern.
    Posted by ChevyPartsGiant Specialist
    See expert answers on similar Exhaust Manifold
    Q:
    What is the final step in the process for the 2005 GMC Savana 2500? Posted by Customer
    A:
    Put the engine cover back in place.
    Posted by ChevyPartsGiant Specialist
    See expert answers on similar Exhaust Manifold
    Q:
    What is the final step before lowering for the 2007 GMC Sierra 1500 Classic? Posted by Customer
    A:
    Tighten the air cleaner outlet duct clamp at the MAF/IAT sensor, raise the vehicle, and install the right exhaust manifold pipe nuts, tightening them to 50 Nm (37 ft. lbs.) before lowering the vehicle.
    Posted by ChevyPartsGiant Specialist
    See expert answers on similar Exhaust Manifold
    Q:
    What is the torque specification for the exhaust manifold bolts for the 2007 GMC Savana 2500? Posted by Customer
    A:
    Tighten the exhaust manifold bolts to 15 N.m (11 lb ft) on the first pass and then to 25 N.m (18 lb ft) on the second pass.
    Posted by ChevyPartsGiant Specialist
    See expert answers on similar Exhaust Manifold
    If you have any questions about this product, please don't hesitate to ask us. We will be happy to help you!

OEM GM 12677665, Excellent Performance and Perfect Fitment

To ensure reliability, purchase GM part # 12677665 Exhaust Manifold. It is sometimes referred to as GM Exhaust Manifold. Choosing OEM parts is the optimal decision for guaranteeing superior quality and perfect performance. These components undergo stringent quality checks and are carefully constructed to comply with GM's factory specifications, ensuring a smooth installation process.

ChevyPartsGiant.com is a leading supplier of genuine GM parts such as GM 12677665 Exhaust Manifold. Our website boasts an extensive inventory of OEM GM parts, available at highly competitive prices in the market. Should you require any new genuine GM parts, rest assured we will deliver them swiftly and efficiently to your doorstep. Furthermore, all our parts come with the assurance of a manufacturer's warranty. For detailed Chevy parts information, click here.
Choose ChevyPartsGiant for discounted prices, exceptional service and fast delivery