ChevyParts
My Garage
My Account
Cart
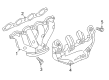
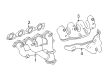
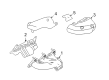
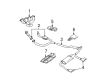
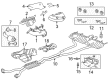
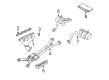
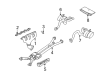
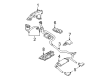
OEM Chevrolet Exhaust Manifold
Engine Exhaust Manifold- Select Vehicle by Model
- Select Vehicle by VIN
Select Vehicle by Model
orMake
Model
Year
Select Vehicle by VIN
For the most accurate results, select vehicle by your VIN (Vehicle Identification Number).
316 Exhaust Manifolds found

Chevrolet Exhaust Manifold, Driver Side Part Number: 12629728
$412.33 MSRP: $648.78You Save: $236.45 (37%)Product Specifications- Other Name: Manifold, Engine Exhaust Manifold
- Position: Driver Side

Chevrolet Exhaust Manifold, Passenger Side Part Number: 12622624
$440.27 MSRP: $692.74You Save: $252.47 (37%)Ships in 1-3 Business DaysProduct Specifications- Other Name: Manifold, Engine Exhaust Manifold
- Position: Passenger Side
Chevrolet Exhaust Manifold, Passenger Side Part Number: 12629729
$389.42 MSRP: $612.74You Save: $223.32 (37%)Ships in 1-3 Business DaysProduct Specifications- Other Name: Manifold, Engine Exhaust Manifold
- Position: Passenger Side
Chevrolet Exhaust Manifold, Driver Side Part Number: 12622623
$476.32 MSRP: $752.84You Save: $276.52 (37%)Ships in 1-3 Business DaysProduct Specifications- Other Name: Manifold, Engine Exhaust Manifold
- Position: Driver Side

Chevrolet Exhaust Manifold, Driver Side Part Number: 12611640
$130.29 MSRP: $205.00You Save: $74.71 (37%)Ships in 1-2 Business DaysProduct Specifications- Other Name: Manifold, Engine Exhaust Manifold
- Position: Driver Side

Chevrolet Exhaust Manifold, Driver Side Part Number: 12560194
$208.56 MSRP: $363.90You Save: $155.34 (43%)Ships in 1-2 Business DaysProduct Specifications- Other Name: Manifold, Engine Exhaust Manifold; Manifold
- Position: Driver Side


Chevrolet Exhaust Manifold, Driver Side Part Number: 12571102
Product Specifications- Other Name: Manifold, Engine Exhaust Manifold; Manifold
- Position: Driver Side

Chevrolet Exhaust Manifold, Driver Side Part Number: 12652399
$433.94 MSRP: $682.78You Save: $248.84 (37%)Product Specifications- Other Name: Manifold, Engine Exhaust Manifold
- Position: Driver Side
Chevrolet Exhaust Manifold, Passenger Side Part Number: 12652400
$426.53 MSRP: $671.11You Save: $244.58 (37%)Product Specifications- Other Name: Manifold, Engine Exhaust Manifold
- Position: Passenger Side
Chevrolet Exhaust Manifold, Passenger Side Part Number: 12560193
Product Specifications- Other Name: Manifold; Manifold, Engine Exhaust Manifold
- Position: Passenger Side

Chevrolet Exhaust Manifold, Driver Side Part Number: 12561308
Product Specifications- Other Name: Manifold; Manifold, Engine Exhaust Manifold
- Position: Driver Side

Chevrolet Exhaust Manifold, Driver Side Part Number: 12562638
Product Specifications- Other Name: Manifold; Manifold, Engine Exhaust Manifold
- Position: Driver Side


Chevrolet Exhaust Manifold, Driver Side Part Number: 25129492
Product Specifications- Other Name: Manifold; Manifold, Engine Exhaust Manifold
- Position: Driver Side
Chevrolet Exhaust Manifold, Passenger Side Part Number: 12571101
Product Specifications- Other Name: Manifold, Engine Exhaust Manifold; Manifold
- Position: Passenger Side

Chevrolet Exhaust Manifold, Passenger Side Part Number: 12550621
Product Specifications- Other Name: Manifold, Engine Exhaust Manifold; Manifold
- Position: Passenger Side

Chevrolet Exhaust Manifold Part Number: 12554232
Product Specifications- Other Name: Manifold, Engine Exhaust Manifold; Manifold
Chevrolet Exhaust Manifold, Passenger Side Part Number: 12561256
Product Specifications- Other Name: Manifold, Engine Exhaust Manifold; Manifold
- Position: Passenger Side

Chevrolet Exhaust Manifold Part Number: 12557746
Product Specifications- Other Name: Manifold, Engine Exhaust Manifold

Chevrolet Exhaust Manifold Part Number: 12556039
Product Specifications- Other Name: Manifold, Engine Exhaust Manifold

Chevrolet Exhaust Manifold Part Number: 12559186
Product Specifications- Other Name: Manifold, Engine Exhaust Manifold
| Page 1 of 16 |Next >
1-20 of 316 Results
Chevrolet Exhaust Manifold
Want to cut long-term maintenance and repair costs? Choose OEM Exhaust Manifold. Those parts deliver top durability you can trust. On our site, you'll find a huge catalog of genuine Chevrolet parts. Prices are unbeatable, so you can keep more in your pocket. Every OEM Chevrolet Exhaust Manifold includes a manufacturer's warranty. You can also get an easy return policy that keeps buying risk free. Fast delivery, get your car on the road quickly. It's simple to search, compare, and order. Stop guessing about quality or fit. Order today and save with parts that last.
Chevrolet Exhaust Manifold Parts Questions & Experts Answers
- Q: How to replace the exhaust manifold on the LLV (2.9L) on Chevrolet Colorado?A:The first step for Exhaust Manifold replacement on the llv (2.9L) requires exhaust seal elimination. The first step is to remove the exhaust seal then proceed with removing the Exhaust Manifold heat shield followed by the Exhaust Manifold bolts. You can remove the Exhaust Manifold assembly and its attached gasket after disconnecting all the parts listed above. Then dispose of the gasket. You must start by installing a new Exhaust Manifold gasket onto the Cylinder Head before correctly positioning the Exhaust Manifold. Before installing the bolts apply threadlock gm p/n 12345493 (Canadian P/N 10953488) to their threads. To achieve proper fastening of the Exhaust Manifold bolts follow a sequence while tightening them to 20 nm (15 lb ft) three times. Reattach both the exhaust seal along with the Exhaust Manifold heat shield.
- Q: How to replace the right exhaust manifold on a 3.5L engine on Chevrolet Malibu?A:A replacement of the right Exhaust Manifold for a 3.5l engine requires the heated Oxygen Sensor socket (J 39194-B) as part of the required tools. First detach the generator and disconnect the heated Oxygen Sensor (HO2S) electrical connector after removing the connector position assurance (CPA) retainer without damaging the attached pigtail. You should employ the heated Oxygen Sensor socket (J 39194-B) to achieve ho2s removal. The workflow proceeds with a three-step removal process of exhaust gas recirculation (EGR) pipe bolts that is followed by a controlled pipe relocation. Start by taking out the spark plugs and then remove the Exhaust Manifold nuts followed by the rear Catalytic Converter before extracting the Exhaust Manifold from its position. The Exhaust Manifold will require a new gasket applied to the cylinder head studs before returning the manifold to its position. First install the Exhaust Manifold nuts while torqueing them to 16 nm (12 ft. Lbs.) before reinstallation of the rear Catalytic Converter along with the spark plugs. Position the egr pipe according to needs before securing the three egr pipe bolts with a torque of 10 nm (89 inch lbs.). The Oxygen Sensor threads should receive nickel-based anti-seize compound equivalent to gm p/n 5613695 before installation through the heated Oxygen Sensor socket (J 39194-B) until the torque reaches 42 nm (31 ft. Lbs.). The ho2s electrical connector needs to be reconnected before installing the generator with its cpa retainer and securing the connector rosebud to its bracket.
- Q: How to replace the right side exhaust manifold on Chevrolet Tahoe?A:The first step for replacing right side Exhaust Manifold requires removal of the heated Oxygen Sensor (HO2S). The vehicle requires complete support through proper lifting. The first step is to remove nuts that hold the Catalytic Converter to the Exhaust Manifold (1500 series is displayed but the procedure for 2500 series is comparable). Play the front wheel house liner from the right side before lowering the vehicle partially to access the wheel opening. Twisting each Spark Plug wire boot half an inch should allow you to pull out the boot so you can access the Spark Plug. To service ignition coils you should disconnect their Spark Plug Wires in a specific method. First remove the engine block oil level indicator tube then proceed with Exhaust Manifold bolt removal and Exhaust Manifold separation. The entire Exhaust Manifold Gasket along with its sealing component needs to be thrown away. To replace the Exhaust Manifold it is necessary to disassemble the heat shield by removing its bolts and releasing it from position. Before attaching the Exhaust Manifold heat shield install it in position then tighten the bolts to 9 nm (80 lb in). Apply threadlock gm p/n 12345493 (Canadian P/N 10953488) to the Exhaust Manifold bolts as a 5 mm (0.2 in) thick strip around the threads after cleaning their surface. At first install a new Catalytic Converter seal while positioning the new Exhaust Manifold Gasket and Exhaust Manifold to the Cylinder Head with attention to seating the Catalytic Converter seal. Install the center Exhaust Manifold bolts with 15 nm torque before working from side to side then finish them at 20 nm. The gasket tab needs to be folded with a flat punch at the Cylinder Head edge. The technician should reinstall the oil level indicator tube while carefully positioning Spark Plug Wires and ignition coils into their connectors through sideward pushing for proper seating verification of each connector boot. Raise and support the vehicle to its full height before installing the Catalytic Converter to Exhaust Manifold nuts which should be tightened up to 50 nm (37 lb ft). The procedure includes lowering the vehicle to access the wheel opening then reinstalling the right-front front wheel house liner before completing the installation with the ho2s and exhaust leak inspection.


Related Chevrolet Parts
 Chevrolet Catalytic Converter
 Chevrolet Fuel Tank Vent Valve
 Chevrolet Vapor Canister
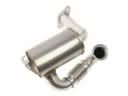 Chevrolet EGR Filter
 Chevrolet EGR Valve Gasket
 Chevrolet Exhaust Gas Temperature Sensor
 Chevrolet Exhaust Heat Shield
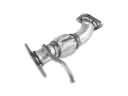 Chevrolet Exhaust Pipe
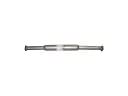 Chevrolet Exhaust Resonator
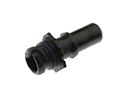 Chevrolet PCV Valve Elbow
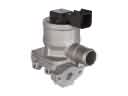 Chevrolet Secondary Air Injection Check Valve
 Chevrolet Secondary Air Injection Pump
Browse Chevrolet Exhaust Manifold by Models
Nova S10 Colorado C10 Tahoe Cruze Malibu Camaro Equinox Impala SS SSR Avalanche Silverado 1500 Silverado 2500 HD Caprice Classic Cobalt Suburban Traverse Blazer HHR Sonic Tracker Volt El Camino K10 Spark Trailblazer Astro Cavalier Corvette C20 Aveo Beretta C1500 C2500 C30 C3500 Celebrity Chevette City Express Corsica Express 1500 Express 2500 Express 3500 G10 G20 G30 K1500 K20 K2500 K30 K3500 K5 Blazer Lumina Metro Monte Carlo P30 Prizm S10 Blazer Silverado 2500 Sprint Uplander Venture Lumina APV Silverado 3500 Suburban 1500 Trailblazer EXT Avalanche 1500 Avalanche 2500 Aveo5 C10 Suburban C1500 Suburban C20 Suburban C2500 Suburban Captiva Sport Citation II Cruze Limited K10 Suburban K1500 Suburban K20 Suburban K2500 Suburban Malibu Limited P20 R10 R10 Suburban R1500 Suburban R20 R20 Suburban R2500 R2500 Suburban R30 R3500 Silverado 1500 Classic Silverado 1500 HD Silverado 1500 HD Classic Silverado 1500 LD Silverado 1500 LTD Silverado 2500 HD Classic Silverado 3500 Classic Silverado 3500 HD Spark EV Spectrum Suburban 2500 Suburban 3500 HD V10 V10 Suburban V1500 Suburban V20 V20 Suburban V2500 Suburban V30 V3500