ChevyParts
My Garage
My Account
Cart
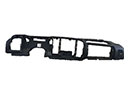
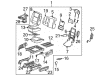
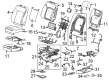
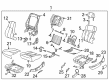
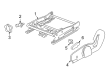
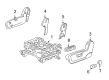
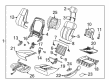
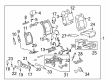
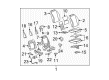
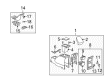
OEM Saturn Seat Switch
Seat Adjust Switch- Select Vehicle by Model
- Select Vehicle by VIN
Select Vehicle by Model
orMake
Model
Year
Select Vehicle by VIN
For the most accurate results, select vehicle by your VIN (Vehicle Identification Number).
42 Seat Switches found


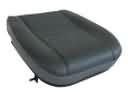
Saturn Seat Switch, Gray, Driver Side Part Number: 88894979
Product Specifications- Other Name: Switch Assembly, Driver Seat Adjuster *Gray; Power Seat Switch; Adjuster Switch; Switch, Seat Adjuster/Recliner; Switch, Front Seat Adjuster
- Position: Driver Side


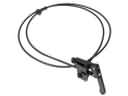
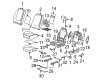
Saturn Lumbar Switch, Front Part Number: 25802504
Product Specifications- Other Name: Switch, Front Seat Lumbar; Power Seat Switch; Switch, Seat Adjuster/Recliner
- Position: Front
- Replaces: 25745585


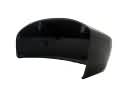
Saturn Trim Cover, Front Driver Side Part Number: 22677356
Product Specifications- Other Name: Switch, Front Seat Adjuster; Power Seat Switch; Seat Switch
- Position: Front Driver Side
Saturn Lumbar Switch, Titanium, Front Part Number: 84545157
Product Specifications- Other Name: Switch Assembly-Front Seat Lumbar *Titanium; Power Seat Switch; Switch; Switch, Seat Adjuster/Recliner; Switch, Front Seat Lumbar
- Position: Front
- Replaces: 15222972, 25802505

Saturn Adjust Handle, Gray, Front Driver Side Part Number: 22702926
Product Specifications- Other Name: Knob, Front Seat Adjuster
- Position: Front Driver Side


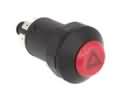
Saturn Seat Heat Switch, Driver Side Part Number: 15295576
Product Specifications- Other Name: Switch, Front/Rear Seat Heater; Seat Heater Switch
- Position: Driver Side

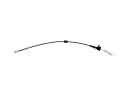
Saturn Recline Knob Part Number: 96839646
Product Specifications- Other Name: Knob, Driver Seat Adjuster Switch *Ebony
- Position: Driver Side

Saturn Seat Switch, Oak, Front Part Number: 22677353
Product Specifications- Other Name: Switch, Front Seat Adjuster; Power Seat Switch
- Position: Front


Saturn Adjust Knob, Blue, Front Part Number: 15222979
Product Specifications- Other Name: Knob, Front Seat Adjuster; Seat Switch Knob; Knob
- Position: Front

Saturn Seat Heat Switch, Driver Side Part Number: 25820121
Product Specifications- Other Name: Switch Assembly-Driver Seat Heater *Ebony; Seat Heater Switch; Switch; Switch, Seat Heater
- Position: Driver Side
Saturn Seat Heat Switch, Passenger Side Part Number: 25820126
Product Specifications- Other Name: Switch Assembly-Passenger Seat Heater *Ebony; Seat Heater Switch; Switch; Switch, Seat Heater
- Position: Passenger Side
Saturn Adjust Handle, Front Driver Side Part Number: 22702927
Product Specifications- Other Name: Knob, Front Seat Adjuster
- Position: Front Driver Side

 Product Specifications
- Other Name: Switch, Front Seat Adjuster; Seat Heater Switch; Power Seat Switch; Switch
- Position: Front Driver Side

Saturn Lumbar Switch, Titanium, Passenger Side Part Number: 15773760
Product Specifications- Other Name: Power Seat Switch
- Position: Passenger Side

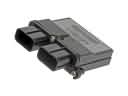
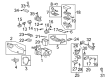
Saturn Switch Assembly Part Number: 9135225
Product Specifications- Other Name: Switch Assembly, Elekk Trac Control *Ebony; Multi Purpose Switch; Seat Heater Switch; Switch; Switch, Front/Rear Seat Heater

Saturn Switch Assembly Part Number: 9135224
Product Specifications- Other Name: Switch Assembly, Driver Seat Heater *Ebony; Windshield Washer Switch; Multi Purpose Switch; Seat Heater Switch; Fog Lamp Switch; Switch; Switch, Front/Rear Seat Heater
- Position: Driver Side

Saturn Seat Heat Switch, Passenger Side Part Number: 15295571
Product Specifications- Other Name: Switch, Front/Rear Seat Heater; Seat Heater Switch
- Position: Passenger Side
Saturn Switch Assembly, Passenger Side Part Number: 22685295
Product Specifications- Other Name: Switch, Front/Rear Seat Heater; Multi Purpose Switch; Seat Heater Switch; Switch
- Position: Passenger Side

Saturn Switch Part Number: 96672977
Product Specifications- Other Name: Switch, Front/Rear Seat Heater; Seat Heater Switch
- Position: Front
Saturn Seat Heat Switch, Titanium, Driver Side Part Number: 15295575
Product Specifications- Other Name: Switch, Front/Rear Seat Heater; Seat Heater Switch
- Position: Driver Side
| Page 1 of 3 |Next >
1-20 of 42 Results
Saturn Seat Switch
Choose OEM Seat Switch, you're making the optimal decision for superior quality and perfect performance. You can feel confident because each component goes through stringent quality checks. Every part is carefully built to comply with Saturn's factory specifications. You'll enjoy a smooth, worry-free installation that fits just right. At ChevyPartsGiant.com, you'll find it easy to get top-quality OEM Saturn Seat Switch. You can shop at highly competitive prices and protect your budget. All our genuine Saturn parts include a dependable manufacturer's warranty. You'll also appreciate our straightforward return policy and swift delivery services for extra convenience.
Saturn Seat Switch gives drivers a fingertip control of the position of the seat, which includes safety sensors to make sure that all rides are easy and safe. Saturn became popular because of its dent resistant plastic body panels, which shrug the impact of grocery carts, shaving weight in its lost foam engine castings to offer better mileage, and its strong multi layer paint that makes all the finishes shine several years later is all in an effort of a factory that was built in an effort to rethink the way automobiles can be made. Saturn also turned the process of marketing into a shared event thereby rendering the owners proud and protective of their cars. It is the spirit of future oriented that the brand has imprinted specific smart features in cabins like the Seat Switch, which helps to make fine changes a one-second task and store favorite settings in memory. Seat Switch is a small electrical component, which is fitted to the frame of the seat, and sends signals to the power motors and detects the presence of an occupant to release airbags respectively. To install Saturn Seat Switch, it is appropriate to park on a flat surface and disconnect the battery to avoid sparks and then move the seat back then use a soft pry and peel the plastic side trim exposing the switch bracket. The wiring harness must be unlocked, and to do so, take a photograph of the wiring harness and note down the position, and unscrew the small bolts on the old unit. Attach a decorative bezel, replace the new switch, screw the bolts and place the connector until it clips in place. Make a snap of the trim back, re-connect the battery, jog the controls all the way.