Make sure this part fits

GM 10347385
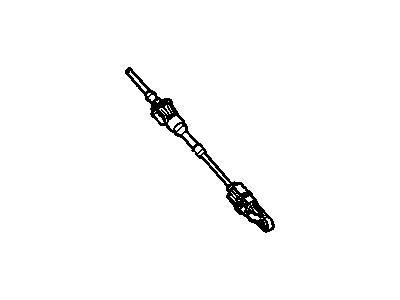
Shift Control Cable

2006-2009 Cadillac XLR

Customer Questions & Expert Answers (4)
GM 10347385 Shift Control Cable
  • Part Description
    Cable Assembly-Automatic Transmission Range Selector Lever; Automatic Transmission Shifter Cable
  • Manufacturer
    General Motors
  • Manufacturer's Notes
    This part is discontinued.
Make sure this part fits
  • Vehicle Fitment

    Year Make Model Trim Engine
    2006-2009 Cadillac XLRBase, Platinum, V8 Cyl 4.4 L GAS, 8 Cyl 4.6 L GAS
    Warning: California's Proposition 65
  • Customer Questions & Expert Answers

    Q:
    Is this 10347385 designed for my car? Posted by ChevyPartsGiant Specialist
    A:
    Please Select Your Vehicle model to see if part number 10347385 is suitable before ordering.
    Posted by ChevyPartsGiant Specialist
    Q:
    How to Ensure Proper Functionality of the Shift Cable on Cadillac XLR? Posted by Customer
    A:
    The first step to replace the Shift Cable requires supporting the car vertically. Set the floor shift control to neutral position because a replacement of damaged cables requires both floor shift control and transmission to be in neutral. Before removing the driveline tunnel panel you need to be cautious about shifting the Shift Cable since the rod end guide tubes maintain their rigid shape. The large flat bladed screwdriver helps to carefully extract the Shift Cable end clip from the floor shift control arm stud. After releasing the cable end clip workers must take out the Shift Cable from the driveline tunnel bracket by dislodging the cable retaining staple clip from the cable and pressing retaining tabs through the bracket hole to extract the cable from its slot. To uninstall the Shift Cable retrieve the end clip from the transmission shift lever stud and remove the Shift Cable from the Shift Cable bracket by dislodging the retaining staple clip from the cable and pushing through the bracket hole to free the cable at the bracket slot. The smaller diameter end of the Shift Cable should be placed inside the slot of the driveline tunnel bracket before pushing the retaining tabs through the hole while applying the staple clip for security. Secure the Shift Cable end to the floor shift control arm stud and follow by installing the Shift Cable to the Shift Cable bracket by inserting the smaller diameter portion into the slot and pushing its retaining tabs through the hole and finally inserting the staple clip. Detach the Shift Cable end clip properly to the transmission shift lever stud. For new transmission Shift Cable installation you must first remove the adjuster lock shipping guard then manipulate the adjuster lock downwards. To check the Shift Cable features perform the following tests after lowering the car on the hoist by keeping it in place: activate the parking brake and turn on the Ignition Switch without starting the engine then press the regular brakes followed by gear shifts that need one-second pauses using each detent position while listening for transmission shift lever noises. Perform the previous procedure by shifting from park to first and then repeat it twice more. A visual inspection of the Shift Cable should be conducted to check for possible damage when no binding sensations appear during inspection. The floor shift control should be shifted into park position while releasing regular brakes followed by an off position of the ignition key and release of the parking brake. Bring the vehicle up with raising support while adding the driveline tunnel closeout panel followed by testing shifts through low-traffic roads to verify each detent position control.
    Posted by ChevyPartsGiant Specialist
    Q:
    How to replace the Automatic Transmission Range Selector Shift Cable on Cadillac XLR? Posted by Customer
    A:
    The first step to replace the Shift Cable requires lifting and supporting the vehicle. Ensure the floor shift control and the transmission are set to neutral before proceeding during cable replacement. Secondly remove the driveline tunnel closeout panel but handle the Shift Cable with caution since its rod end guide tubes are stiff. The transmission shift angle is released from the floor shifting mechanism by using a wide flathead screwdriver to gently detach the Shift Cable end clip from supporting its floor mechanism. The Shift Cable is extracted from the driveline tunnel bracket when the cable retaining staple clip is pulled away from the cable letting the retaining tabs drop through the bracket hole and allowing the cable to slide out. Begin by gently detaching the Shift Cable end clip from the transmission shift lever stud before removing the Shift Cable from the Shift Cable bracket through staple clip removal by depressing its tabs then pushing them through the bracket hole before pulling the cable out. The Shift Cable installation starts with placing its smaller diameter end section into the bracket slot before pushing retaining tabs through the hole to become fixed and adding a staple clip for support. First attach the Shift Cable end to the floor shift control arm stud before placing the Shift Cable into the Shift Cable bracket slot up to the diameter opening while pushing retaining tabs through the hole followed by inserting the staple clip for security. Position the transmission shift lever stud into the Shift Cable end clip before applying this component. To install a new transmission Shift Cable users should remove its shipping guard from the adjuster lock and depress the adjuster lock. The operator must lower the vehicle on the hoist but keep it in position. Then they should confirm the Shift Cable works correctly by activating the parking brake followed by turning the Ignition Switch to on without engine start-up. Finally, they should apply normal vehicle brakes and shift through all gears to verify proper transmission shift lever sound. Perform the same procedure for the second shift from park to first before repeating it twice more. You should check the condition of the Shift Cable whenever the checking process reveals binding with no transmission sounds. After setting the floor shift control to park position, drivers need to let go of the regular brake and turn the ignition off before releasing the parking brake. Test the vehicle in a low-traffic area after supporting the vehicle to verify easy shifting between detents while maintaining each detent position.
    Posted by ChevyPartsGiant Specialist
    Q:
    What is the process for removing the shift control cable from the shift control cable bracket for the 2009 Cadillac XLR? Posted by Customer
    A:
    Release the end clip from the transmission shift lever stud, pry the retaining staple clip from the cable, depress the retaining tabs, push the tabs through the hole, and slide the cable out of the bracket slot.
    Posted by ChevyPartsGiant Specialist
    See expert answers on similar Shift Cable
    If you have any questions about this product, please don't hesitate to ask us. We will be happy to help you!

OEM GM Shift Control Cable 10347385 Designed for Proper Fit and Performance

Original OEM GM parts deliver superior quality and meet all performance standards needed for optimal automotive operation. The authentic part identified by 10347385 Shift Control Cable is available in the market under the name GM Shift Cable. This genuine product has a full warranty coverage from the manufacturer available at all authorized GM dealers throughout the United States. This part 10347385 Shift Control Cable fits certain Cadillac XLR models.
The original GM component designated by manufacturer part number 10347385 maintains top performance when functioning as the Cable Assembly-Automatic Transmission Range Selector Lever; Automatic Transmission Shifter Cable unit. The component 10347385 is constructed from durable material and its dimensions span 22.7 x 6.2 x 6.3 inches while weighing 0.70 Pounds. The Direct Replacement component is ready in New condition to ensure full compatibility with your vehicle system. This component receives the designation of Cable, Transmission Shift Control Cable. The part 10347385 has available replacement options. GM manufacturer provides a warranty that ensures reliable operation of this product. The Shipping Policy and Return Policy pages outline complete details regarding shipping procedures and return processes.
If you want to save money in the long run on maintenance and repairs, you should choose OEM products because they're of the top level of durability. Are you on the quest of finding GM parts, our site is worth a visit. We stock an endless selection of high-quality GM components including things like ignition coils all the way through to fan shrouds and all at prices that can not be matched. You have nothing to worry about because all our OEM parts are covered with a manufacturer warranty, which guarantees superior quality and value.