Popular OEM Cadillac XLR Parts
- Body & Hardware Parts View More >
- Steering Parts View More >
- Electrical Parts View More >
- Air & Fuel Delivery Parts View More >
- Engine Parts View More >
- Belts & Cooling Parts View More >
- Suspension Parts View More >
- Driveline & Axles Parts View More >
- Emission Control & Exhaust Parts View More >
- Transmission Parts View More >
- Brakes Parts View More >
- Headlights & Lighting Parts View More >
Why Buy Genuine Cadillac XLR Parts From ChevyPartsGiant.com
Looking for real Cadillac XLR parts? ChevyPartsGiant.com may be a better choice to find genuine parts at wallet-friendly prices. We sell only OEM Cadillac XLR parts, ensuring perfect fit, reliability, and long-term performance. With our website, you can easily get access to the same parts found at local Cadillac stores. All components are produced by Cadillac and are exclusively fitted on Cadillac XLR automobiles. By shopping at our store, you can enjoy the quality of the Cadillac factory without the high prices of brick-and-mortar facilities. We achieve this because we are an online store operating at lower costs, which we pass on to you. We also have a user-friendly platform where you can find and order genuine Cadillac XLR parts swiftly. We are here to make your process of restoring a Cadillac XLR or dealing with simple repairs quick and inexpensive. We also make it easy to obtain Cadillac XLR parts at competitive shipping prices and a team of knowledgeable staff ready to take your order. Choose ChevyPartsGiant.com to save time and money, as well as keep your Cadillac XLR in the good condition.
The Cadillac XLR set a major industry marker for Cadillac in 2003 through its run from 2004 until 2009 by merging luxury design with driving excellence. General Motors Y platform technology powers the Cadillac XLR because it establishes front-engine rear-wheel-drive capabilities which result in superior driving control. Both XLR models came standard with a 4.6L Northstar V8 (LH2) engine delivering 320 horses while only XLR-V vehicles gets the upgraded 4.4L Northstar V8 (LC3) powerplant generating 443 horsepower. Standard Cadillac XLR models received a 5-speed 5L50-E automatic transmission yet the XLR-V version included a 6-speed 6L80 automatic transmission to provide better performance features. Many people understand controlling the balance on the Cadillac XLR because it has a total curb weight of 3,840 pounds and a wheelbase length of 105.7 inches. The adaptive suspension system enhances ride quality by providing better control during all kinds of driving scenarios. Customers will find that this automobile measures up to 77.7 inches in length combined with 72.3 inches in width and 50.4 inches in height while carrying a sleek two-door retractable hardtop design. The XLR requires real factory parts according to Cadillac to function properly at its peak performance level so the original luxury standards can be maintained and parts require factory specifications for form and durability. The Cadillac XLR, with its blend of advanced engineering and luxurious features, stands as a testament to Cadillac's commitment to quality and innovation in the automotive market.
Cadillac XLR groups concerns into stability control, evaporative emissions, and ignition maintenance for clear diagnosis. This model can display a service stability message under steering sensor faults. A failed steering wheel position sensor confuses yaw estimates and ABS logic in the Cadillac XLR. Verify live data, perform a lock to lock test, then replace the steering wheel position sensor on the XLR. For evaporative emissions, the Cadillac XLR often sets a light from a loose gas cap. Inspect the gas cap seal, run an EVAP leak test, clear codes, and confirm the monitor on the XLR. For ignition upkeep, the Cadillac XLR uses coils on plugs with long intervals. At 100,000 miles, install new spark plugs and check coil boots for cracks. Warm the engine, ensure quiet idle, and verify misfire counters on the XLR. Disturbed geometry, check wheel alignment, and tire condition may cause stability control diagnostics to give false information. Once repaired, take a short city tour and a highway run to ensure that it is stable. Log freeze frame data, fuel trims, and mileage at each visit for future comparison. Throughout repairs, document discovery and steadfast steering, emissions integrity and clean ignition on the Cadillac.
Cadillac XLR Parts Questions & Answers
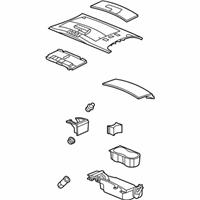
- Q: How to replace the Center Console on Cadillac XLR?A: Starting the console replacement requires first disconnecting the battery ground cable with shaker knob removal. Disconnect the battery ground cable before pulling at the rear of the hinge cover from the console bin to release its retainer. Start by uninstalling the console Cup Holder and ashtray before moving on to the console trim plate. You need to remove the bolts which secure the console to the i-p carrier by unscrewing the console nuts. Lifting the back end of the console with slight force enables pulling the console back to release its front section from underneath the i-p carrier. Start by disconnecting the electrical connector from the electrical accessory plug and unscrewing the console electrical accessory plug retainer from its housing. Finally disconnect the housing from the console. Use a flat tool to disengage the lamp from its retainer then guide it through the console hole before you can safely remove the console from the vehicle. Place the console into its position in the vehicle while fitting the lamp into the bin while ensuring the hole routes the lamp to engage with its retainer. First position the electrical accessory plug housing on the console while ensuring the cover is in place then attach the electrical accessory plug retainer to the housing. Connect the electrical connector at the front of the console so it fits under the i-p carrier's rear section. Secure the console retaining nuts and bolt to the I/P carrier, and tighten the nuts to 10 N m (89 lb in). Reinstall the console trim plate and Cup Holder and ashtray before applying the hinge cover to the console bin by pressing down to activate the retaining clips. For final setup replace the shifter knob, check that the console door works properly, then complete by reconnecting the battery ground cable.
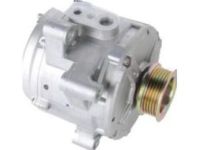
- Q: How to replace the alternator on the LC3 - 8 Cyl, 4.4L, SC, DOHC on Cadillac XLR?A: To remove the generator on the lc3 - 8 cyl, 4.4l, sc, dohc, first remove the negative Battery Cable, drain cooling system using ge 47716. Take off the generator Drive Belt and front suspension crossmember. Remove the bolt from generator coolant hose assembly and separate the coolant hose from the generator port. Disconnect the generator electrical connector and disconnect the starter cable terminal from the starter cable nut and boot and stud. Then remove the upper generator bolt, thru-bolt for the idler pulley, idler pulley nut, and the idler pulley assembly before removing the generator. For installation, place the generator and fasten it with the upper bolt to 50 n.m (37 lb ft). Install the idler pulley assembly, torque the idler pulley bolt and nut to 50 n.m (37 lb-ft). Connect the starter cable terminal to the generator stud, tighten the starter cable nut onto it at 20 n.m (15 lb ft) then slide the boot over the stud. Reattach the generator coolant hose assembly and secure the bolt to 27 n.m (20 lb. Ft), and attach the generator electrical connector. Reinstall the front suspension crossmember, fill the cooling system with ge 47716, reconnect the negative Battery Cable and, finally, install the generator Drive Belt.
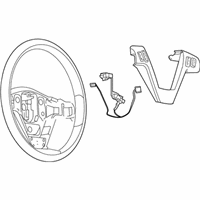
- Q: How to replace the steering wheel on Cadillac XLR?A: Start by detaching the Steering Wheel inflator module alongside the horn electrical connector. Insert the steering column lock pin (J 42640) to the steering column before removing and discarding the Steering Wheel set nut. Fasten the pair of Steering Wheel puller legs (J 36541-A) combined with the Steering Wheel puller (J 1859-A) onto the Steering Wheel before tightening the puller center screw which will make the steering column shaft push the Steering Wheel away from its position. Install the new Steering Wheel on the steering column while paying attention to alignment marks before tightening. Screw and torque a new Steering Wheel set nut at 41 n.m (30 lb ft torque value). Finish the parking wheel procedure by detaching (J 42640) the lock pin before reattaching the horn wires and putting back the wheel inflator module.
- Q: How to replace the rear compartment lid emblem/nameplate on a V8 on Cadillac XLR?A: Before replacing the V8 rear compartment lid emblem/nameplate you must tape the mounting surface and take alignment marks for easy installation. Use J 25070 heat gun to heat the emblem/nameplate in circular motions for 30 seconds at a 152 mm (6 in) distance from the surface. Quintessential flat blade made of plastic to pry off the emblem/nameplate from its panel surface. Set up the emblem/nameplate installation site between 85 and 90 degrees Fahrenheit. Avoid handling the adhesive side of the nameplate. First remove the protective film at the back of the emblem/nameplate then apply J 25070 heat gun at 27-41°C (80-105°F) to warm up the installation area. Place the V8 Northstar emblem to the left side of the driver area at 67 mm (2.6 in) from the edge and 86 mm (3.4 in) from the bottom of the rear compartment lid. Position the XLR emblem on the passenger side 2.4 inches from the right edge and 3.4 inches from the bottom of the rear compartment lid. Push down evenly on all parts of the emblem to evenly attach it to the mounting point before lifting off the covering tape.


