Make sure this part fits

GM 24264047
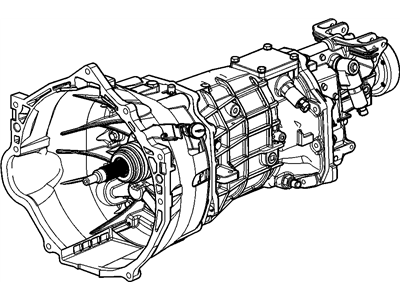
Transmission

2009-2015 Cadillac CTS

Customer Questions & Expert Answers (2)
GM 24264047 Transmission
  • Part Description
    Transmission, Manual
  • Replaces
    24258817, 24235889, 24251717
  • Manufacturer
    General Motors
Make sure this part fits
$5508.96 MSRP: $6203.78
You Save: $694.82 (12%)
Ships in 1-3 Business Days
1
ADD TO CART
  • Vehicle Fitment

    Year Make Model Trim Engine
    2015, 2009-2010 Cadillac CTSV8 Cyl 6.2 L GAS
    Warning: California's Proposition 65
  • Customer Questions & Expert Answers

    Q:
    Can you help me check if this 24264047 is the right part for my car? Posted by ChevyPartsGiant Specialist
    A:
    Please Select Your Vehicle model to see if part number 24264047 is suitable before ordering.
    Posted by ChevyPartsGiant Specialist
    Q:
    How to Perform a Transmission Assembly Replacement for All-Wheel Drive on Cadillac CTS? Posted by Customer
    A:
    The first step for servicing and repairing the transmission position switch/sensor requires the removal of the Thermostat Housing along with the exhaust system and catalytic converters. The front and rear propeller shafts should be detached along with removing the shift linkage and transmission wiring harness connector through the unlocking process. Extract the wiring harness retainers and transmission vent hose from their retaining clips on the transmission mount assembly. Begin by positioning an oil drain pan under the transmission fluid cooler pipes followed by their removal during which time discard the o-rings and use plugs to prevent fluid leakage from open ports of the cooler. Before removing the Starter motor, detach the transmission close out plug and document the Torque Converter's relationship with the flexplate while marking the starting point. To gain access to the Torque Converter bolts you should turn the center bolt of the harmonic balancer clockwise until it lines up with the bolt access hole before removing and discarding each bolt. Separate the intermediate shaft from the power steering gear after you secure the transmission with an appropriate transmission jack to detach the transmission mount assembly. Begin by placing adjustable jack stands under the rear of the front frame to provide support. Then remove all bolts from the rear of the front frame. Loosen the front frame bolts by two turns before lowering the rear section of the front frame and transmission together. Finally reduce the transmission level as you remove the vent hose from the vent tube. Begin by placing the wire harnesses and vent tube to the side before removing the Transfer Case. Continue by taking out transmission mounting bolts (1-6) so you can pull out the transmission while ensuring enough space exists between the transmission and its wire harness, vent tube and cooler pipes. Prepare the transmission for lowering from your vehicle while flushing the transmission oil cooler when required. To install the transmission use a transmission jack to lift it toward the engine then align the dowels before securing transmission bolts with a torque of 50 nm (37 lb ft). Now install the Transfer Case before taking out engine Oil Pan support stands and gently lower the engine-transmission combine to reach the vent hose tube. Install the vent hose into the vent tube while positioning the engine wiring harness. Then raise the transmission to its final installation position. Secure bolts at the rear section of the front frame then torque all frame bolts to specification while installing the transmission mount assembly. The transmission jack must be removed while the intermediate shaft joins the power steering gear alongside the flexplate/flywheel orientation marks from removal time. Put new Torque Converter bolts first before final tightening to 63 nm (46 lb ft) torque and next install the transmission close out plug and Starter motor. Install new o-rings onto transmission fluid cooler pipes before securing them to the transmission. Connect the transmission vent hose by securing it to the retaining clips and wiring harness retainers while rotating the locking latch in a clockwise direction. Secure the shift linkage first followed by the transmission manual shift shaft nut tightening of 15 nm (11 lb ft). Then install the oxygen sensor wiring harness retainer. Catalytic converters along with the exhaust system and front and rear propeller shafts should be reinstalled. The next steps involve lowering the vehicle but first install the Thermostat Housing then check the transmission fluid level before refilling it if needed. Complete the final examination after setting the shift linkage by powering the engine several times with ignition off then checking for improper sounds before inspecting fluid seepage and conducting additional inspections for appropriate fluid levels and tcm calibrations and tap reset procedures followed by a road test.
    Posted by ChevyPartsGiant Specialist
    If you have any questions about this product, please don't hesitate to ask us. We will be happy to help you!

OEM GM Transmission 24264047 Designed for Proper Fit and Performance

Original OEM GM parts deliver superior quality and meet all performance standards needed for optimal automotive operation. The authentic part identified by 24264047 Transmission is available in the market under the name GM Transmission Assembly. This genuine product has a full warranty coverage from the manufacturer available at all authorized GM dealers throughout the United States. This part 24264047 Transmission fits certain Cadillac CTS models.
The original GM component designated by manufacturer part number 24264047 maintains top performance when functioning as the Transmission, Manual unit. The component 24264047 is constructed from durable material and its dimensions span 39.8 x 23.0 x 13.3 inches while weighing 158.40 Pounds. The Direct Replacement component is ready in New condition to ensure full compatibility with your vehicle system. This component receives the designation of Transmission, Manual(6 - Speed); Transmission, Automatic. The part 24264047 has available replacement options 24258817, 24235889, 24251717. GM manufacturer provides a warranty that ensures reliable operation of this product. The Shipping Policy and Return Policy pages outline complete details regarding shipping procedures and return processes.
If you want to save money in the long run on maintenance and repairs, you should choose OEM products because they're of the top level of durability. Are you on the quest of finding GM parts, our site is worth a visit. We stock an endless selection of high-quality GM components including things like ignition coils all the way through to fan shrouds and all at prices that can not be matched. You have nothing to worry about because all our OEM parts are covered with a manufacturer warranty, which guarantees superior quality and value.