OEM 2001 Chevrolet Metro Exhaust Manifold

Engine Exhaust Manifold
  • Select Vehicle by Model
  • Select Vehicle by VIN
Select Vehicle by Model
Make
Model
Year
or
Select Vehicle by VIN
For the most accurate results, select vehicle by your VIN (Vehicle Identification Number).

2 Exhaust Manifolds found

  • 2001 Chevy Metro Exhaust Manifold - 91176795
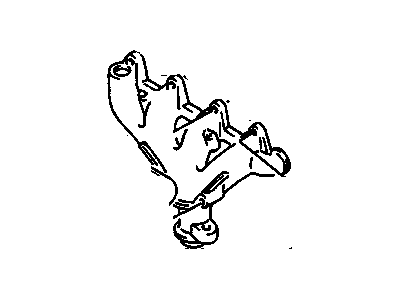
    2001 Chevy Metro Exhaust Manifold Diagram - 91176795
    View related parts
    Product Specifications
    • Other Name: Manifold, Engine Exhaust Manifold
    • Item Weight: 11.50 Pounds
    • Item Dimensions: 15.4 x 10.2 x 4.3 inches
    • Condition: New
    • Fitment Type: Direct Replacement
    • SKU: 91176795
    • Warranty: This genuine part is guaranteed by GM's factory warranty.
    More Info
    Fits the following 2001 Chevrolet Metro Submodels:
    • Base, LSi | 3 Cyl 1.0 L GAS, 4 Cyl 1.3 L GAS
  • 2001 Chevy Metro Exhaust Manifold - 91176019
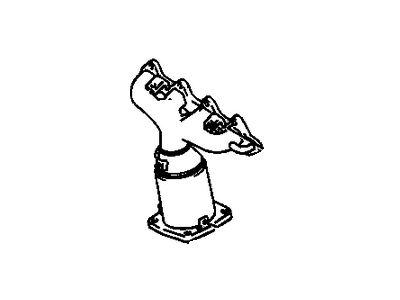
    2001 Chevy Metro Exhaust Manifold Diagram - 91176019
    View related parts
    Product Specifications
    • Other Name: Manifold, Engine Exhaust Manifold
    • Item Weight: 11.50 Pounds
    • Item Dimensions: 21.0 x 14.3 x 9.3 inches
    • Condition: New
    • Fitment Type: Direct Replacement
    • SKU: 91176019
    • Warranty: This genuine part is guaranteed by GM's factory warranty.
    More Info
    Fits the following 2001 Chevrolet Metro Submodels:
    • Base, LSi | 4 Cyl 1.3 L GAS

2001 Chevrolet Metro Exhaust Manifold

With a comprehensive array of OEM 2001 Chevrolet Metro Exhaust Manifold, from fuel pumps to door handles, our website is a one-stop-shop for your needs. All our genuine 2001 Chevrolet Metro Exhaust Manifold are backed by the manufacturer's warranty and are offered at competitive prices in the market. Rest assured, you can shop with complete confidence.

2001 Chevrolet Metro Exhaust Manifold Parts Questions & Experts Answers

  • Q: How to service the exhaust manifold on 2001 Chevrolet Metro?
    A: Service of the Exhaust Manifold requires both cool exhaust system temperature prevention and negative Battery Cable disconnection. Raise and support the vehicle. A successful pup Catalytic Converter removal requires first removing the lower Exhaust Pipe by taking out its four bolts to split it away from the Exhaust Manifold and then detaching the Exhaust Manifold stiffener bracket. The service starts with disconnecting the oxygen sensor electric connector followed by unboltage of three bolts to detach the Exhaust Manifold heat shield from the rest of the system. The removal process of low side a/c line bracket demands careful handling of the a/c lines while the procedure continues. Extract the eight bolts joined with one nut from the Exhaust Manifold before pulling out the Exhaust Manifold together with the Exhaust Manifold Gasket from the Cylinder Head. Installation without a pup Catalytic Converter requires removal of the two bolts and front pipe/catalytic converter assembly from the Exhaust Manifold . Post that lower the vehicle and disconnect the oxygen sensor electric connector followed by removal of the four bolts and the Exhaust Manifold heat shield . To perform the replacement begin by separating the low side a/c line bracket and realigning the a/c lines. Then remove the five bolts and three nuts from the Exhaust Manifold followed by installation of the Exhaust Manifold and Exhaust Manifold Gasket onto the Cylinder Head. When using a pup Catalytic Converter for installation you must first apply the new Exhaust Manifold Gasket to the Cylinder Head surface before installing the Exhaust Manifold at eight points with one nut while tightening it to 32 nm (24 ft.lbs. Torque). The Exhaust Manifold heat shield needs installation and you should tighten its three bolts to 15 nm (11 ft. Lbs.). Place the low side a/c line bracket while tormenting its bolt to 15 nm (11 ft. Lbs.) torque. Support the vehicle's elevation then fasten the Exhaust Manifold stiffener bracket with two bolts at 50 nm (37 ft. Lbs.) torque. The front pipe assembly must be installed onto the Exhaust Manifold with a fresh seal using four bolts which should reach a torque of 50 nm (37 ft. Lbs.). Vehicle height should be lowered before connecting the oxygen sensor electrical connector and reconnecting the negative Battery Cable and conducting an exhaust gas leakage test. When using a pup Catalytic Converter is not possible, first fit the new Exhaust Manifold Gasket onto the Cylinder Head then attach the Exhaust Manifold while tightening five bolts and three nuts to 23 nm (17 ft. Lbs.). Fasten the Exhaust Manifold heat shield in position using four bolts which should be tightened to 15 nm (11 ft. Lbs.). Use one bolt to reinstall the low side a/c line bracket while tightening it to 15 nm (11 ft. Lbs.). Raise and support the vehicle before installing the front pipe/catalytic converter assembly to the Exhaust Manifold using new seals and securing the two bolts to 50 nm (37 ft. Lbs.). Lower the vehicle, connect the oxygen sensor electrical connector, reconnect the negative Battery Cable and perform exhaust gas leakage inspection.

Related 2001 Chevrolet Metro Parts