
Popular OEM Chevrolet Metro Parts
- Body & Hardware Parts View More >
- Steering Parts View More >
- Electrical Parts View More >
- Air & Fuel Delivery Parts View More >
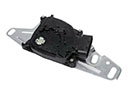
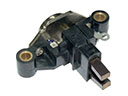
- Charging & Starting Parts View More >
- Engine Parts View More >
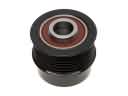
- Belts & Cooling Parts View More >
- Suspension Parts View More >
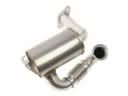
- Emission Control & Exhaust Parts View More >
- Transmission Parts View More >
- Brakes Parts View More >
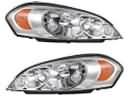
- Headlights & Lighting Parts View More >


Why Buy Genuine Chevrolet Metro Parts From ChevyPartsGiant.com
Looking for real Chevrolet Metro parts? ChevyPartsGiant.com may be a better choice to find genuine parts at wallet-friendly prices. We sell only OEM Chevrolet Metro parts, ensuring perfect fit, reliability, and long-term performance. With our website, you can easily get access to the same parts found at local Chevrolet stores. All components are produced by Chevrolet and are exclusively fitted on Chevrolet Metro automobiles. By shopping at our store, you can enjoy the quality of the Chevrolet factory without the high prices of brick-and-mortar facilities. We achieve this because we are an online store operating at lower costs, which we pass on to you. We also have a user-friendly platform where you can find and order genuine Chevrolet Metro parts swiftly. We are here to make your process of restoring a Chevrolet Metro or dealing with simple repairs quick and inexpensive. We also make it easy to obtain Chevrolet Metro parts at competitive shipping prices and a team of knowledgeable staff ready to take your order. Choose ChevyPartsGiant.com to save time and money, as well as keep your Chevrolet Metro in the good condition.
The Chevrolet Metro was introduced under the Chevrolet brand in 1998, following the phase-out of the Geo nameplate. Originally based on the Suzuki Swift, it served as a budget-friendly subcompact vehicle within GM's lineup. The Chevrolet Metro offered two engine choices with LSi trim using a 1.3-liter four-cylinder engine that produced 79 horsepower and the hatchback model utilized 1.0-liter three-cylinder engine to generate 55 horsepower. The 1.0-liter engine provided exceptional fuel economy, achieving an EPA-estimated 36 mpg in the city and 42 mpg on the highway, making the Metro among the highly fuel-efficient cars of its time. Vehicles could be purchased with either a 3-speed automatic or 5-speed manual transmission system which delivered enough speed control and remarkable fuel consumption. The Chevrolet Metro handled smoothly due to its compact dimensions of 149.4 inches in length and its 54.7 inches in height and through its front-wheel-drive layout design. Between the sedan and hatchback models of the 2000 model Chevrolet Metro received an extra 15-inch body length that paired with a 93-inch wheelbase for enhanced stability. Performance tests of fuel economy by the Chevrolet Metro led to seven recognition awards during its last eight model years. Our online shop provides Chevrolet Metro components which uphold original factory standards so customers can obtain quality parts for maintenance and repairs.
Chevrolet Metro groups engine sealing, emissions control, and evaporative systems for clear diagnosis. In engine sealing, the Metro can seep oil around the valve cover gasket. Dampness may also appear at the crank seal and cam seal. Check PCV flow, clean breathers, and reseal leaking areas to stop odor and mess. For emissions, the Metro often sets P0400 with carbon-packed passages. A clogged EGR valve and passages trigger rough idle, pinging, and weak response. Remove the valve and throttle body, remove the ports, then install new gaskets. Verify EGR command and base timing before road testing. In the evaporative system, the Metro may hard start after refueling with fuel odor. A stuck purge solenoid or blocked vent causes rich starts and stored EVAP codes. Replace the purge solenoid, inspect the canister and lines, and reseat the gas cap. These three groups connect oil control, combustion quality, and clean tank ventilation. Address sealing first on the Chevrolet Metro, then EGR performance, then EVAP function. This order keeps the Chevrolet Metro dry, smooth-running, and easy to start. Follow Chevrolet specifications for torque and routing during reassembly.
Chevrolet Metro Parts Questions & Answers
- Q: How to service and repair the distributor on Chevrolet Metro?A:In order to service and repair the Distributor, one should proceed and check out the resistance of camshaft position (CMP) sensor between its two terminals in the Distributor connector with the aid of the digital multimeter (J 39200); replace the cmp sensor if the resistance is outside the will specify range of 185-325 ohms. Then you should withdraw the Distributor rotor from the Distributor housing, remove the cmp sensor cover from the cmp sensor and then opened the two screws that hold the cmp sensor in place on the Distributor housing. If need be, take off the two Distributor flange bolts and the Distributor housing of the Cylinder Head. Check the corrosion and wear on the Distributor housing, the end play of the shaft, and the signal rotor for damage; if the defects are located, change the Distributor housing assembly. Also check the rotor for wear or crack, Distributor cap for carbon tracking, arcing or crack, and Distributor shaft o-ring seal is worn around tear, changing any component if required. Installation starts with installing the cmp sensor to the Distributor housing and tightening it using two screws without full tightening. Then install the cmp sensor cover to the cmp sensor and align the signal rotor ridge with the ridge on the cmp sensor by rotating the signal rotor. Adjust the air gap of the signal rotor (0.2 - 0.4 mm, 0.008-0.016 in) by shifting cmp sensor relative to signal rotor and tighten cmp sensor retaining screws to 5 n.m (44 lb in). As for cranking the engine after the Distributor was removed, make sure to replace it as required. Mount the Distributor rotor onto the Distributor housing proceed to mount the Distributor housing onto the Cylinder Head and align the marks made during the earlier steps and mount the two Distributor flange bolts loosely. Then, install the new Distributor Cap seal on the Distributor Cap and fasten the cap with two screws and join the Distributor electrical connector. Lastly, adjust the ignition timing of 1.0l engine as needed.
- Q: How to replace the alternator on Chevrolet Metro?A:The generator replacement requires beginning with disconnecting the negative Battery Cable to prevent severe injuries that could result from tool shorts at the generator lead. You should first take out the air cleaner assembly then remove the rubber insulator, the nut and the electrical connector from generator b+ terminal. The generator becomes removable once the upper mounting bolt and Drive Belt lose their place before extracting the two lower generator mounting bolts. To install the generator place it back onto the vehicle first before tightening the lower bolts and then finish by leaving the upper bolt loose. For used belts set the desired deflection between 6-8 mm (0.24-0.31 in) while new belts need adjustments between 5-7 mm (0.20-0.27 in) during belt installation across the pulleys by applying 10 kg (22 lb) weight. Apply 23 n.m (17 lb ft) of torque when you finish adjusting the generator mounting bolts. Secure the electrical connector over the generator b+ terminal using the provided nut along with a rubber insulator before locking the connector nut with a torque of 8 n.m (71 lb in). Put everything back for the air cleaner assembly before reconnecting the negative Battery Cable and fastening it to 15 n.m (11 lb in).
- Q: How to properly service and repair the camshaft on a Chevrolet Metro?A:To remove the Camshaft, disconnect the negative Battery Cable and remove the valve rocker arm cover and the Timing Belt. Next, pull off the Camshaft Timing Belt pulley as well as the Camshaft sensor from its house. Lay a shop rag in the area where the Camshaft housing will be removed to catch any oil that hates. Then take off three Camshaft sensor housing bolts and the Camshaft housing itself from the Cylinder Head. Loosen all valve adjusting screw lock nuts and adjust screws back to permit free motion of the rocker arms. Remove the twelve Camshaft housing bolts gradually in the specified order and get the Camshaft housings and the Camshaft out of the Cylinder Head. For installation pour clean engine oil on the cams, journals, and the oil seal and install the Camshaft into the Cylinder Head. After applying engine oil to the housing bolts, they should then be tightened in a specified sequence to 11 nm (97 inch lbs.). Install the Camshaft oil seal beyond being flush with housing surface and then the Camshaft timing sprocket. Make sure that the pin from the Camshaft goes into the slot formed by the sprocket, and secure it with the Camshaft timing sprocket bolt with 60 nm (43 ft. Lbs.). Change the Timing Belt and adjust the valve lash by positioning the number one cylinder at the top dead center and the Camshaft in the right phase and adjust the valves as 1,2,8 and 6 and turn the Crankshaft for one revolution (360°) to adjust the valve as 3,4,7 and 5. Finally, mount the Camshaft sensor housing to the Cylinder Head using 11 nm (97 ft. Lbs.), the cam sensor to the housing, installation of the valve rocker arm cover and connecting back the negative battery lead.
- Q: How to service and repair the power steering pump on Chevrolet Metro?A:The service process starts with power steering pump assembly mounting into a soft jaw vise where you must avoid excessive force to prevent housing deformity. Discovery of the pump body involves removing two bolts, inlet pipe and its O-ring before extracting the pressure sensor. Start the pump service by disconnecting the high pressure line connector and its O-rings and relief valve together with the spring from the pump body. The service requires removal of the 4 bolts and pump cover and O-ring before extracting the cam ring and rotor vane plates from the rotor. Start by extracting the pump shaft snap ring followed by removing the rotor together with the pulley and pump shaft from the pump body. To remove the pump shaft oil seal a flat-bladed tool should be used while simultaneously removing the side plate and O-rings. Prior to assembly you must clean all components until they are totally dry. Check each piece of the pump body, cover, side plate and shaft for heavy wear or damage while inspecting them. Replacement of the complete pump assembly will be necessary in case damage occurs. Check for damages on the cam ring, rotor and vanes before examining the relief valve fluid passage for both blockages and extensive wear areas. A feeler gauge should be used to check rotor and vane plate clearance but the measurement should stay below 0.06 mm (0.0023 inch). The dial calipers should measure the relief spring's free length between 33.5 mm and 36.5 mm (1.43 - 1.32 inch) to prevent needing pump replacement.


