ChevyParts
My Garage
My Account
Cart
OEM Chevrolet Cavalier A/C Switch
Air Conditioning Switch- Select Vehicle by Model
- Select Vehicle by VIN
Select Vehicle by Model
orMake
Model
Year
Select Vehicle by VIN
For the most accurate results, select vehicle by your VIN (Vehicle Identification Number).
25 A/C Switches found

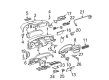
Chevrolet Cavalier Dash Control Unit Part Number: 89018239
$42.84 MSRP: $79.95You Save: $37.11 (47%)
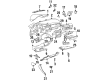
Chevrolet Cavalier Heater Control Part Number: 52481514
Chevrolet Cavalier Heater Control Part Number: 16242861


Chevrolet Cavalier Dash Control Unit Part Number: 16178311

Chevrolet Cavalier Dash Control Unit Part Number: 16034581

Chevrolet Cavalier Blower Motor Switch Part Number: 16137536

Chevrolet Cavalier Blower Motor Switch Part Number: 16147657

Chevrolet Cavalier Dash Control Unit Part Number: 16125031

Chevrolet Cavalier Dash Control Unit Part Number: 16050721

Chevrolet Cavalier Dash Control Unit Part Number: 16030101
Chevrolet Cavalier Dash Control Unit Part Number: 16052781
Chevrolet Cavalier Dash Control Unit Part Number: 16089641

Chevrolet Cavalier Dash Control Unit Part Number: 16164381
Chevrolet Cavalier Dash Control Unit Part Number: 16120721
Chevrolet Cavalier Heater Control Part Number: 16242891
Chevrolet Cavalier Heater Control Part Number: 12214682
Chevrolet Cavalier Heater Control Part Number: 12214652
Chevrolet Cavalier Heater Control Part Number: 52481508
Chevrolet Cavalier Heater Control Part Number: 52481510
Chevrolet Cavalier Heater Control Part Number: 52481512
| Page 1 of 2 |Next >
1-20 of 25 Results
Chevrolet Cavalier A/C Switch
Want to cut long-term maintenance and repair costs? Choose OEM A/C Switch. Those parts deliver top durability you can trust. On our site, you'll find a huge catalog of genuine Chevrolet Cavalier parts. Prices are unbeatable, so you can keep more in your pocket. Every OEM Chevrolet Cavalier A/C Switch includes a manufacturer's warranty. You can also get an easy return policy that keeps buying risk free. Fast delivery, get your car on the road quickly. It's simple to search, compare, and order. Stop guessing about quality or fit. Order today and save with parts that last.
A vital attachment of the Chevrolet Cavalier climate control system stands as the A/C Switch which showcases reliability alongside exceptional performance for the Chevrolet Cavalier. The A/C Switch functions as an essential controller that guides the air conditioning performance while enabling passengers to have comfort regardless of outside weather situations. The A/C Switch is usable with Chevrolet Cavalier vehicles spanning from 1982 to 2005 and onward models which provides users enhanced control of temperature management as well as operational efficiency and safety features. The Chevrolet Cavalier A/C Switch has user-centric buttons along with dials that let drivers easily control it during vehicle operation. This strong design element increases durability because it tackles regular problems that emerge from control failures and label deterioration when performance declines. The Chevrolet Cavalier A/C Switch distinguishes itself in the market because of its flawless connection with the climate control module and its ability to control blower motor speeds through temperature monitoring which produces an effective climate system response. This safety-enhancing feature offers comfort while providing both better view visibility and reduced driver distraction during operation. The Chevrolet Cavalier A/C Switch presents an essential contribution to the brand's quality-focused innovation standards that help sustain the the automaker model's dominance in the compact car market.
Chevrolet Cavalier A/C Switch Parts and Q&A
- Q: How to service the A/C Switch in the HVAC system on Chevrolet Cavalier?A:To service the hvac system, the sir system needs first to be turned off. Next, draw out the trim plate of the instrument panel and the screws of the retaining screw of the hvac assembly and draw it rearward. Turn the socket lamp twists to turn off and pull the bulbs out of the sockets gently. For installation, replace the bulbs into sockets and install hvac assembly paying keen attention to fastener notices for service precautions. Secure the hvac retaining screws by tightening it to 2 n.m (18 lb in), then reinstall the instrument trim panel trim plate. Finally, enable the sir system.
- Q: How to replace the A/C Switch in the HVAC Control Assembly on Chevrolet Cavalier?A:Begin A/C Switch installation by taking out the accessory trim plate and removing screws that fasten the switch in place. First remove the A/C Switch from its position against the instrument panel before disconnecting electrical components and both temperature control cables and mode control cables. Installation requires connecting electrical components alongside mode control and temperature control wires before placing the A/C Switch in position on the instrument panel while tightening retaining screws to 2 n.m (18 lb in). The last step consists of mounting the accessory trim plate.


Related Chevrolet Cavalier Parts
 Chevrolet Cavalier Cabin Air Filter
 Chevrolet Cavalier Heater Core
 Chevrolet Cavalier Blend Door Actuator
 Chevrolet Cavalier A/C Accumulator
 Chevrolet Cavalier A/C Clutch
 Chevrolet Cavalier A/C Compressor
 Chevrolet Cavalier A/C Hose
 Chevrolet Cavalier A/C Idler Pulley
 Chevrolet Cavalier A/C System Valve Core
 Chevrolet Cavalier Ambient Temperature Sensor
 Chevrolet Cavalier Blower Control Switches
 Chevrolet Cavalier Evaporator