ChevyParts
My Garage
My Account
Cart
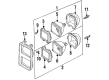
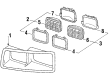
OEM Chevrolet Monte Carlo Headlight
Headlamp- Select Vehicle by Model
- Select Vehicle by VIN
Select Vehicle by Model
orMake
Model
Year
Select Vehicle by VIN
For the most accurate results, select vehicle by your VIN (Vehicle Identification Number).
13 Headlights found


Chevrolet Monte Carlo Headlamp Assembly, Passenger Side Part Number: 10420376
$169.84 MSRP: $253.92You Save: $84.08 (34%)Ships in 1-2 Business Days


Chevrolet Monte Carlo Headlamp Assembly, Passenger Side Part Number: 25958360
$244.63 MSRP: $365.74You Save: $121.11 (34%)Ships in 1-2 Business Days


Chevrolet Monte Carlo Headlamp Assembly, Driver Side Part Number: 25958359
$239.84 MSRP: $358.57You Save: $118.73 (34%)

Chevrolet Monte Carlo Headlamp Assembly, Driver Side Part Number: 10420375
$120.91 MSRP: $180.77You Save: $59.86 (34%)Ships in 1-2 Business Days
Chevrolet Monte Carlo Headlamp Assembly Part Number: 16501996
$33.81 MSRP: $43.98You Save: $10.17 (24%)


Chevrolet Monte Carlo Headlamp Assembly Part Number: 5973931
$180.47 MSRP: $269.82You Save: $89.35 (34%)
Chevrolet Monte Carlo Headlamp Assembly Part Number: 16502326
Chevrolet Monte Carlo Headlamp Assembly Part Number: 16502325
Chevrolet Monte Carlo Headlamp Assembly Part Number: 16501995
Chevrolet Monte Carlo Headlight
Want to cut long-term maintenance and repair costs? Choose OEM Headlight. Those parts deliver top durability you can trust. On our site, you'll find a huge catalog of genuine Chevrolet Monte Carlo parts. Prices are unbeatable, so you can keep more in your pocket. Every OEM Chevrolet Monte Carlo Headlight includes a manufacturer's warranty. You can also get an easy return policy that keeps buying risk free. Fast delivery, get your car on the road quickly. It's simple to search, compare, and order. Stop guessing about quality or fit. Order today and save with parts that last.
Chevrolet Monte Carlo Headlight is a signature styling, as well as a crucial element to the safety of the legendary coupe. As a personal luxury coupe, the Chevrolet Monte Carlo gives drivers high-speed acceleration and the highways with bold lines, spacious two door cabin and engines that can perform with efficiency, or with throaty power depending on the type of engines installed. Several owners commend the even distribution of weight, responsive steering and the smooth ride that allows them to enjoy every journey. Over a six generations the Chevrolet badge represented dependability as the Monte Carlo continued to optimize aerodynamics and suspensions in a bid to remain competitive both in the street and on the NASCAR. In order to offset those virtues, the Headlight features contemporary composite lenses and exact reflectors to cast a sharp and focused beam of light that make the Monte Carlo visible during rain or dusk and enhance the aggressive Chevrolet front fascia. Contrary to generic lamps, Chevrolet Monte Carlo Headlight has built-in turn signals and running lights into a single smooth unit that has reduced drag and smoothed the coupe sporty look. Durable housings will withstand moisture and optional LED or HID bulbs will allow each Headlight to slice through the dark in cool white light consuming fewer power in the electrical system. Installing a new Headlight requires parking on flat ground, switching off the ignition, opening the hood, unscrewing the old unit, hooking the harness, installing the new unit, bolts, installing the trim, and checking the beam aim.
Related Chevrolet Monte Carlo Parts
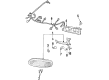
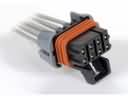 Chevrolet Monte Carlo Chassis Wiring Harness Connector
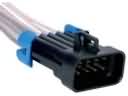 Chevrolet Monte Carlo Engine Wiring Harness Connector
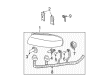
 Chevrolet Monte Carlo Fog Light
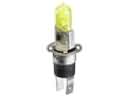 Chevrolet Monte Carlo Fog Light Bulb
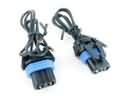 Chevrolet Monte Carlo Fog Light Connector
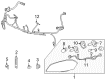
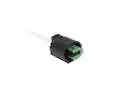 Chevrolet Monte Carlo Forward Light Harness Connector
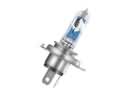 Chevrolet Monte Carlo Headlight Bulb
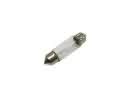 Chevrolet Monte Carlo Interior Light Bulb
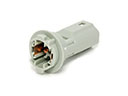 Chevrolet Monte Carlo Light Socket
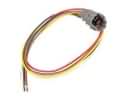 Chevrolet Monte Carlo Rear Light Harness Connector
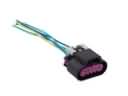 Chevrolet Monte Carlo Tail Light Connector
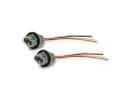 Chevrolet Monte Carlo Turn Signal Light Connector