ChevyParts
My Garage
My Account
Cart
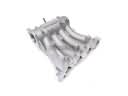
OEM Saturn Air Charge Temperature Sensor
Mass Air Flow Sensor- Select Vehicle by Model
- Select Vehicle by VIN
Select Vehicle by Model
orMake
Model
Year
Select Vehicle by VIN
For the most accurate results, select vehicle by your VIN (Vehicle Identification Number).
3 Air Charge Temperature Sensors found


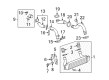
Saturn Temperature Sensor Part Number: 12592017
$65.71 MSRP: $111.87You Save: $46.16 (42%)Ships in 1-2 Business DaysProduct Specifications- Other Name: Sensor Assembly-Intake Air Pressure & Temperature; Air Charge & Intake Temperature Sensor; Air Intake Temperature Sensor; Sensor, Computer Control Sensors
- Replaces: 19458981


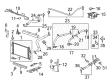
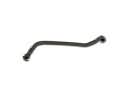
Saturn Mass Air Flow Sensor, Passenger Side Part Number: 15865791
$75.18 MSRP: $152.70You Save: $77.52 (51%)Ships in 1-2 Business DaysProduct Specifications- Other Name: Sensor, Mass Airflow (W/Intake Air Temperature Sensor); Air Charge Temperature Sensor; Manifold Sensor; Air Mass Sensor; Air Temperature Sensor; Intake Air Temperature Sensor; Computer Control Sensors.
- Position: Passenger Side
- Replaces: 12576410


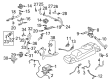
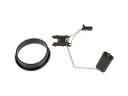
Saturn Temperature Sensor Part Number: 12160244
$20.42 MSRP: $33.63You Save: $13.21 (40%)Ships in 1-3 Business DaysProduct Specifications- Other Name: Sensor, Computer Control Sensors; Air Charge Temperature Sensor; Intake Air Temperature Sensor; Air Temperature Sensor; Air Intake Temperature Sensor; Intake Temperature Sensor; Sensor
- Replaces: 12110319
Saturn Air Charge Temperature Sensor
Choose OEM Air Charge Temperature Sensor, you're making the optimal decision for superior quality and perfect performance. You can feel confident because each component goes through stringent quality checks. Every part is carefully built to comply with Saturn's factory specifications. You'll enjoy a smooth, worry-free installation that fits just right. At ChevyPartsGiant.com, you'll find it easy to get top-quality OEM Saturn Air Charge Temperature Sensor. You can shop at highly competitive prices and protect your budget. All our genuine Saturn parts include a dependable manufacturer's warranty. You'll also appreciate our straightforward return policy and swift delivery services for extra convenience.
Saturn Air Charge Temperature Sensor informs the engine computer of the temperature of the intake air in order to balance fuel and spark to achieve maximum efficiency. In 1991 Saturn was launched with own factory and mission to re-invent car manufacturing and fans were pleased by dent resistent plastic panel that would not dent the door and would keep the paint fresh. Lost foam casting saved engine weight, which made the Saturn cars light on their tires and consumed less fuel. A long-lasting process of multistage painting keeping the paint shiny and careful marketing created a tight community of simple reliability and unique style. Those qualities made Saturn to remain in the spotlight despite the production. Its customer friendly policies, such as no haggle pricing, showroom gatherings were also against industry standards and further enhanced consumer confidence that the brand will consistently focus on people. Among these are the low-end Air Charge Temperature Sensor, which is a thermistor installed somewhere in the airflow and transmits constant temperatures to the control unit. The installation of a new Air Charge Temperature Sensor at home is not complicated. Disconnect the battery, trace the intake tube/manifold until you reach the current Air Charge Temperature Sensor, unclip the wiring and twist or pull the sensor out, including the O-ring. Apply oil slightly on the new seal, insert the replacement into the port and place it firmly. Reconnect the connector, move the harness out of the heat, reconnect the battery, clear any codes, turn on the engine, and verify the temperature information as well as ensuring there are no leaks or warning lights.