ChevyParts
My Garage
My Account
Cart
OEM Saturn Vapor Pressure Sensor
Fuel Vapor Pressure Sensor- Select Vehicle by Model
- Select Vehicle by VIN
Select Vehicle by Model
orMake
Model
Year
Select Vehicle by VIN
For the most accurate results, select vehicle by your VIN (Vehicle Identification Number).
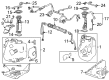
2 Vapor Pressure Sensors found


Saturn Fuel Pressure Regulator, Passenger Side Part Number: 16238399
$54.17 MSRP: $101.06You Save: $46.89 (47%)Product Specifications- Other Name: Sensor, Fuel Tank Pressure; Fuel Tank Pressure Sensor; Fuel Pressure Sensor; Pressure Regulator; Sensor, Early Fuel Evaporation; Fuel Gauge Sending Unit; Tank Pressure Sensor
- Position: Passenger Side
- Replaces: 12206740, 16217059, 16257276, 22678829, 09377680, 12219388, 16196060, 9377680


Saturn Pressure Sensor, Passenger Side Part Number: 13502903
$48.74 MSRP: $100.17You Save: $51.43 (52%)Ships in 1-2 Business DaysProduct Specifications- Other Name: Sensor Kit, Fuel Tank Meter/Pump; Fuel Tank Pressure Sensor; Level Sensor; Tank Pressure Sensor; Sensor; Sensor, Early Fuel Evaporation; Sensor, Fuel Tank Meter/Pump
- Position: Passenger Side
- Replaces: 13502510
Saturn Vapor Pressure Sensor
Choose OEM Vapor Pressure Sensor, you're making the optimal decision for superior quality and perfect performance. You can feel confident because each component goes through stringent quality checks. Every part is carefully built to comply with Saturn's factory specifications. You'll enjoy a smooth, worry-free installation that fits just right. At ChevyPartsGiant.com, you'll find it easy to get top-quality OEM Saturn Vapor Pressure Sensor. You can shop at highly competitive prices and protect your budget. All our genuine Saturn parts include a dependable manufacturer's warranty. You'll also appreciate our straightforward return policy and swift delivery services for extra convenience.
The Saturn Vapor Pressure Sensor ensures that the fuel vapors are contained to ensure that the emissions are minimal and that the warning lights remain off, which is in line with the tendency of the brand to offer durable and progressive cars. Saturn cars attracted its followers with body panels made of dent-resistant plastic that bounces back when struck by a parking lot, castings of lost foam that are shaped in the engine that remove unnecessary weight, and a hard paint that makes its mark shine over years. The glasshouse look and readable gauges were also popular with drivers and large doors made it easy on families to go inside. The company further developed a special factory, a cordial advertising, and a devoted group that acclaims Saturn as a combination of longevity, economy as well as unique style. Nowadays Saturn owners are proud that they keep their cars at home. The Vapor Pressure Sensor measures the pressure in the tank and informs the computer at which time rely on the purge of fumes, and a defective Vapor Pressure Sensor switches the light. Installation a new unit requires parking on flat surface, disengaging the brake, disconnecting the battery and emptying the fuel pressure. Be on the look out of sparks and keep off the statics at all times. Crawl, unplug wiring and hose on sensor on tank or canister, peel off clip or screws and remove old part. Check rubber O-ring, rub on light coat of clean oil, screw the new Vapor Pressure Sensor into its seat that fully inserts, clamp it down, reattach hoses and plug and connect battery, clear codes and take a short test run to ensure steady readings.