ChevyParts
My Garage
My Account
Cart
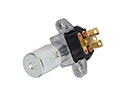
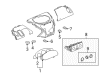
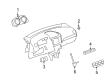
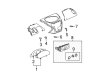
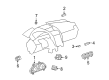
OEM Saturn Speedometer
Speedometer Gauge- Select Vehicle by Model
- Select Vehicle by VIN
Select Vehicle by Model
orMake
Model
Year
Select Vehicle by VIN
For the most accurate results, select vehicle by your VIN (Vehicle Identification Number).
35 Speedometers found

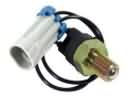
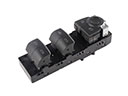
Saturn Instrument Cluster Part Number: 25913321
$13.83 MSRP: $25.97You Save: $12.14 (47%)Ships in 1-2 Business DaysProduct Specifications- Other Name: Sensor Kit, Brake; Brake Light Switch; Stoplamp Switch


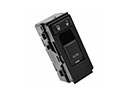
Saturn Instrument Cluster Part Number: 20791622
$119.07 MSRP: $177.98You Save: $58.91 (34%)Product Specifications- Other Name: Cluster, Instrument Panel Gage; Cluster Assembly


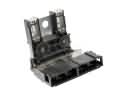
Saturn Instrument Cluster, Black; Red Line Part Number: 10373952
$153.48 MSRP: $229.43You Save: $75.95 (34%)Product Specifications- Other Name: Cluster, Instrument Panel Gage; Cluster Assembly


Saturn Instrument Cluster, Silver Part Number: 20872429
Product Specifications- Other Name: Cluster, Instrument Panel Gage; Cluster Assembly


Saturn Cluster Assembly, Red Line; White Part Number: 10373953
Product Specifications- Other Name: Cluster, Instrument Panel Gage; Instrument Cluster


Saturn Instrument Cluster, Black; Red Line Part Number: 22708266
Product Specifications- Other Name: Cluster, Instrument Panel Gage; Cluster Assembly


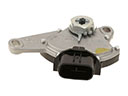
Saturn Instrument Cluster Part Number: 20808418
$208.59 MSRP: $311.80You Save: $103.21 (34%)Product Specifications- Other Name: Cluster, Instrument Panel Gage; Cluster Assembly
- Replaces: 25895440
Saturn Instrument Cluster, Silver Part Number: 20872431
$133.58 MSRP: $199.66You Save: $66.08 (34%)Product Specifications- Other Name: Cluster, Instrument Panel Gage; Cluster Assembly
- Replaces: 25874888, 96850947

Saturn Cluster Assembly Part Number: 23161125
$151.42 MSRP: $226.34You Save: $74.92 (34%)Product Specifications- Other Name: Cluster, Instrument Panel Gage; Instrument Cluster
- Replaces: 20951744, 22763019, 20930695
Saturn Instrument Cluster Part Number: 10373954
$84.67 MSRP: $125.98You Save: $41.31 (33%)Product Specifications- Other Name: Cluster, Instrument Panel Gage
Saturn Cluster Assembly, Red Line Part Number: 22722706
Product Specifications- Other Name: Cluster; Instrument Cluster; Cluster, Instrument Panel Gage
Saturn Instrument Cluster Part Number: 93358025
Product Specifications- Other Name: Cluster
Saturn Instrument Cluster, Red Line Part Number: 15223710
Product Specifications- Other Name: Cluster, Instrument Panel Gage; Cluster Assembly

Saturn Instrument Cluster, Silver Part Number: 10369366
Product Specifications- Other Name: Cluster, Instrument Panel Gage; Cluster Assembly
Saturn Instrument Cluster, Silver Part Number: 15237453
Product Specifications- Other Name: Cluster, Instrument Panel Gage; Cluster Assembly

Saturn Instrument Cluster Part Number: 15916734
Product Specifications- Other Name: Cluster, Instrument Panel Gage; Cluster Assembly

Saturn Cluster Assembly Part Number: 25920116
Product Specifications- Other Name: Cluster, Instrument Panel Gage; Instrument Cluster
- Replaces: 15775273, 25854506
Saturn Instrument Cluster, Red Line; White Part Number: 22708267
Product Specifications- Other Name: Cluster, Instrument Panel Gage; Cluster Assembly

Saturn Instrument Cluster Part Number: 21025355
Product Specifications- Other Name: Cluster, Instrument Panel Gage; Cluster Assembly

Saturn Instrument Cluster Part Number: 21024577
Product Specifications- Other Name: Cluster, Instrument Panel Gage; Cluster Assembly; Cluster
| Page 1 of 2 |Next >
1-20 of 35 Results
Saturn Speedometer
Choose OEM Speedometer, you're making the optimal decision for superior quality and perfect performance. You can feel confident because each component goes through stringent quality checks. Every part is carefully built to comply with Saturn's factory specifications. You'll enjoy a smooth, worry-free installation that fits just right. At ChevyPartsGiant.com, you'll find it easy to get top-quality OEM Saturn Speedometer. You can shop at highly competitive prices and protect your budget. All our genuine Saturn parts include a dependable manufacturer's warranty. You'll also appreciate our straightforward return policy and swift delivery services for extra convenience.
Saturn Speedometer offers the occupants with the correct reading of speed to make the occupants strike the balance between the boisterous nature of a car with the control. Saturn was developed as one of the projects conceived by the innovative team in the General Motors in 1985, Saturn was developed with dent resistant plastic panels that bead-bounced in the receiving lots, a lightweight yet powerful engine, developed by the use of the lost foam casting technique, and durable multistage paint that made the colours shine after many years on the road. The brand is unique with innovative forward looking touches that would cost the owners less in terms of the fix, and this adds some certainty on the daily traveling, hence why the brand continues to shine even today in the eyes of the loyal community. The Saturn Speedometer is easily attached to the dash, shows electronic or cable signals, and is difficult to shake to achieve steady results. Fitting of the Speedometer in most of the Saturn models is not very hard as one follows the steps step by step. The first step is to disconnect the battery then remove the instrument bezel and slide the cluster out with the battery. Install the Speedometer with bracket, provide the power, the ground and light leads and ensure that the signal cable or sensor plug is fitted. Slip the wires in a loom, to prevent their chafe, carry them out of the way of hot metal, and screw down all the screws. After reconnecting the trim, repeat the battery reconnection process followed by the quick calibration process as in the manual and then proceed on a cautious test run to be sure that the needle is following true at neighborhood speeds up to highway speeds.