Popular OEM Chevrolet Silverado 1500 Classic Parts
- Body & Hardware Parts View More >
- Steering Parts View More >
- Electrical Parts View More >
- Air & Fuel Delivery Parts View More >
- Charging & Starting Parts View More >
- Engine Parts View More >
- Belts & Cooling Parts View More >
- Suspension Parts View More >
- Driveline & Axles Parts View More >
- Emission Control & Exhaust Parts View More >
- Transmission Parts View More >
- Brakes Parts View More >
Why Buy Genuine Chevrolet Silverado 1500 Classic Parts From ChevyPartsGiant.com
Looking for real Chevrolet Silverado 1500 Classic parts? ChevyPartsGiant.com may be a better choice to find genuine parts at wallet-friendly prices. We sell only OEM Chevrolet Silverado 1500 Classic parts, ensuring perfect fit, reliability, and long-term performance. With our website, you can easily get access to the same parts found at local Chevrolet stores. All components are produced by Chevrolet and are exclusively fitted on Chevrolet Silverado 1500 Classic automobiles. By shopping at our store, you can enjoy the quality of the Chevrolet factory without the high prices of brick-and-mortar facilities. We achieve this because we are an online store operating at lower costs, which we pass on to you. We also have a user-friendly platform where you can find and order genuine Chevrolet Silverado 1500 Classic parts swiftly. We are here to make your process of restoring a Chevrolet Silverado 1500 Classic or dealing with simple repairs quick and inexpensive. We also make it easy to obtain Chevrolet Silverado 1500 Classic parts at competitive shipping prices and a team of knowledgeable staff ready to take your order. Choose ChevyPartsGiant.com to save time and money, as well as keep your Chevrolet Silverado 1500 Classic in the good condition.
The Chevrolet Silverado 1500 Classic released in 2007 demonstrates significant development for pickup trucks because it adopts the GMT800 platform. Customers who buy the 2007 Chevrolet Silverado 1500 Classic benefit from several engine choices but the 6.0L LQ9 V8 configuration stands out for its exceptional towing and hauling capabilities. Powered by an available 6.0L LQ9 V8 engine the Silverado 1500 Classic includes a four-speed automatic transmission system that promotes both quick responsiveness and efficient power distribution. New aerodynamic elements located on the windshield along with updated body lines enhance efficiency so the Silverado 1500 Classic works well for work transport and family usage. Vehicle suspension technology receives enhancements through optimized designs that improve both handling and riding comfort features which result in stable driving performance under different load conditions. Premium audio options together with the enhanced Driver Information Center represent interior innovations found in the Chevrolet Silverado 1500 Classic that enhance driving experiences. Customers can guarantee vehicle performance and dependability by using factory standard parts availability from the Chevrolet Silverado 1500 Classic manufacturer to replace damaged components. Engineers planned the Chevrolet Silverado 1500 Classic to meet present-day needs by maintaining customer options for reliable pickup truck performance.
Chevrolet Silverado 1500 Classic issues group into drivetrain shifting, engine lubrication, and front suspension stability. In the transmission, Chevrolet Silverado 1500 Classic trucks may shift harshly or shudder on the throttle. Wear in clutches or a sticking transmission solenoid disrupts pressure and timing. Confirm with a road test, scan data, and line pressure checks. Service fluid and filter, update adaptives, and replace the faulty transmission solenoid if needed. For the engine, the Chevrolet Silverado 1500 Classic can burn oil between services and trigger warnings. Worn piston rings and lifter wear raise consumption and foul plugs. Measure usage, check PCV flow, perform compression and leakdown, plan repair or overhaul of ring. The chassis of the Chevrolet Silverado 1500 Classic includes loose steering and improperly worn tires. The ball joints and control arm bushings contain play, which leads to misalignment of the wheel. Replace worn ball joints, torque fasteners, and perform a precise alignment to spec. Finish by road testing the Silverado 1500 Classic and verifying smooth shifts and stable temperatures. These steps keep the Chevrolet Silverado 1500 Classic's power delivery, oil control, and handling predictable.
Chevrolet Silverado 1500 Classic Parts Questions & Answers
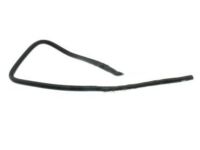
- Q: How to Replace a Radiator Hose in the Cooling System on Chevrolet Silverado 1500 Classic?A:Before changing the Radiator vent inlet hose, drain the cooling system. Then, take the vent inlet hose clamp off the Radiator and pull the vent inlet hose out from the Radiator. Move the vent inlet hose clamp up from the surge tank and remove the vent inlet hose from inside the surge tank. Install the hose from the vent inlet to the tank and fix the vent inlet clamp on top of the tank. Attach the hose to the Radiator after you have removed it. Then place the hose clamp over the hose's point of attachment on the Radiator. Finally, fill the cooling system.
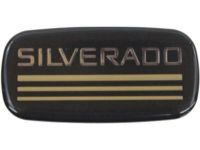
- Q: How to replace the door emblem and nameplate on Chevrolet Silverado 1500 Classic?A:The necessary replacement tools for door emblem and nameplate work include the following: Heat Gun (J 25070) combined with 3M(TM) Scotch Brite Molding Adhesive Remover Disk (3M(TM) P/N 07501). The toolkit consists of Heat Gun (J 25070) and 3M(TM) Scotch Brite Molding Adhesive Remover Disk (3M(TM) P/N 07501). The first step is to wrap tape across the door emblem space for both protection and precise positioning. Position the Heat Gun (J 25070) 152 mm away from the emblem/nameplate during a 30-second circular motion period. Start by removing the emblem/nameplate with a round-blade plastic tool then clean up any remaining adhesive from both the door panel and the back of the emblem/nameplate using 3M(TM) Scotch Brite Molding Adhesive Remover Disk (3M(TM) P/N 07501). Use varnish makers and painters (VMP) naptha to clean the door surface. Place tape once more in the unmarked emblem/nameplate area. Use the Heat Gun (J 25070) to warm the door surface to at least 21°C (70°F) without touching either the adhesive backing of the emblem/nameplate. Reposition the front end of the emblem/nameplate onto the door panel by removing its backing while still pulling away the backing. Hand rolling the emblem and nameplate will secure proper adhesion after which you should inspect the bonding before removing tape from around the door emblem.
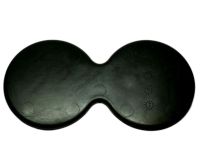
- Q: How to replace the front floor console cup holder (Non-Luxury) on Chevrolet Silverado 1500 Classic?A:The replacement of the front floor console cup holder (Non-Luxury) requires you to grab the middle of the cup holder and pull outwards to remove clips then remove the cup holder from the console. For installation, push the cup holder inwards while the clips click into position, ensuring the corners of the cup holder are seated right.
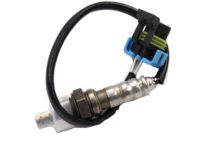
- Q: How to replace the Heated Oxygen Sensor (HO2S) for Bank 2 Sensor 1 on Chevrolet Silverado 1500 Classic?A:A proper vehicle support system must be implemented before starting the HO2S for bank 2 sensor 1 replacement process. Gently separating the HO2S from its connector requires removing its harness clip before unclipping the sensor from the harness. After removing the connector position assurance retainer, disconnect the HO2S electrical connection users can proceed to remove the bank 2 sensor 1 HO2S unit. Installation of old HO2S requires threads to be treated with anti-seize compound GM P/N 12377953 equivalent to provide easier removal. This compound consists of liquid graphite and glass beads. Affix the bank 2 HO2S while ensuring it reaches 42 N.m tightening torque (31 lb ft). Following the repair of the bank 2 HO2S connect the HO2S electrical connector then install the CPA retainer before reattaching the HO2S to the harness with its clip and lowering the vehicle.


