Make sure this part fits

GM 89060538
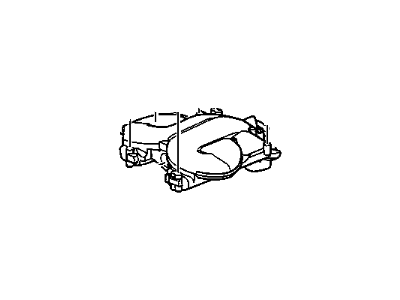
Intake Plenum

2006-2008 GM

Customer Questions & Expert Answers (6)
GM 89060538 Intake Plenum
  • Part Description
    Manifold Kit, Engine Fuel Intake Manifold
  • Position
    Upper
  • Manufacturer
    General Motors
Make sure this part fits
$75.04 MSRP: $117.54
You Save: $42.50 (37%)
Ships in 1-3 Business Days
1
ADD TO CART
  • Product Specifications
  • Vehicle Fitment
  • Customer Questions & Expert Answers
  • Product Specifications

    BrandGenuine GM
    Manufacturer Part Number89060538
    Part DescriptionManifold Kit, Engine Fuel Intake Manifold
    Item Dimensions23.7 x 17.9 x 12.0 inches
    Item Weight19.20 Pounds
    PositionUpper
    ConditionNew
    Fitment TypeDirect Replacement
    ManufacturerGeneral Motors
    SKU89060538
    WarrantyThis genuine GM part is guaranteed by GM's factory warranty.
    Shipping & ReturnShipping Policy Return Policy
    Warning: California's Proposition 65
  • Vehicle Fitment

    Year Make Model Trim Engine
    2006-2007 Buick TerrazaCX, CXL6 Cyl 3.9 L FLEX, 6 Cyl 3.9 L GAS
    2006-2008 Chevrolet UplanderBase, LS, LT6 Cyl 3.9 L FLEX, 6 Cyl 3.9 L GAS
  • Customer Questions & Expert Answers

    Q:
    Is 89060538 compatible with my car? Posted by ChevyPartsGiant Specialist
    A:
    Please Select Your Vehicle model to see if part number 89060538 is suitable before ordering.
    Posted by ChevyPartsGiant Specialist
    Q:
    How to replace the upper intake manifold on Buick Terraza? Posted by Customer
    A:
    The procedure starts by disconnecting the battery terminal then removing vacuum hoses from two components: evaporative emissions (EVAP) canister purge valve and Brake Booster. First disconnect all electrical connectors from three specific components including the exhaust gas recirculation valve along with the Mass Air Flow Sensor and electronic throttle control device along with the evap canister purge valve. First drain the cooling system and then remove the air cleaner intake duct. First disconnect the left side Spark Plug Wires and eliminate the camshaft position (CMP) sensor wiring harness together with the left side spark plug wire harness and engine wiring harness from their retention points. First disconnect the Ignition Coil bracket together with its coils as well as the evap canister purge solenoid valve and manifold absolute pressure (MAP) sensor bracket and EGR Valve. The next step requires removal of upper Intake Manifold bolts and stud followed by generator bracket till the process finishes with upper Intake Manifold removal and upper Intake Manifold gaskets. The upper Intake Manifold replacement process requires you to remove the Throttle Body while cleaning the upper intake gasket mating surfaces. After reinstalling the Throttle Body you should install the upper Intake Manifold gaskets along with the upper Intake Manifold itself. Apply threadlocker gm p/n 12345382 (Canadian P/N 10953489) to the upper Intake Manifold bolt threads before installing the upper Intake Manifold bolts and the stud with a torque of 25 nm (18 ft. Lbs.). The installation sequence includes replacement of the generator bracket followed by EGR Valve then MAP Sensor bracket and sensor followed by the evap canister purge solenoid valve. You should start with the Ignition Coil bracket installation which includes coils and wiring harnesses to their retainers then connect left side Spark Plug Wires to spark plugs and the air cleaner intake duct. Install the electrical connectors to the evap canister purge valve followed by the electronic throttle control and maf sensor and EGR Valve and finally hook up the vacuum hoses to the Brake Booster and evap canister purge valve. Reinstall the negative Battery Cable then begin filling the cooling system.
    Posted by ChevyPartsGiant Specialist
    Q:
    How to replace the upper intake manifold on Chevrolet Uplander? Posted by Customer
    A:
    Before removing the upper Intake Manifold, you should unplug the negative Battery Cable. Pull off the Intake Manifold cover and drain the cooling system. Next, remove the positive crankcase vehicle (PCV) fresh air tube as well as the pcv foul air tube. Reamp the Brake Booster Vacuum Hose clamp, and next, remove your vacuum hose from the Intake Manifold. Remove the engine harness electrical connector from the manifold absolute pressure (MAP) sensor and evap canister purged solenoid's and electronic throttle control (ETC). Remove the engine harness electrical connector from the Intake Manifold tuning valve and then air cleaner outlet duct. Detach left side Spark Plug Wires from the spark plugs and Ignition Control Module, unhook the Spark Plug wire retainer clips and pull out the left side Spark Plug Wires. Withdraw the heater inlet and outlet pipe nuts from the Throttle Body studs,/widget the inlet and outlet pipe. First, take out the nut from the generator bracket to the Intake Manifold; also remove the bolt from the generator to the bracket and the Intake Manifold, which will help you to remove the bracket. Take off the bolt that fastens the transmission Dipstick Tube onto the upper Intake Manifold and the ignition coils. Deregister the debut the upper Intake Manifold bolts & stud, then part and take away the upper Intake Manifold transverse the lower Intake Manifold & link up the upper to inches insignia gaskets. Take off the inlet manifold tuning valve and evap canister purge solenoid valve. Disconnect the MAP Sensor bracket bolts and sensor. Remove the Throttle Body bolts/studs and Throttle Body, clean the upper intake to lower intake gasket mating surfaces, and inspect the Intake Manifold tuning valve seal and replace if found to be damaged. Apply lubricant to the nose of the valve blade, make a smooth movement. For installation, install the inlet manifold tunings valve and bolts tightening by 10 n.m (89 lb in). Check and replace the evap canister purge solenoid valve and bolt and tighten to 16 n.m (12 lb ft). Check and install the MAP Sensor, bracket and bolts, check and install the Throttle Body with threadlocker on the bolts/studs and tighten to 10 n.m (89 lb in). Roll in a new upper to lower Intake Manifold gaskets, position the upper Intake Manifold over the lower Intake Manifold, apply a threadlocker to the threads of upper Intake Manifold bolts/stud threads, and install the bolts and studs, tighten to 25 n.m (18 lb ft). Install the Ignition Coil, move the transmission tube, and screw the bolt at the Intake Manifold. Mount the bracket of this generator and the bolt that connects the generator, bracket, and Intake Manifold, then fit in the nut that connects the bracket of this generator to the upper Intake Manifold. Mount the inlet and outlet pipe to the studs, and heater inlet and outlet pipe nuts to the Throttle Body studs and tighten to 10 n.m (89 lb in). Reattach the wires to the spark plugs and back into the Ignition Control Module and attach the retainer clips to the Spark Plug Wires while back on and install the air cleaner outlet duct. Connect the engine harness electrical connector to the Intake Manifold tuning valve as well as to the connectors on the evap canister purge solenoid and etc and then the MAP Sensor electrical connector. Put on the Brake Booster Vacuum Hose, and install the position of the hose clamp then install the pcv foul air tube, and pcv fresh air tube. Top-up the cooling system and fit in the Intake Manifold cover before you reconnect the negative Battery Cable.
    Posted by ChevyPartsGiant Specialist
    Q:
    How to replace the lower intake manifold on Chevrolet Uplander? Posted by Customer
    A:
    In order to replace the lower Intake Manifold, start off by removing the coolant crossover pipe by removing the upper Intake Manifold as well. Then remove the left and right valve Rocker Arm covers, disconnect the engine coolant temperature (ECT) electrical connection, and remove the fuel feed line from the Fuel Rail. Disconnnect the wastegate electric connector from the throttle body and identify the number on the tube grommet at the top of the thermostat airflow tube. Remove the thermostat airflow tube. Remove the grommet plug at the top of the throttle body bypass tube. Put a flat pry tool between bypass tube clamp and tube. Disconnnect the accelerator valve exhaust connector from the passenger side of the throttle body. Then remove the second accelerator valve exhaust connector on the driver side of throttle body. Next, unfasten the Fuel Injector harness connector bracket bolt, disconnect the cmp sensor electrical connector, remove the Fuel Injector rail bolts & pull off the Fuel Rail. Go ahead and remove the lower Intake Manifold bolts and the lower Intake Manifold as well. Loosen the valve Rocker Arm bolts and make sure to get the valve train components on a rack for return installment. Unscrew the valve rocker arms and push rods, make sure that the intake push rods stretch to 147.51mm (5.81inch) and the exhaust push rod to 154.87mm (6.1 inch). The lower Intake Manifold gaskets and seals are to be removed followed by cleaning gasket and seal surfaces of cylinder heads and the engine block, and the lower Intake Manifold with degreaser and eliminating any loose room temperature vulcanizing sealer (RTV). Mount the new lower Intake Manifold gaskets and seals, prelubel the ends of the push rods, and put the push rods back in their positions. Apply prelube to the Rocker Arm friction surfaces, and replace valve rocker arms with their original positions, using 34 n.m (25 lb ft) torque to tighten the valve rocker arms bolts. Replace the gaskets and seals before you apply a small amount of rtv sealer to the four corners of the Intake Manifold to engine block joints before installing the lower Intake Manifold. Put sealer on the lower Intake Manifold bolt threads and install the lower Intake Manifold bolts in the sequence as specified: first to 16 n.m (12 lb ft) and then to 25 n.m (18 lb ft). Check for Fuel Rail damage, inspection of fuel injectors and Fuel Injector o-rings for the purpose of which they must be lubricated with engine oil, install injector nozzles into the lower Intake Manifold injector bores, using pressure from the injector rail until fully seated. Install the Fuel Injector rail bolts in 10 n.m (89 lb in), then connect the cmp sensor electrical connector, place the Fuel Injector harness connector bracket to the Intake Manifold and install a bracket bolt in 8 n.m (71 lb in). Hook up the engine harness electrical connector through the Fuel Injector wiring harness, address the cpa retainer, and address the fuel feed line and Fuel Rail. Lastly, reconnect the ect electrical connector and install the right and left valve Rocker Arm covers, the upper Intake Manifold, and the coolant crossover pipe.
    Posted by ChevyPartsGiant Specialist
    Q:
    What should be done after installing the fuel injector rail for the 2007 Buick Terraza? Posted by Customer
    A:
    Reconnect the CMP sensor electrical connector, position the fuel injector harness connector bracket, and tighten its bolt to 8 N.m (71 lb in).
    Posted by ChevyPartsGiant Specialist
    See expert answers on similar Intake Manifold
    Q:
    What is the next step after disconnecting the heater inlet pipe for the 2006 Chevrolet Uplander? Posted by Customer
    A:
    Disconnect the radiator inlet hose from the engine, then remove the water outlet and thermostat.
    Posted by ChevyPartsGiant Specialist
    See expert answers on similar Intake Manifold
    If you have any questions about this product, please don't hesitate to ask us. We will be happy to help you!

OEM GM 89060538, Excellent Performance and Perfect Fitment

To ensure reliability, purchase GM part # 89060538 Intake Plenum. It is sometimes referred to as GM Intake Manifold. Choosing OEM parts is the optimal decision for guaranteeing superior quality and perfect performance. These components undergo stringent quality checks and are carefully constructed to comply with GM's factory specifications, ensuring a smooth installation process.

ChevyPartsGiant.com is a leading supplier of genuine GM parts such as GM 89060538 Intake Plenum. Our website boasts an extensive inventory of OEM GM parts, available at highly competitive prices in the market. Should you require any new genuine GM parts, rest assured we will deliver them swiftly and efficiently to your doorstep. Furthermore, all our parts come with the assurance of a manufacturer's warranty. For detailed Chevy parts information, click here.
Choose ChevyPartsGiant for discounted prices, exceptional service and fast delivery