Make sure this part fits

GM 9158421
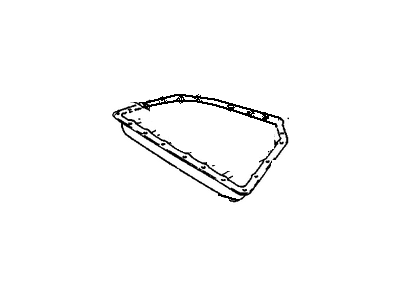
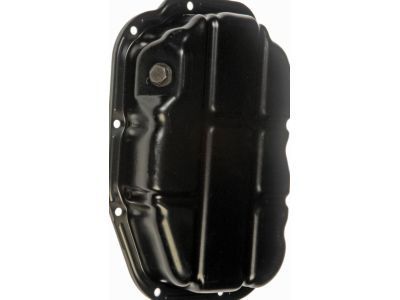
Oil Pan

1997-2001 Cadillac Catera

Customer Questions & Expert Answers (4)
GM 9158421 Oil Pan
GM 9158421 Oil Pan
  • Part Description
    Pan, Oil
  • Manufacturer
    General Motors
  • Manufacturer's Notes
    This part is discontinued.
Make sure this part fits
  • Related Parts
  • Product Specifications
  • Vehicle Fitment
  • Customer Questions & Expert Answers
  • Product Specifications

    BrandGenuine GM
    Manufacturer Part Number9158421
    Part DescriptionPan, Oil
    Other NamesPan, Engine Oil
    Item Dimensions26.9 x 13.1 x 5.5 inches
    Item Weight4.40 Pounds
    ConditionNew
    Fitment TypeDirect Replacement
    ManufacturerGeneral Motors
    SKU9158421
    WarrantyThis genuine GM part is guaranteed by GM's factory warranty.
    Shipping & ReturnShipping Policy Return Policy
    Warning: California's Proposition 65
  • Vehicle Fitment

    Year Make Model Trim Engine
    1997-2001 Cadillac CateraBase, Sport6 Cyl 3.0 L GAS
  • Customer Questions & Expert Answers

    Q:
    Hey, is 9158421 a good match for my vehicle? Posted by ChevyPartsGiant Specialist
    A:
    Please Select Your Vehicle model to see if part number 9158421 is suitable before ordering.
    Posted by ChevyPartsGiant Specialist
    Q:
    How to replace the upper oil pan on Cadillac Catera? Posted by Customer
    A:
    The repair process starts by disconnecting the battery's negative terminal and then supporting the car. Start by removing the lower Oil Pan as well as nuts from the frame bracket that secure the engine mount along with engine splash shield bolts and the shield itself. Start by detaching the a/c compressor hose and ground strap bolt from the upper Oil Pan's front section. Next, separate the catalytic converter hanger bolts from the hanger bracket and Exhaust Manifold catalytic converter nuts. For the next step lower the catalytic converters before securing them with mechanic wire then remove the two idler arm bolts to finish with lowering the vehicle. The combination of engine support fixture (J 28467-A), engine support fixture adapter (J 28467-450), and lift brackets (J 36857) provides engine support before technicians can raise the vehicle again and install jack stands to the engine frame assembly. You should remove the four rear frame bolts yet keep the two front frame bolts loose. Proceed by using jack stands to lower the engine frame assembly before you remove the four transmission bolts from the upper Oil Pan and all but the four corner upper Oil Pan bolts that require loose corner bolts. Use a soft-faced hammer to carefully push the upper Oil Pan toward the vehicle front and collect any loose rubber seal before cleaning both mating surfaces without silicone left behind. A washing unit should clean the Oil Pan and compressed air should dry it before moving on. Test the silicone sealing compound gm p/n 12346286 or equivalent, place a 3 mm bead on the upper Oil Pan and around the rear crankshaft bearing cap joints before feeding the upper Oil Pan through the front of the vehicle. Place the engine frame back into its original position before you install the four rear frame bolts that need 150 nm (111 ft. Lbs.) torque. Tighten the front frame bolts to 65 nm (48 ft. Lbs.) first. After removing the jack stands you should lower the vehicle and utilize the engine support fixture to guide the engine gradually into position while checking motor mounts alignment before discarding the fixture. Reposition the transmission bolts tightly to 40 nm (30 ft. Lbs.) at the upper Oil Pan. Lift the relay rod while you install and torque the right idler arm bolts to 60 nm (44 ft. Lbs.) next, position the catalytic converters and install their nuts with 25 nm (18 ft. Lbs.) torque. Install each catalytic converter hanger bolt with 20 nm (15 ft. Lbs.) torque before adding the upper Oil Pan A/C Hose strap bolt to 8 nm (71 inch lbs.) then set engine mount lower nuts to 55 nm (41 ft. Lbs.). After installing the lower Oil Pan and splash shield, secure the splash shield bolts to 10 nm (89 inch lbs.) torque specifications and while lowering the vehicle, add engine oil to the crankcase and perform leak inspections.
    Posted by ChevyPartsGiant Specialist
    Q:
    What should be done to the oil pan housing and engine block for the 2000 Cadillac Catera? Posted by Customer
    A:
    Remove the rubber seal and all RTV sealant, thoroughly cleaning the oil pan housing and engine block.
    Posted by ChevyPartsGiant Specialist
    See expert answers on similar Oil Pan
    Q:
    What should be removed after raising the 2001 Cadillac Catera? Posted by Customer
    A:
    Remove the 4 splash shield bolts and take off the splash shield.
    Posted by ChevyPartsGiant Specialist
    See expert answers on similar Oil Pan
    If you have any questions about this product, please don't hesitate to ask us. We will be happy to help you!

OEM GM 9158421, Excellent Performance and Perfect Fitment

To ensure reliability, purchase GM part # 9158421 Oil Pan. It is sometimes referred to as GM Oil Pan. Choosing OEM parts is the optimal decision for guaranteeing superior quality and perfect performance. These components undergo stringent quality checks and are carefully constructed to comply with GM's factory specifications, ensuring a smooth installation process.

ChevyPartsGiant.com is a leading supplier of genuine GM parts such as GM 9158421 Oil Pan. Our website boasts an extensive inventory of OEM GM parts, available at highly competitive prices in the market. Should you require any new genuine GM parts, rest assured we will deliver them swiftly and efficiently to your doorstep. Furthermore, all our parts come with the assurance of a manufacturer's warranty. For detailed Cadillac parts information, click here.
Choose ChevyPartsGiant for discounted prices, exceptional service and fast delivery