
Popular OEM Cadillac Catera Parts
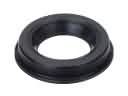
- Body & Hardware Parts View More >
- Steering Parts View More >
- Electrical Parts View More >
- Air & Fuel Delivery Parts View More >
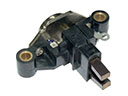
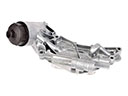
- Charging & Starting Parts View More >
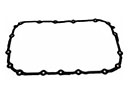
- Engine Parts View More >
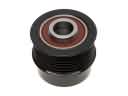
- Belts & Cooling Parts View More >
- Suspension Parts View More >
- Driveline & Axles Parts View More >
- Emission Control & Exhaust Parts View More >
- Transmission Parts View More >
- Brakes Parts View More >


Why Buy Genuine Cadillac Catera Parts From ChevyPartsGiant.com
Looking for real Cadillac Catera parts? ChevyPartsGiant.com may be a better choice to find genuine parts at wallet-friendly prices. We sell only OEM Cadillac Catera parts, ensuring perfect fit, reliability, and long-term performance. With our website, you can easily get access to the same parts found at local Cadillac stores. All components are produced by Cadillac and are exclusively fitted on Cadillac Catera automobiles. By shopping at our store, you can enjoy the quality of the Cadillac factory without the high prices of brick-and-mortar facilities. We achieve this because we are an online store operating at lower costs, which we pass on to you. We also have a user-friendly platform where you can find and order genuine Cadillac Catera parts swiftly. We are here to make your process of restoring a Cadillac Catera or dealing with simple repairs quick and inexpensive. We also make it easy to obtain Cadillac Catera parts at competitive shipping prices and a team of knowledgeable staff ready to take your order. Choose ChevyPartsGiant.com to save time and money, as well as keep your Cadillac Catera in the good condition.
Cadillac launched the Catera model in 1994 as the LSE concept car before starting manufacturing from 1997 through 2001 for the luxury sedan segment. Through its development by Opel Automobile GmbH the Cadillac Catera exists as an Opel Omega B model which uses front-engine rear-wheel-drive configuration for better handling dynamics. A 3.0 L L81 V6 engine provides balanced performance to the vehicle which is supported by the smooth operating 4-speed GM 4L30-E automatic transmission. The dimension details of Cadillac Catera include a 107.5-inch wheelbase and a weight of 3,897 pounds which enhance its stability and road comfort. Passengers can fit comfortably in the spacious sedan interior that seats five people with additional style features including leather seating and Bose premium sound system available as options. The Cadillac Catera delivers its impressive structure and smooth ride quality through its base in the General Motors V platform. The popular vehicle gets its reputation from OEM parts that meet Cadillac manufacturing requirements leading to durable operation with excellent performance. Vehicle owners can use authentic Cadillac Catera parts to protect their vehicles because manufacturer warranties back these products and ensure effective vehicle maintenance.
Cadillac Catera groups issues into drivetrain controls, engine timing, and engine sensing. In drivetrain controls, the Catera may not shift fully into park and traps the key. Wear in the shifter assembly or cable alignment prevents proper detent engagement. Verify brake switch input, confirm linkage adjustment, then replace the shifter assembly if travel remains short. For engine sensing, the Catera can stall warm or crank without starting after a brief stop. A failing crankshaft position sensor drops reference, disables spark, and confuses fueling. Confirm signal with live data, protect wiring from heat, then install a new crankshaft position sensor. For timing, the Catera risks severe damage when the timing belt system degrades. Idler and tensioner bearings seize, the belt skips teeth, and valve timing drifts. Replace the timing belt, tensioner, and idlers on schedule using Cadillac specifications, and renew the water pump. After repairs, the Catera should start cleanly, shift correctly, and hold stable idle. Run a full Cadillac scan, clear codes, and road test under varied loads. Finish with charging checks and grounds to keep the Cadillac Catera reliable daily.
Cadillac Catera Parts Questions & Answers
- Q: How to replace the radiator grille emblem/nameplate on Cadillac Catera?A:Start by taking out the front grill from your vehicle to access the radiator emblem. Unscrew the grille emblem retainer from the emblem using a thin flat blade. Warm the emblem with the Heat Gun (J 25070) by moving it in circles at least 152 mm (6 in) away to keep from destroying the emblem. A plastic flat tool should be used gently to take off or raise the grille emblem from its position. Wipe the surface using a blend of 50/50 isopropyl alcohol and water or high flash naphtha. Install the emblem within temperatures that stay at or below 40°C (105°F). Warm the front grille and emblem to 26°C (80°F) using the Heat Gun J 25070. Place the front grille emblem on top of the molded wreath and crest then stick it to the grille surface. Push the grille emblem retainer onto the grille emblem to its proper position before installing the front grille components.
- Q: How to service and repair the steering wheel on Cadillac Catera?A:Service and repairing Steering Wheel requires first-removing the inflatable restraint Steering Wheel module. Reposition the locking tab on the Steering Wheel nut, and undo the nut and the locking tab. Mark the Steering Wheel with the Steering Column. When unmounting the Steering Wheel, the use of the specified Steering Wheel puller (J1859-A) and the legs of the Steering Wheel puller (J-36541-A), one only exclude causing damage to the Steering Column. Use these tools to pull off the Steering Wheel. In terms of installation, point the Steering Wheel along the Steering Column using match points and install the Steering Wheel nut locking tab followed by the Steering Wheel nut which should be secured to 28 nm (21 ft. Lbs.). Finally, you need to lock in place the nut using its locking tab and install the inflatable restraint Steering Wheel module.
- Q: How to properly remove and install the Center Console on Cadillac Catera?A:To change the console, first, take out the rear vent housing of the console and afterward lift upward on the advance end of the gear selector boot to unfasten it from the console. Pull out the console opening near the gear selector to get the shift indicator and the connector into it, then the winter mode switch. Afterward, remove the console trim plate screws and pull the trim plate out to access the front-mounted console bolts that should be taken out along with the park brake boot by carefully prying on its sides. Irrelevant, use of it could lead to missing screws, i.e., one could forget to have them available. To install, place the console in position with the shift selector in park position and install the rear console bolts, tight them until seated but not stripped. The center screw to replace in park brake trim panel, car boot, and install and tighten front console bolt. Reconnect the console trim plate and its screws making sure that they are firmly seated but not stripped. Finaly install the winter mode switch, reconnect the shift indicator, click it into place, connect the gear selector boot to the lower console, and install the console rear vent housing.
- Q: How to Service and Repair the Alternator on Cadillac Catera?A:The Alternator replacement begins by disconnecting the negative Battery Cable followed by removing the intake air resonator and Drive Belt. The coolant heater must be removed before lifting the vehicle onto proper supports. The first step involves disconnecting the generator cooling duct from its cap and unfastening both the field coil terminals with leads and battery terminals with leads. Begin by removing first the upper mounting nut and then the lower mounting nut followed by the lower mounting bolt. Push out the upper mounting bolt through the generator and bracket then lower the vehicle while removing the generator and its generator cooling duct cap screws and cap. Begin generator installation by attaching the generator cooling duct cap while tightening its screws to 1 n.m (9 lb in). Position the generator where needed while lifting the vehicle and installing the upper mounting bolt followed by the lower mounting bolt . Begin by installing the lower mounting nut followed by tightening the lower mounting bolt and nut to 35 n.m (26 lb ft) before tightening the upper mounting bolt and nut to 40 n.m (30 lb ft). Start by installing the field coil terminal lead with its nut then tighten the nut to 3.5 n.m (31 lb in). After that attach the battery terminal lead with its nut followed by tightening the nut to 8 n.m (71 lb in). Next install the generator cooling duct before lowering the vehicle and then add the coolant heater system if equipped and then put on the Drive Belt while finishing with the intake air resonator. Finally attach the battery negative cable.


