Make sure this part fits

GM 25995545
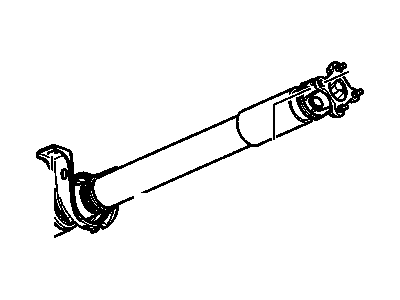
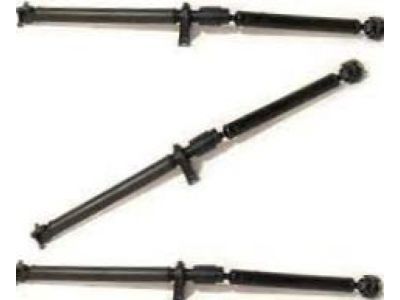
Drive Shaft

2007-2011 GM

Customer Questions & Expert Answers (4)
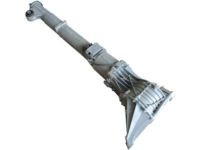
GM 25995545 Drive Shaft
  • Part Description
    Shaft Assembly-Propeller; Driveshaft
  • Manufacturer
    General Motors
Make sure this part fits
$1393.09 MSRP: $1812.50
You Save: $419.41 (24%)
Ships in 1-2 Business Days
1
ADD TO CART
  • Vehicle Fitment

    Year Make Model Trim Engine
    2008-2011 Buick EnclaveCX, CXL6 Cyl 3.6 L GAS
    2009-2011 Chevrolet TraverseLS, LT, LTZ6 Cyl 3.6 L GAS
    2007-2011 GMC AcadiaDenali, SL, SLE, SLT6 Cyl 3.6 L GAS
    2007-2010 Saturn OutlookXE, XR6 Cyl 3.6 L GAS
    Warning: California's Proposition 65
  • Customer Questions & Expert Answers

    Q:
    Can you help me check if this 25995545 is the right part for my car? Posted by ChevyPartsGiant Specialist
    A:
    Please Select Your Vehicle model to see if part number 25995545 is suitable before ordering.
    Posted by ChevyPartsGiant Specialist
    Q:
    How to properly remove and install a Drive Shaft on Buick Enclave? Posted by Customer
    A:
    The initial step requires marking the transfer case flange to the propeller shaft flange and the rear differential drive flange to minimize driveline system imbalance. This marking process should include painting or scribing these parts. Raise and support the vehicle. Record the positioning relationship between the front propeller shaft and the transfer case drive flange as well as the propeller shaft positioning with the rear differential yoke. First remove the mounting bolts and the propeller shaft bolts from the rear differential drive flange. Then support the propeller shaft at its rear differential position. Disassemble the propeller shaft bolts along with its associated washers from the system. A brass drift or punch should be placed on the propeller shaft where it meets between notches of the transfer case drive flange then a hammer can be used against the drift or punch to separate the propeller drive shaft from both transfer case and rear differential drive flange. Hold up the propeller shaft at the transfer case drive flange then loosen its center support mounting bolts. An assistant helps while you extract the propeller shaft both from the vehicle supports and vehicle itself. The installation process requires alignment of paint marks on the transfer case flange to propeller shaft flange and the rear differential drive flange for minimized driveline system imbalance. Apply threadlocker to the bolt threads after cleaning mounting bolts from the center bearing as well as front and rear propeller shaft drive flanges. First install several propeller shaft mounting bolts together with washers while support personnel maintain its position on both mounts. Drive the transfer case flange reference points to match those on the front propeller shaft before fastening the mounting bolt that centers the bearing. Placing the center support bearing onto the vehicle now allows you to install a few mounting bolts which will maintain the position of the propeller shaft. Locate the reference points of the rear propeller shaft based on the rear differential yoke. Secure the propeller shaft bolts with washers on the transfer case flange by tightening them to 34 Nm (25 lb ft). Position the center support bearing on the vehicle then install several mounting bolts onto the propeller shaft - rear differential yoke connection while tightening to 58 Nm (43 lb ft). Proceed by taking away the vehicle supports before lowering the vehicle to the floor.
    Posted by ChevyPartsGiant Specialist
    Q:
    How to properly remove and install a Drive Shaft on GMC Acadia? Posted by Customer
    A:
    It is vital to create paint markings or scribe lines between the transfer case flange and propeller shaft flange as well as the rear differential drive flange to minimize any imbalance in the driveline system. Ascend the vehicle before making marks that show how the front propeller shaft joins with the transfer case drive flange and the rear propeller shaft connects to the rear differential yoke. Dangerous work requires removing the bolts around the rear differential drive flange together with the propeller shaft bolts before supporting the propeller shaft through the rear differential. First remove the propeller shaft bolts along with each washer round the propeller shaft. The use of a brass drift or punch positioned at the propeller shaft notches in the transfer case drive flange will allow you to remove both the propeller drive shaft from the transfer case drive flange and then from the rear differential drive flange by carefully striking with a hammer. Support the propeller shaft where it connects to the transfer case drive flange then uninstall the bolts that mount the center support. Remove the support-mounted propeller shaft by working jointly with an assistant both on the vehicle and support structures. To minimize driveline system imbalance install the components by lining up the paint or scribe reference marks between the transfer case flange and the propeller shaft flange together with the rear differential drive flange. It is necessary to clean all bolts used for center bearing mounting as well as front and rear propeller shaft drive flanges. The propeller shaft should be positioned with helping hands on the supports before installing several mounting bolts together with washers to secure its position. Centre the reference marks of the front propeller shaft with the transfer case flange while installing the mounting bolt to maintain the center bearing position. Install temporary mounting bolts to the vehicle-based center support bearing before tightening several other mounting bolts into position to fix the propeller shaft. Confirm that the reference marks on the rear propeller shaft track with the rear differential yoke. Put the rest of the bolts and washers between the propeller shaft and transfer case flange into position before tightening them to 35 Nm (25 lb ft). Install all remaining connecting bolts which secure the propeller shaft to the rear differential yoke by torquing them to 50 Nm (37 lb ft). The vehicle descent should begin by removing all vehicle supports.
    Posted by ChevyPartsGiant Specialist
    Q:
    How to properly remove and install a Drive Shaft on Chevrolet Traverse? Posted by Customer
    A:
    The initial step requires marking the transfer case flange to the propeller shaft flange and the rear differential drive flange to minimize driveline system imbalance. This marking process should include painting or scribing these parts. Raise and support the vehicle. Record the positioning relationship between the front propeller shaft and the transfer case drive flange as well as the propeller shaft positioning with the rear differential yoke. First remove the mounting bolts and the propeller shaft bolts from the rear differential drive flange. Then support the propeller shaft at its rear differential position. Disassemble the propeller shaft bolts along with its associated washers from the system. A brass drift or punch should be placed on the propeller shaft where it meets between notches of the transfer case drive flange then a hammer can be used against the drift or punch to separate the propeller drive shaft from both transfer case and rear differential drive flange. Hold up the propeller shaft at the transfer case drive flange then loosen its center support mounting bolts. An assistant helps while you extract the propeller shaft both from the vehicle supports and vehicle itself. The installation process requires alignment of paint marks on the transfer case flange to propeller shaft flange and the rear differential drive flange for minimized driveline system imbalance. Apply threadlocker to the bolt threads after cleaning mounting bolts from the center bearing as well as front and rear propeller shaft drive flanges. First install several propeller shaft mounting bolts together with washers while support personnel maintain its position on both mounts. Drive the transfer case flange reference points to match those on the front propeller shaft before fastening the mounting bolt that centers the bearing. Placing the center support bearing onto the vehicle now allows you to install a few mounting bolts which will maintain the position of the propeller shaft. Locate the reference points of the rear propeller shaft based on the rear differential yoke. Secure the propeller shaft bolts with washers on the transfer case flange by tightening them to 34 Nm (25 lb ft). Position the center support bearing on the vehicle then install several mounting bolts onto the propeller shaft - rear differential yoke connection while tightening to 58 Nm (43 lb ft). Proceed by taking away the vehicle supports before lowering the vehicle to the floor.
    Posted by ChevyPartsGiant Specialist
    If you have any questions about this product, please don't hesitate to ask us. We will be happy to help you!

OEM GM Drive Shaft 25995545 Designed for Proper Fit and Performance

Original OEM GM parts deliver superior quality and meet all performance standards needed for optimal automotive operation. The authentic part identified by 25995545 Drive Shaft is available in the market under the name GM Drive Shaft. This genuine product has a full warranty coverage from the manufacturer available at all authorized GM dealers throughout the United States. This part 25995545 Drive Shaft fits certain Chevrolet Traverse models, as well as GMC Acadia. Additionally, it is compatible with Buick Enclave and Saturn Outlook models.
The original GM component designated by manufacturer part number 25995545 maintains top performance when functioning as the Shaft Assembly-Propeller; Driveshaft unit. The component 25995545 is constructed from durable material and its dimensions span 81.1 x 9.5 x 8.4 inches while weighing 41.20 Pounds. The Direct Replacement component is ready in New condition to ensure full compatibility with your vehicle system. This component receives the designation of Shaft, Propeller. The part 25995545 has available replacement options. GM manufacturer provides a warranty that ensures reliable operation of this product. The Shipping Policy and Return Policy pages outline complete details regarding shipping procedures and return processes.
If you want to save money in the long run on maintenance and repairs, you should choose OEM products because they're of the top level of durability. Are you on the quest of finding GM parts, our site is worth a visit. We stock an endless selection of high-quality GM components including things like ignition coils all the way through to fan shrouds and all at prices that can not be matched. You have nothing to worry about because all our OEM parts are covered with a manufacturer warranty, which guarantees superior quality and value.