Make sure this part fits

GM 12621662
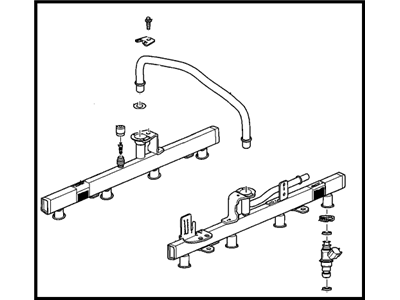
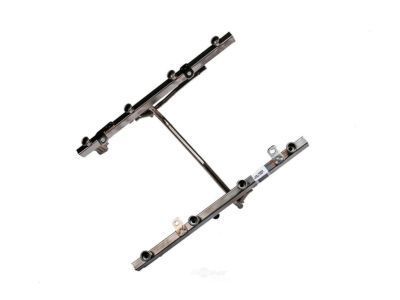
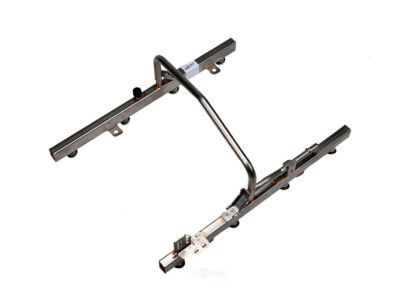
Fuel Rail

2007-2009 GM

Customer Questions & Expert Answers (3)
GM 12621662 Fuel Rail
  • Part Description
    Rail, Fuel Injection
  • Replaces
    89018110, 89017110, 12621560
  • Manufacturer
    General Motors
Make sure this part fits
$188.56 MSRP: $341.28
You Save: $152.72 (45%)
Ships in 1-2 Business Days
1
ADD TO CART
  • Vehicle Fitment

    Year Make Model Trim Engine
    2007-2009 Chevrolet AvalancheLS, LT, LTZ8 Cyl 5.3 L FLEX
    2008-2009 Chevrolet Express 1500Base, LS, LT8 Cyl 5.3 L FLEX, 8 Cyl 5.3 L GAS
    2007-2009 Chevrolet Silverado 1500LS, LT, LTZ, WT8 Cyl 4.8 L GAS, 8 Cyl 5.3 L FLEX, 8 Cyl 5.3 L GAS, 8 Cyl 6.2 L FLEX
    2007-2009 Chevrolet Suburban 1500LS, LT, LTZ8 Cyl 5.3 L FLEX, 8 Cyl 6.0 L GAS
    2007-2009 Chevrolet Suburban 2500LS, LT, LTZ8 Cyl 6.0 L GAS
    2007-2009 Chevrolet TahoeLS, LT, LTZ8 Cyl 5.3 L FLEX, 8 Cyl 5.3 L GAS
    2008-2009 GMC Savana 1500Base, LS, LT8 Cyl 5.3 L FLEX, 8 Cyl 5.3 L GAS
    2007-2009 GMC Sierra 1500Denali, SL, SLE, SLT, WT8 Cyl 4.8 L GAS, 8 Cyl 5.3 L FLEX, 8 Cyl 5.3 L GAS, 8 Cyl 6.2 L FLEX
    2007-2009 GMC YukonSLE, SLT8 Cyl 5.3 L FLEX, 8 Cyl 5.3 L GAS
    2007-2009 GMC Yukon XL 1500SLE, SLT8 Cyl 5.3 L FLEX, 8 Cyl 6.0 L GAS
    View More
    Warning: California's Proposition 65
  • Customer Questions & Expert Answers

    Q:
    Is this 12621662 designed for my car? Posted by ChevyPartsGiant Specialist
    A:
    Please Select Your Vehicle model to see if part number 12621662 is suitable before ordering.
    Posted by ChevyPartsGiant Specialist
    Q:
    How to replace the Fuel Injection Fuel Rail Assembly on Chevrolet Silverado 1500? Posted by Customer
    A:
    You should start by taking off the air cleaner outlet duct before lowering fuel system pressure with ch 48027 or without it to perform fuel injection Fuel Rail assembly replacement. First remove the engine wiring harness bracket nut while disconnecting all electrical connectors from the evap purge solenoid generator MAP Sensor and ignition coil main electrical connector and electronic throttle control. Proceed by disconnecting and noting the fuel injector electrical connectors before removing any necessary cpa retainers from the unit. All necessary steps include detaching engine wiring harness clips (4 and 6) and the negative Battery Cable stud along with terminals (2 and 3) from the Cylinder Head. You should disconnect the chassis fuel feed pipe as well as the evap tube quick connect fittings while disengaging the evap canister purge solenoid retainer and removing the Fuel Rail bolts. Raise the Fuel Rail assembly with caution while maintaining safety of injector electrical connectors and spray tips before sealing plugged pipe fittings to avoid system contamination. Apply a spray type engine cleaner to the Fuel Rail before you take out the fuel injector retainers and injectors while discarding both the top and bottom o-ring seals (2 and 4). You should first detach the crossover pipe retainer screws and retainers then remove the crossover pipe along with its o-ring seals from the system. Apply clean engine oil to the new o-ring seals before placing them onto the crossover pipe and inserting this pipe between the fuel rails where retainers and screws should be tightened to 3.8 n.m (34 lb in). After applying lubrication to new o-ring seals numbers 2 and 4 the technician installs the rubber seals on the fuel injectors before inserting them into the fuel rails to retain them with proper hardware. Use firm pressure to insert the Fuel Rail onto the intake manifold until all injectors are properly positioned. Install Fuel Rail bolts along with their matching torque to 10 n.m (89 lb in). The evap tube should be connected first followed by the purge solenoid and then the evap canister purge solenoid to the Fuel Rail bracket before installing the chassis fuel feed pipe and evap tube fittings. Reinstall the pcv hose and gather all engine wiring harness branches before using the clip bolt to secure them tightly to 9 n.m (80 lb in). Complete battery connection starts with attaching the negative Battery Cable terminal while installing the ground terminal followed by tightening the negative Battery Cable stud to 25 n.m (18 lb ft). The ignition coil main electrical connector needs to reconnect before installing the cpa retainer while also uniting electronic throttle control and fuel injector connectors properly with full security in place. The installation process ends by joining the MAP Sensor with the generator and evap purge solenoid followed by installing the engine wiring harness bracket nut with 5 n.m (44 lb in) torque and negative Battery Cable reconnection. Leak inspection should occur by turning the ignition on and off. The installation ends with ducting the airflow to the air cleaner after completion.
    Posted by ChevyPartsGiant Specialist
    Q:
    How to replace the fuel rail assembly on GMC Sierra 1500? Posted by Customer
    A:
    You must detach the air cleaner outlet duct before starting to replace the Fuel Rail assembly. Use ch-48027 to relieve fuel system pressure or follow the applicable procedure. Start by detaching the engine wiring harness bracket nut before disconnecting the external electrical connectors from the evap purge solenoid, generator and MAP Sensor, evap purge solenoid, generator, ignition coil main connector, electronic throttle control. Start by marking the Fuel Injector electrical connectors for reassembly but disconnecting them from their location. Remove the cpa retainers to disconnect other connectors. Detach the engine wiring harness clips alongside the negative Battery Cable from the right cylinder head. The technician disconnects the quick connect fitting of the chassis fuel feed pipe while also taking off the evap tube quick connect fittings at both the intake manifold and the evap canister purge solenoid. You should first remove the retainer locking the evap canister purge solenoid to the Fuel Rail before removing the Fuel Rail bolts and carefully moving the entire Fuel Rail assembly to protect its injector electrical connector terminals together with spray tips. After cleaning the Fuel Rail users must extract the Fuel Injector retainers and fuel injectors with disposal of original upper and lower o-ring seals (2 and 4). The installation begins with engine oil lubrication of new o-ring seals followed by placement on the injectors before inserting them into the Fuel Rail. Handle the Fuel Rail retainers first before arranging the Fuel Rail on the intake manifold and pushing it to achieve full seating. First install the Fuel Rail bolts while tightening them to 10 nm (89 lb in) then reconnect the evap tube and purge solenoid and the chassis fuel feed pipe by installing the quick connect fitting. Gather the engine wiring harness branches and reinstall the pcv hose before using the clips for connection. The engine wiring harness bracket nut requires installation at 5 nm to 44 lb in torque. At this time, connect the negative Battery Cable while ensuring all electrical connections are correctly in place. The process ends with turning on the ignition to verify for leaks before installing the air cleaner outlet duct.
    Posted by ChevyPartsGiant Specialist
    If you have any questions about this product, please don't hesitate to ask us. We will be happy to help you!

OEM GM Fuel Rail 12621662 Designed for Proper Fit and Performance

Original OEM GM parts deliver superior quality and meet all performance standards needed for optimal automotive operation. The authentic part identified by 12621662 Fuel Rail is available in the market under the name GM Fuel Rail. This genuine product has a full warranty coverage from the manufacturer available at all authorized GM dealers throughout the United States. This part 12621662 Fuel Rail fits certain Chevrolet Silverado 1500 models, as well as GMC Sierra 1500 models.
The original GM component designated by manufacturer part number 12621662 maintains top performance when functioning as the Rail, Fuel Injection unit. The component 12621662 is constructed from durable material and its dimensions span 18.8 x 14.4 x 8.8 inches while weighing 2.20 Pounds. The Direct Replacement component is ready in New condition to ensure full compatibility with your vehicle system. The part 12621662 has available replacement options 89018110, 89017110, 12621560. GM manufacturer provides a warranty that ensures reliable operation of this product. The Shipping Policy and Return Policy pages outline complete details regarding shipping procedures and return processes.
If you want to save money in the long run on maintenance and repairs, you should choose OEM products because they're of the top level of durability. Are you on the quest of finding GM parts, our site is worth a visit. We stock an endless selection of high-quality GM components including things like ignition coils all the way through to fan shrouds and all at prices that can not be matched. You have nothing to worry about because all our OEM parts are covered with a manufacturer warranty, which guarantees superior quality and value.