ChevyParts
My Garage
My Account
Cart
OEM 2000 Chevrolet Astro Engine Control Module
Engine Control Computer- Select Vehicle by Model
- Select Vehicle by VIN
Select Vehicle by Model
orMake
Model
Year
Select Vehicle by VIN
For the most accurate results, select vehicle by your VIN (Vehicle Identification Number).
1 Engine Control Module found

2000 Chevrolet Astro PCM Part Number: 16263494
$341.63 MSRP: $610.42You Save: $268.79 (45%)Product Specifications- Other Name: Module, Emission Control System; Engine Control Module; ECM
- Item Weight: 5.60 Pounds
- Item Dimensions: 11.0 x 8.2 x 4.1 inches
- Condition: New
- Fitment Type: Direct Replacement
- SKU: 16263494
- Warranty: This genuine part is guaranteed by GM's factory warranty.
2000 Chevrolet Astro Engine Control Module
With a comprehensive array of OEM 2000 Chevrolet Astro Engine Control Module, from fuel pumps to door handles, our website is a one-stop-shop for your needs. All our genuine 2000 Chevrolet Astro Engine Control Module are backed by the manufacturer's warranty and are offered at competitive prices in the market. Rest assured, you can shop with complete confidence.
2000 Chevrolet Astro Engine Control Module Parts Questions & Experts Answers
- Q: How to service the Engine Control Module while avoiding Electrostatic Discharge damage on 2000 Chevrolet Astro?A: If working on the vehicle control module (VCM), you should replace or reprogram it, but avoid the risk of esd damage by not handling the soldered parts or connector pins. When replacing the vcm, install the Knock Sensor module on the new one, then have it programmed and run the passlock reprogramming and ckp system variation learn procedures to keep from getting a dtc p1336 error. Disconnect the negative battery before removing the retainer clips and all of the vcm electrical connectors. Take the wiring harness pin out from the bracket, pinch the two metal ends of the v-clip, and take it off the bracket's tongue. Take the vcm bracket out of the battery tray bracket and move it out from the engine compartment. Press in the bracket release tabs and take the vcm out. When changing the vcm, first take out the access cover screws and cover, then gently press the retaining clip to release the Knock Sensor module, putting it somewhere safe so it does not get damaged. Check to see that the vcm is either original or has the same service number. Clip the Knock Sensor into position, pressing on the ends, and wait for it to click into place. Put on the access cover and tighten the screws together to 4.8 n.m, which is 42 lb inches. Join the two halves of the vcm bracket, put the bracket in its correct spot, and slip it back in place. Put the v-clip and wiring harness pin into place, reconnect all the vcm electrical plugs and retainers, and then attach the negative Battery Cable prior to vcm programming.
Related 2000 Chevrolet Astro Parts
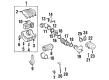
 2000 Chevrolet Astro Crankshaft Position Sensor
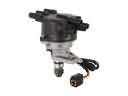 2000 Chevrolet Astro Distributor
 2000 Chevrolet Astro Ignition Control Module
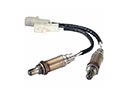 2000 Chevrolet Astro Oxygen Sensor
 2000 Chevrolet Astro Camshaft Position Sensor
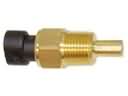 2000 Chevrolet Astro Coolant Temperature Sensor
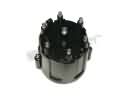 2000 Chevrolet Astro Distributor Cap
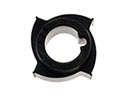 2000 Chevrolet Astro Distributor Reluctor
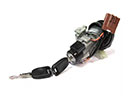 2000 Chevrolet Astro Igniter
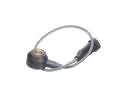 2000 Chevrolet Astro Knock Sensor
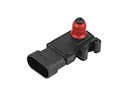 2000 Chevrolet Astro MAP Sensor
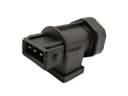 2000 Chevrolet Astro Vehicle Speed Sensor