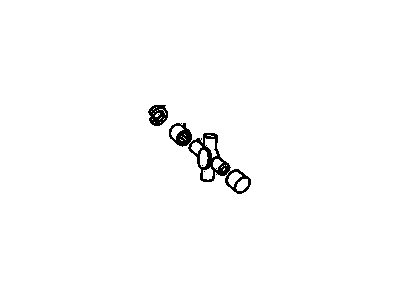
OEM 2000 Chevrolet Tracker Universal Joint

U-Joint
  • Select Vehicle by Model
  • Select Vehicle by VIN
Select Vehicle by Model
Make
Model
Year
or
Select Vehicle by VIN
For the most accurate results, select vehicle by your VIN (Vehicle Identification Number).

1 Universal Joint found

  • 2000 Chevy Tracker Universal Joint - 91173316
    2000 Chevy Tracker Universal Joint Diagram - 91173316
    View related parts

    2000 Chevrolet Tracker Universal Joints

    Part Number: 91173316
    $57.09 MSRP: $114.62
    You Save: $57.53 (51%)
    ADD TO CART
    Product Specifications
    • Other Name: Joint Kit, Propeller Shaft Universal; Joint Kit, Propeller Shaft Universal Joint
    • Replaces: 96069180
    • Item Weight: 0.80 Pounds
    • Item Dimensions: 4.3 x 4.2 x 2.3 inches
    • Condition: New
    • Fitment Type: Direct Replacement
    • Require Quantity: 2
    • SKU: 91173316
    • Warranty: This genuine part is guaranteed by GM's factory warranty.
    More Info
    Fits the following 2000 Chevrolet Tracker Submodels:
    • Base, LSi, LT, ZR2 | 4 Cyl 1.6 L GAS, 4 Cyl 2.0 L GAS, 6 Cyl 2.5 L GAS

2000 Chevrolet Tracker Universal Joint

With a comprehensive array of OEM 2000 Chevrolet Tracker Universal Joint, from fuel pumps to door handles, our website is a one-stop-shop for your needs. All our genuine 2000 Chevrolet Tracker Universal Joint are backed by the manufacturer's warranty and are offered at competitive prices in the market. Rest assured, you can shop with complete confidence.

2000 Chevrolet Tracker Parts Questions & Experts Answers

  • Q: How to service and repair the universal joint on 2000 Chevrolet Tracker?
    A: To work on the universal joint you first need to remove the propeller shaft from the car. Insert GM P/N 1052864 on all surfaces surrounding the joint bearing caps of the pinion flange yoke before removing its two snap rings. Secure the pinion flange yoke with both sockets that fit onto a soft-jaw vise by gripping it with the 18 mm socket and 24 mm socket at the same time. Clip the 18 mm socket first and adjust force until the bearing cap pops out 3 - 4 mm. Place the exposed portion into a soft-jaw vise to release the pinion flange yoke. Install this technique onto the opposite bearing cap before taking out the pinion flange yoke from the spider. Secure the 18 mm socket to the 24 mm socket and place them in a soft-jaw vise. Tighten until the 2 bearing caps on the propeller shaft yoke become exposed at 3-4 mm. Use the 18 mm socket to take off both bearing caps from the propeller shaft yoke by following the same steps. Eject the spider from the propeller shaft yoke by following the steps to remove the opposite bearing cap. Then inspect both parts of the universal joint system for damage and replace the pinion flange yoke if it does not meet specifications. Any component exhibiting abnormal signs of wear or damage needs an entire universal joint replacement. Gently insert the bearing caps onto the pinion flange and then the propeller shaft yoke to check for damaged needle bearings; replace the whole universal joint when you find problems. When placing the needle bearings in their proper spots will help protect them from harm. Mount the spider component onto the yoke area of the propeller shaft and lubricate both pinion flange yoke joint bearing caps with GM manufactured product P/N 1052864. Fasten one bearing cap onto the propeller shaft yoke while tapping softly until the pinion flange yoke joint spider fits smoothly. Then mount the opposite bearing cap until you can install a snap ring. Put the propeller shaft yoke in place with one snap ring to make sure it lies flat and stable. You can put the opposite bearing cap into the propeller shaft yoke using an 18 mm socket with a 24 mm socket in a soft-jaw vise until the snap ring can be installed. Then, put the second snap ring and check if the bearing caps are properly seated. Position the pinion flange yoke on the spider before putting on the bearing cap into the pinion flange yoke while tapping it carefully. Force the opposite bearing cap into the pinion flange yoke until you can add a snap ring and check that it is correctly positioned. Push the bearing cap into the pinion flange yoke with an 18 mm and a 24 mm socket wedged in a soft-jaw vise until a snap ring can fit. Set the snap ring properly and inspect the element. Fit the propeller shaft into its designated vehicle position.

Related 2000 Chevrolet Tracker Parts