ChevyParts
My Garage
My Account
Cart
OEM 2001 GMC Safari Distributor
Ignition Distributor- Select Vehicle by Model
- Select Vehicle by VIN
Select Vehicle by Model
orMake
Model
Year
Select Vehicle by VIN
For the most accurate results, select vehicle by your VIN (Vehicle Identification Number).
1 Distributor found


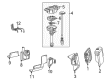
2001 GMC Safari Distributor Assembly Part Number: 12598210
Product Specifications- Other Name: Distributor; Distributor, Ignition
- Replaces: 01104057, 01104078, 01104050, 1104050, 1104078, 1104057, 93441559
- Item Weight: 2.60 Pounds
- Item Dimensions: 15.8 x 8.3 x 5.2 inches
- Condition: New
- Fitment Type: Direct Replacement
- SKU: 12598210
- Warranty: This genuine part is guaranteed by GM's factory warranty.
2001 GMC Safari Distributor
With a comprehensive array of OEM 2001 GMC Safari Distributor, from fuel pumps to door handles, our website is a one-stop-shop for your needs. All our genuine 2001 GMC Safari Distributor are backed by the manufacturer's warranty and are offered at competitive prices in the market. Rest assured, you can shop with complete confidence.
2001 GMC Safari Distributor Parts and Q&A
- Q: How to replace the distributor in an engine on 2001 GMC Safari?A: In order to replace the Distributor, first turn off ignition, then the engine cover, also air cleaner assembly and the air intake resonator assembly. Pull the brake parking shoe and brake ajusting tool between the brake shoes. Unplug the electrical connector from the bottom of the Distributor and then pull out the 2 screws holding the Distributor Cap to the housing and discard them. Remove the Distributor Cap and with the help of grease pencil mark the position of the rotor in reference to the distrbutor housing and Intake Manifold when you take out the Distributor, notice that rotor moves against the clock by counterclockwise turn of 42 and put a 2 nd mark on the base of Distributor for installing the rotor in the right direction when putting it back. Put off the mounting clamp hold-down bolt and remove the Distributor. For installation procedure 1, in case of installing a new Distributor assembly, mark the new Distributor housing at the same position as the one from origin. Unfortunately the manuscript is lost, but from the written notes we are able to piece together parts of the story that he attempted to write down in that manuscript. However the words are those of poem #30 so that may give an added idea of what the manuscript was to be. As the Distributor is shown, watch the rotor spin clockwise for approximately 42 degrees. Once seated, align the rotor segment to the mark of the Distributor base ; otherwise, take out the Distributor and reinstall it. Mount the Distributor mounting clamp bolt and secure it to 25 n.m (18 lb ft), then mount the Distributor Cap and tighten the new cap screws to 2.4 n.m (21 lb in). Re-connect the electrical connector and the Spark Plug Wires should be installed into the Distributor Cap and an ignition coil wire should be attached, making sure the orientation of the boot is correctly made. If the malfunction indicator lamp light up, and dtc p1345 is recorded, the Distributor has been installed in the wrong manner. With installation procedure 2, rotate the no. 1 cylinder to top dead center (TDC) compression stroke, positioning crankshaft balancer marks with the engine front cover tabs in alignment. Readjust so the white paint mark on the bottom stem of the Distributor to the pre-drilled indent hole of the gear. Mark the Distributor components to reconnect them in the right way, since incorrect replacement of the connection can lead to a no-start condition or damage to the engine. With the gear positioned accordingly, guide the Distributor in the engine, make sure that the flat part of the housing faces the front. After positioning, the rotor segment should lie within the area covered by the pointer on the Distributor base; if not, repeat the procedure. Mount the Distributor mounting clamp bolt and tighten it to 25 n.m (18 lb ft) then mount the Distributor Cap slightly and tighten the cap screws to 2.4 n.m (21 lb in). Connect the electrical connector back, mount the Spark Plug Wires, and connect the ignition coil wire in the correct manner. In case the malfunction indicator lamp lights up after installation and dtcp 1345 is stored, repeat installation procedure 2. Finally, install the engine cover.
Related 2001 GMC Safari Parts
 2001 GMC Safari Automatic Transmission Shifter
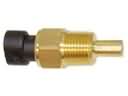 2001 GMC Safari Coolant Temperature Sensor
 2001 GMC Safari Crankshaft Position Sensor
 2001 GMC Safari Dimmer Switch
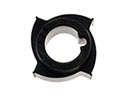 2001 GMC Safari Distributor Reluctor
 2001 GMC Safari Engine Control Module
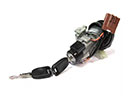 2001 GMC Safari Igniter
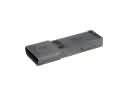 2001 GMC Safari Ignition Control Module
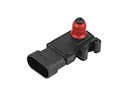 2001 GMC Safari MAP Sensor
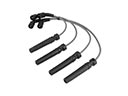 2001 GMC Safari Spark Plug Wires
 2001 GMC Safari Throttle Position Sensor
 2001 GMC Safari Turn Signal Switch