ChevyParts
My Garage
My Account
Cart
OEM 2002 Chevrolet Tracker Intake Manifold
Engine Intake Manifold- Select Vehicle by Model
- Select Vehicle by VIN
Select Vehicle by Model
orMake
Model
Year
Select Vehicle by VIN
For the most accurate results, select vehicle by your VIN (Vehicle Identification Number).
2 Intake Manifolds found
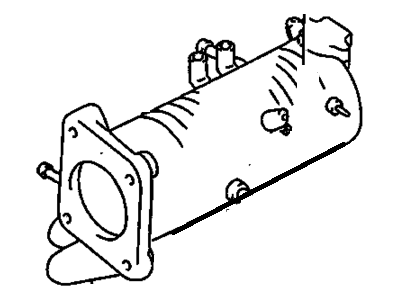
2002 Chevrolet Tracker Intake Manifold Part Number: 91176126
Product Specifications- Other Name: Manifold, Intake
- Item Weight: 9.40 Pounds
- Item Dimensions: 17.5 x 13.1 x 9.9 inches
- Condition: New
- SKU: 91176126
- Warranty: This genuine part is guaranteed by GM's factory warranty.
2002 Chevrolet Tracker Intake Manifold Part Number: 91176128
Product Specifications- Other Name: Manifold
- Condition: New
- SKU: 91176128
- Warranty: This genuine part is guaranteed by GM's factory warranty.
2002 Chevrolet Tracker Intake Manifold
With a comprehensive array of OEM 2002 Chevrolet Tracker Intake Manifold, from fuel pumps to door handles, our website is a one-stop-shop for your needs. All our genuine 2002 Chevrolet Tracker Intake Manifold are backed by the manufacturer's warranty and are offered at competitive prices in the market. Rest assured, you can shop with complete confidence.
2002 Chevrolet Tracker Intake Manifold Parts Questions & Experts Answers
- Q: How to replace the intake manifold on 2002 Chevrolet Tracker?A: Remove the filler cap of the fuel tank to relieve the fuel vapor pressure, and reinstall. Let out the fuel pressure and remove the negative Battery Cable. Drain the cooling system and then unhook the intake air temperature (IAT) sensor and the mass air flow (MAP) sensor. Depress the electrical harness clamps in order to release the harness from the air cleaner assembly, remove the air intake hose from the Throttle Body. Unwire the accelerator cable from the accelerator cable bracket and the Throttle Body bellcrank. Remove the electrical connectors of the throttle position (TP) sensor, idle air control (IAC) valve, engine coolant temperature (ECT) sensor, and the evaporate emission canister purge valve. Take off the evac canister purge valve vacuum hose and bracket bolt, then remove the bracket and valve assembly. Disconnect also egr from the Throttle Body, map connector, and engine ground from the Intake Manifold. Remove the brake booster supply hose and use a shop rag to catch any fuel that might run when disconnecting the inlet fuel line and return fuel line. Release the upper Radiator Hose between the Thermostat Housing and the reservoir, the upper generator mounting bracket, and the lower Intake Manifold support bracket from the intake. Take off the twc bolts and the both upper-front and rear Intake Manifold support brackets from the Intake Manifold. Pull off the crankcase vent hose, the pcv hose attached the PCV Valve, and undo the fuel injector 6-way connector located behind the Intake Manifold. Remove the 8 nuts, 3 bolts, and Intake Manifold with gasket from the Cylinder Head as well as remove the EGR Valve. Transfer the ect sensor, ect sensor sending unit, throttle body, fuel rail, fuel injector harness, map sensor, egr tube and accelerator cable bracket where necessary to the new Intake Manifold. Make sure the Intake Manifold gets the EGR Valve, ect sensor, ect sensor sending unit, throttle body, fuel rail, fuel injector harness, map sensor, egr tube, and accelerator cable bracket. Change the old Intake Manifold Gasket to a new one and bolt the new Intake Manifold onto the Cylinder Head using a new 8 nuts and 3 bolts and tighten them to 23 nm (17 ft. Lbs.). Mount the upper rear Intake Manifold support bracket and secure it with twc bolts, the later require 50 nm (37 ft. Lbs.), this is followed by the upper front Intake Manifold support bracket using two bolts that are then tightened to 50 nm (37 ft. Lbs. as well). Replace the crankcase vent hose and the pcv hose back onto the PCV Valve. Connect the fuel injector 6-way connector at the rear of the Intake Manifold, then install the lower Intake Manifold support bracket using 2 bolts and tighten to 50 nm (37 ft. Lbs). Replace the upper generator mounting bracket with twc bolts, with torques of 50 nm (37 ft. Lbs.), and adjust the generator drive belt tension. Change the evap canister and the upper Radiator Hose with the Thermostat Housing, the fuel inlet hose with the fuel line union, and the fuel return hose with the fuel line union. Connect the egr connector, map sensor connector and engine ground wire from the Intake Manifold as well as the brake booster supply hose to the Intake Manifold. Replug the tp sensor, iac valve, ect sensor, and the evaporative emission canister purge valve and then plug in the evap canister purge valve vacuum tube. Reconnect the Throttle Body to the coolants hose, the accelerator cable to the accelerator cable bracket, and the Throttle Body bellcrank to the accelerator cable, and adjust as necessary. Lastly, plug in the iat sensor and the map sensor, secure the electrical harness clamps to air cleaner assembly, and mount the air intake pipe to the Throttle Body. Refill the cooling system as needed and reinstall the negative Battery Cable, with the bolt's torque being 15 nm (11 ft. Lbs.).


