ChevyParts
My Garage
My Account
Cart
OEM 2003 Chevrolet Monte Carlo Headlight Bulb
Headlamp Bulb- Select Vehicle by Model
- Select Vehicle by VIN
Select Vehicle by Model
orMake
Model
Year
Select Vehicle by VIN
For the most accurate results, select vehicle by your VIN (Vehicle Identification Number).
2 Headlight Bulbs found


2003 Chevrolet Monte Carlo Bulb & Socket Part Number: 19257054
$14.11 MSRP: $25.22You Save: $11.11 (45%)Ships in 1-2 Business DaysProduct Specifications- Other Name: Bulb Assembly, Headlamp (Low Beam); Fog Light Bulbs; Headlight Bulbs; Car Bulbs; Headlight; Headlamp Bulb; Composite Assembly; Fog Lamp Bulb; Lower Beam Bulb; Bulb; Bulb, Capsule/Headlamp/Fog Lamp
- Replaces: 09441733, 12450177, 01999366, 9441733, 01999357, 1999366, 1999357
- Item Weight: 0.30 Pounds
- Item Dimensions: 4.2 x 2.1 x 2.2 inches
- Condition: New
- Fitment Type: Direct Replacement
- SKU: 19257054
- Warranty: This genuine part is guaranteed by GM's factory warranty.


2003 Chevrolet Monte Carlo Bulb & Socket, Green Line Part Number: 9441732
$13.16 MSRP: $23.52You Save: $10.36 (45%)Ships in 1-3 Business DaysProduct Specifications- Other Name: Bulb, Headlamp (High Beam); Headlight Bulbs; Car Bulbs; Headlight; Headlamp Bulb; High Beam; Composite Assembly; Fog Lamp/Turn Signal; Capsule Bulb
- Item Weight: 0.40 Pounds
- Item Dimensions: 4.2 x 2.2 x 2.1 inches
- Condition: New
- Fitment Type: Direct Replacement
- SKU: 9441732
- Warranty: This genuine part is guaranteed by GM's factory warranty.
2003 Chevrolet Monte Carlo Headlight Bulb
With a comprehensive array of OEM 2003 Chevrolet Monte Carlo Headlight Bulb, from fuel pumps to door handles, our website is a one-stop-shop for your needs. All our genuine 2003 Chevrolet Monte Carlo Headlight Bulb are backed by the manufacturer's warranty and are offered at competitive prices in the market. Rest assured, you can shop with complete confidence.
2003 Chevrolet Monte Carlo Headlight Bulb Parts Questions & Experts Answers
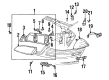
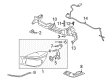
- Q: How to replace the front headlight bulb on 2003 Chevrolet Monte Carlo?A: Starting the headlamp bulb replacement requires first opening the hood then taking out the radiator air baffle. Gently press down on the lens of the headlamp while you remove its retainers then raise the retainers until the headlamp disconnects from the upper fascia support. Take out the headlamp from the slots in the upper fascia support after disconnecting its electrical connector. First remove the rubber access cover from the headlamp before performing counterclockwise rotation on the bulb/socket while paying attention to the halogen bulb caution. The electrical connector of the bulb/socket needs to be removed first. Before mounting the headlamp connect the electrical connector to the bulb/socket and return the lamp into position by rotating it clockwise. The next step involves attaching the rubber access cover to the opening then connecting the electrical connector to the headlamp. Finally, the headlamp must be moved back onto the upper fascia support. Plug the electrical connector to the bulb/socket before placing the radiator air baffle back in and ensuring proper headlamp adjustment and then replacing the hood.
Related 2003 Chevrolet Monte Carlo Parts
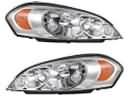 2003 Chevrolet Monte Carlo Headlight
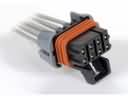 2003 Chevrolet Monte Carlo Chassis Wiring Harness Connector
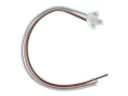 2003 Chevrolet Monte Carlo Door Lock Switch Connector
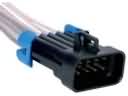 2003 Chevrolet Monte Carlo Engine Wiring Harness Connector
 2003 Chevrolet Monte Carlo Fog Light
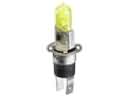 2003 Chevrolet Monte Carlo Fog Light Bulb
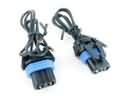 2003 Chevrolet Monte Carlo Fog Light Connector
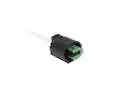 2003 Chevrolet Monte Carlo Forward Light Harness Connector
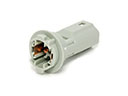 2003 Chevrolet Monte Carlo Light Socket
 2003 Chevrolet Monte Carlo Rear Light Harness Connector
 2003 Chevrolet Monte Carlo Tail Light Connector
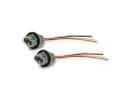 2003 Chevrolet Monte Carlo Turn Signal Light Connector