ChevyParts
My Garage
My Account
Cart
OEM 2004 Buick Rainier Fuse Box
Fuse Holder Box- Select Vehicle by Model
- Select Vehicle by VIN
Select Vehicle by Model
orMake
Model
Year
Select Vehicle by VIN
For the most accurate results, select vehicle by your VIN (Vehicle Identification Number).
2 Fuse Boxes found


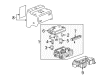
2004 Buick Rainier Fuse Box Part Number: 15197529
Product Specifications- Other Name: Block, Body & Instrument Panel Wiring Harness Junction; Junction Boxes; Block, Chassis Electrical; Block, Wiring Junction
- Item Weight: 3.00 Pounds
- Item Dimensions: 11.9 x 9.7 x 5.4 inches
- Condition: New
- Fitment Type: Direct Replacement
- SKU: 15197529
- Warranty: This genuine part is guaranteed by GM's factory warranty.

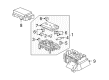
2004 Buick Rainier Fuse Box Part Number: 15120875
Product Specifications- Other Name: Block Assembly-Accessory Wiring Junction; Junction Boxes; Block, Wiring Junction
- Item Weight: 3.90 Pounds
- Item Dimensions: 12.1 x 9.4 x 5.5 inches
- Condition: New
- Fitment Type: Direct Replacement
- SKU: 15120875
- Warranty: This genuine part is guaranteed by GM's factory warranty.
2004 Buick Rainier Fuse Box
With a comprehensive array of OEM 2004 Buick Rainier Fuse Box, from fuel pumps to door handles, our website is a one-stop-shop for your needs. All our genuine 2004 Buick Rainier Fuse Box are backed by the manufacturer's warranty and are offered at competitive prices in the market. Rest assured, you can shop with complete confidence.
2004 Buick Rainier Fuse Box Parts and Q&A
- Q: How to replace the underhood fuse box on 2004 Buick Rainier?A: The replacement of the underhood electrical center or junction block starts with disconnecting the negative Battery Cable. Begin by pressing tabs on the junction block cover to expose inward and gently lifting it off the cover. To take out the fuse relay center cover you must lift upward to free its retaining tabs. Mark down the harness end bolt locations prior to its removal from the fuse relay center. Remove all bolts securing the fuse relay center until you can take the fuse relay center out from the junction block bracket. The bottom of the fuse relay center can be accessed by detaching the wiring harness ends using downward pulling force. Once the wiring ends are detached install screws holding the junction block bracket to retrieve the bracket from the vehicle. Install the junction block bracket first before tightening its bolts to 6 n.m (53 lb in). Secure the fuse relay center to the harnesses by installing bolts which should be tightened to 6 n.m (53 lb in). Fasten the harness end bolts before putting the fuse relay center cover into position over its bolts and pressing downward to snap the tabs together. Last but not least install the junction block cover while pressing down the tabs to engage them.
Related 2004 Buick Rainier Parts
 2004 Buick Rainier Antenna
 2004 Buick Rainier Antenna Cable
 2004 Buick Rainier Battery Fuse
 2004 Buick Rainier Camshaft Position Sensor
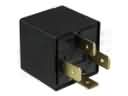 2004 Buick Rainier Daytime Running Light Relay
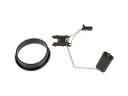 2004 Buick Rainier Fuel Level Sensor
 2004 Buick Rainier Fuel Pump Relay
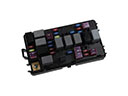 2004 Buick Rainier Fuse
 2004 Buick Rainier Headlight Relay
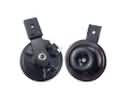 2004 Buick Rainier Horn
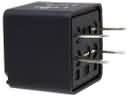 2004 Buick Rainier Relay
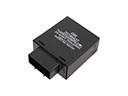 2004 Buick Rainier Turn Signal Flasher