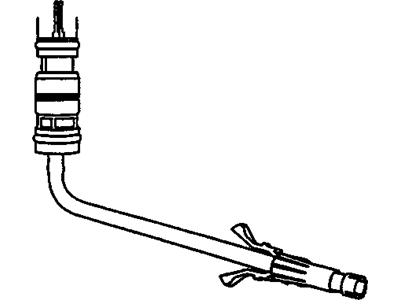
OEM 2004 Chevrolet Blazer Fuel Injector

Gas Injector
  • Select Vehicle by Model
  • Select Vehicle by VIN
Select Vehicle by Model
Make
Model
Year
or
Select Vehicle by VIN
For the most accurate results, select vehicle by your VIN (Vehicle Identification Number).

1 Fuel Injector found

  • 2004 Chevy Blazer Fuel Injector - 88894353
    2004 Chevy Blazer Fuel Injector Diagram - 88894353
    View related parts

    2004 Chevrolet Blazer Injector

    Part Number: 88894353
    $136.14 MSRP: $244.20
    You Save: $108.06 (45%)
    Ships in 1-2 Business Days
    ADD TO CART
    Product Specifications
    • Other Name: Injector, Fuel Injection; Fuel Injector
    • Item Weight: 0.60 Pounds
    • Item Dimensions: 10.2 x 3.5 x 1.1 inches
    • Condition: New
    • Fitment Type: Direct Replacement
    • SKU: 88894353
    • Warranty: This genuine part is guaranteed by GM's factory warranty.
    More Info
    Fits the following 2004 Chevrolet Blazer Submodels:
    • Base, LS, Xtreme, ZR2 | 6 Cyl 4.3 L GAS

2004 Chevrolet Blazer Fuel Injector

With a comprehensive array of OEM 2004 Chevrolet Blazer Fuel Injector, from fuel pumps to door handles, our website is a one-stop-shop for your needs. All our genuine 2004 Chevrolet Blazer Fuel Injector are backed by the manufacturer's warranty and are offered at competitive prices in the market. Rest assured, you can shop with complete confidence.

2004 Chevrolet Blazer Fuel Injector Parts Questions & Experts Answers

  • Q: How to clean the fuel injector on 2004 Chevrolet Blazer?
    A: The first step to Fuel Injector cleaning requires loosening the fuel filler cap to decrease Fuel Tank vapor pressure. The technician should start by disconnecting the pcv clean air tube from the air inlet duct before proceeding to remove the resonator and air inlet duct from the Throttle Body. Detach first the Brake Booster Vacuum Hose and connector from the Intake Manifold followed by removal of the electrical connector from the central sequential fuel injection (CSFI) fuel metering body. Before maintenance start you need to remove Spark Plug Wires from cylinders 1, 3, and 5 at the Distributor Cap and disconnect fuel line bolt at the rear of the Intake Manifold. Circulate cool engine coolant through the fuel system before untightening the fuel pipe nuts while removing the clamp. Take the fuel pipes away from the metering body. The fuel pipe o-ring and washers and spacers need to stay in their right locations. Assemble the fuel metering body jumper block (J 44466-12CSFI) and screws (J 44466-13) to the metering body then tighten it followed by attaching the fuel transfer tube recycling tube (J 44466-11IAFM) and its clamp, screws to the fuel pipe. The evap pressure/purge diagnostic station (J 41413) enables you to close the tank valve while removing the regulator assembly for installation of the regulator and hose assembly (J 44466-10). Fasten a hose between the regulator and fuel metering body jumper block. Connect the Fuel Injector coil/balance tester (J 39021) with the injector switch box (J 39021-210) and injector harness connector (4.3L) (J 39021-301) to the metering body electrical connector at 0.5 amps setting on the amperage switch of the tester. Open both valves to increase the fuel system pressure until it reaches least 150 psi. Use the tester machine to operate each injector while observing the pressure decrease which proves correct injector/poppet valve function. Do the procedure again when an injector does not operate properly until it functions properly. Close the tank pressure valve after testing all injectors while releasing all pressurized fuel at the regulator. The next steps include putting back the pcv fresh air tube followed by disconnection of the regulator from the fuel metering body jumper block and diagnostic station and also removal of injector testing equipment. Reinstall the vehicle electrical connector to the metering body then connect the Brake Booster Vacuum Hose followed by the ignition wires. To complete the repairs you should join the air intake duct and resonator while making sure all fasteners remain by hand just tight. Place the Fuel Injector cleaner (J 38500-A) in position while making sure its valve at the canister base remains sealed then proceed to add gm p/n 12346535 top engine cleaner and standard unleaded gas into the canister. Support the cleaner at a suitable placement under the hood and open the valve at the bottom of the cleaner after you connect the hose to the service port of the fuel metering body jumper block. Use a shop air source to feed the fitting at the cleaner top and set its regulator to 75 psi before allowing the vehicle to empty the canister. The process ends with disconnection of the hose and cleaning the shop air and depressurizing the unit. Bleed the remaining pressure from the fuel metering body jumper block by repeating the procedure of removing the pcv clean air tube, resonator and ignition wires. Service the fuel transfer tube recycling tube along with the fuel metering body screws before reinstalling the fuel pipe by verifying that o-rings, washers and spacers are present in their designated positions. Secure all nuts with threadlock on the fuel pipe bolt before its installation and tightening. Reinstall the Brake Booster Vacuum Hose, the resonator and the air inlet duct and the ignition wires. You must add port Fuel Injector cleaner gn p/n 12345104 (or P/N 12345515 in Canada) at one ounce per gallon of gasoline in the Fuel Tank before tightening the fuel cap manually and testing for leaks while verifying powertrain dtc codes with a tech ii scan tool. Clear any stored codes as needed. The scan tool needs to be disconnected and the customer must change fuel brands.

Related 2004 Chevrolet Blazer Parts