ChevyParts
My Garage
My Account
Cart
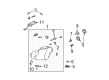
OEM 2007 Cadillac CTS Headlight
Headlamp- Select Vehicle by Model
- Select Vehicle by VIN
Select Vehicle by Model
orMake
Model
Year
Select Vehicle by VIN
For the most accurate results, select vehicle by your VIN (Vehicle Identification Number).
11 Headlights found

2007 Cadillac CTS Headlamp Assembly, Driver Side Part Number: 19352111
$832.08 MSRP: $1249.62You Save: $417.54 (34%)Ships in 1-3 Business DaysProduct Specifications- Other Name: Headlamp Kit, (Service); Headlight; Headlamp Kit, Capsule/Headlamp/Fog Lamp
- Position: Driver Side
- Replaces: 15145301, 15276225, 15826023, 25748358, 25838671
- Item Weight: 8.40 Pounds
- Item Dimensions: 24.0 x 14.9 x 13.0 inches
- Condition: New
- Fitment Type: Direct Replacement
- SKU: 19352111
- Warranty: This genuine part is guaranteed by GM's factory warranty.
2007 Cadillac CTS Headlamp Assembly, Passenger Side Part Number: 19352112
$547.17 MSRP: $821.75You Save: $274.58 (34%)Ships in 1-3 Business DaysProduct Specifications- Other Name: Headlamp Kit, (Service); Headlight; Headlamp Kit, Capsule/Headlamp/Fog Lamp
- Position: Passenger Side
- Replaces: 25838672, 15826022, 15145302, 15276224, 25748357
- Item Weight: 9.10 Pounds
- Item Dimensions: 23.8 x 14.6 x 13.0 inches
- Condition: New
- Fitment Type: Direct Replacement
- SKU: 19352112
- Warranty: This genuine part is guaranteed by GM's factory warranty.
2007 Cadillac CTS Headlamp Assembly, Passenger Side Part Number: 15826020
$399.55 MSRP: $597.35You Save: $197.80 (34%)Ships in 1-2 Business DaysProduct Specifications- Other Name: Headlight; Headlamp, Capsule/Headlamp/Fog Lamp
- Position: Passenger Side
- Replaces: 15276222, 25748354
- Item Weight: 8.10 Pounds
- Item Dimensions: 24.9 x 13.5 x 14.6 inches
- Condition: New
- Fitment Type: Direct Replacement
- SKU: 15826020
- Warranty: This genuine part is guaranteed by GM's factory warranty.

 Product Specifications
- Other Name: Headlight Assembly; Head Lamps; Headlight; Composite Headlamp; Headlamp, Capsule/Headlamp/Fog Lamp
- Position: Passenger Side
- Replaces: 15145294, 25781486, 15276218, 25668206, 25748350, 25744175, 25771730
- Item Weight: 7.10 Pounds
- Item Dimensions: 24.4 x 13.2 x 14.9 inches
- Condition: New
- Fitment Type: Direct Replacement
- SKU: 15826014
- Warranty: This genuine part is guaranteed by GM's factory warranty.


2007 Cadillac CTS Headlamp Assembly, Driver Side Part Number: 15826015
Product Specifications- Other Name: Headlight Assembly; Head Lamps; Headlight; Composite Headlamp; Headlamp, Capsule/Headlamp/Fog Lamp
- Position: Driver Side
- Replaces: 25744174, 15276219, 15145293, 25748349, 25668205, 25771729
- Item Weight: 7.40 Pounds
- Item Dimensions: 24.4 x 13.5 x 14.3 inches
- Condition: New
- Fitment Type: Direct Replacement
- SKU: 15826015
- Warranty: This genuine part is guaranteed by GM's factory warranty.
2007 Cadillac CTS Composite Headlamp, Front Part Number: 19367376
Product Specifications- Other Name: Headlamp Kit, Front (Service); Headlight
- Position: Front
- Replaced by: 19371169
- Item Weight: 8.20 Pounds
- Item Dimensions: 24.1 x 14.9 x 13.0 inches
- Condition: New
- SKU: 19367376
- Warranty: This genuine part is guaranteed by GM's factory warranty.

2007 Cadillac CTS Composite Headlamp Part Number: 19352102
Product Specifications- Other Name: Headlamp Kit, (Service); Headlight; Headlamp, Capsule/Headlamp/Fog Lamp
- Replaces: 15145305, 15826027, 25748361, 15276231
- Item Weight: 8.60 Pounds
- Item Dimensions: 24.5 x 15.4 x 13.5 inches
- Condition: New
- Fitment Type: Direct Replacement
- SKU: 19352102
- Warranty: This genuine part is guaranteed by GM's factory warranty.

2007 Cadillac CTS Composite Headlamp Part Number: 19352101
Product Specifications- Other Name: Headlamp Kit, (Service); Headlight; Headlamp Kit, Capsule/Headlamp/Fog Lamp; Headlamp, Capsule/Headlamp/Fog Lamp
- Replaced by: 19367383
- Item Weight: 8.60 Pounds
- Item Dimensions: 23.5 x 15.4 x 13.1 inches
- Condition: New
- Fitment Type: Direct Replacement
- SKU: 19352101
- Warranty: This genuine part is guaranteed by GM's factory warranty.
- Product Specifications
- Other Name: Headlamp Kit, Front (Service); Composite Headlamp; Headlamp Kit, Capsule/Headlamp/Fog Lamp
- Position: Front Passenger Side
- Replaces: 15276228, 15826016, 19352097, 19367380, 15214484
- Item Weight: 11.20 Pounds
- Item Dimensions: 24.5 x 14.9 x 13.5 inches
- Condition: New
- SKU: 19371170
- Warranty: This genuine part is guaranteed by GM's factory warranty.
- Product Specifications
- Other Name: Headlamp Kit, Front (Service); Headlight; Headlamp Kit, Capsule/Headlamp/Fog Lamp
- Position: Front Driver Side
- Replaces: 15276229, 15145299, 15214485, 19352098, 19367376, 25748356, 25768945, 15826017, 25699099, 25744181
- Item Weight: 8.00 Pounds
- Item Dimensions: 23.6 x 15.4 x 13.0 inches
- Condition: New
- Fitment Type: Direct Replacement
- SKU: 19371169
- Warranty: This genuine part is guaranteed by GM's factory warranty.
2007 Cadillac CTS Headlamp Assembly, Driver Side Part Number: 15826021
Product Specifications- Other Name: Headlamp Assembly (Left-Hand ); Headlight; Headlamp, Capsule/Headlamp/Fog Lamp
- Position: Driver Side
- Replaces: 15276223, 25748353
- Item Weight: 7.80 Pounds
- Item Dimensions: 25.1 x 13.2 x 14.8 inches
- Condition: New
- Fitment Type: Direct Replacement
- SKU: 15826021
- Warranty: This genuine part is guaranteed by GM's factory warranty.
2007 Cadillac CTS Headlight
With a comprehensive array of OEM 2007 Cadillac CTS Headlight, from fuel pumps to door handles, our website is a one-stop-shop for your needs. All our genuine 2007 Cadillac CTS Headlight are backed by the manufacturer's warranty and are offered at competitive prices in the market. Rest assured, you can shop with complete confidence.
2007 Cadillac CTS Headlight Parts Questions & Experts Answers
- Q: How to replace the headlight assembly or headlight bulb, as well as the cornering, sidemarker, park, or turn signal bulb on 2007 Cadillac CTS?A: You must lift your vehicle correctly and put it on jack stands before doing either headlamp system work or replacing any cornering, parking, turning signal or sidewall lights. Open the hood by removing push-pin retainers both on the air deflector and fascia extension. Pop out one push-pin retainer from the push-pin retainers that clamp the grille to the tie bar and then lower the grille to give it space to bend. Take off the front fascia extension then disconnect the bolt that fastens the front fascia to the fender while loosening the bolt that holds the front fascia to the fender. Push the fascia studs within the new fender space and lower it carefully to unstick from the front fender. Depress the headlamp until screws at 3 places clearly show before unplugging the washer hose (when present). To free the headlamp stud from its socket at the fender requires strong pulling while guiding the lamp straight ahead. After that, hand access behind the lamp allows disconnecting the power connector. Move forward the top part of the front fascia and grille to easily detach the headlamp assembly from the vehicle and remove the bulb cover and bulb from the unit. First put the bulb inside the headlamp unit then place the headlamp bulb cover on top. Push the top of the front fascia until you access the assembly to secure the headlamps then plug in all electrical wires. The headlamp assembly needs strong pressure to move backward so that the headlamp ball stud fits into the fender socket. Use the 3 bolts to fix the headlamp to the vehicle and torque them to 6 N.m (53 lb in). Insert the fascia studs into the fender key slots while lifting upwards. Pull the fascia towards the back to engage it to the fender. Finally attach it to the fender using bolts 1 and 2 and tighten them to 9 N.m (80 lb in). Secure the upper part of the front fascia and grille to the upper tie bar using push-pin retainers. Then install the front fascia extension and close the hood while lower the vehicle. Position the air deflector and place push-pin retainers to attach it to the car once you have lowered the vehicle.
Related 2007 Cadillac CTS Parts
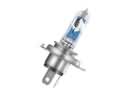 2007 Cadillac CTS Headlight Bulb
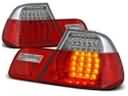 2007 Cadillac CTS Tail Light
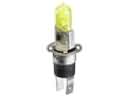 2007 Cadillac CTS Fog Light Bulb
 2007 Cadillac CTS Back Up Light
 2007 Cadillac CTS Fog Light
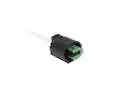 2007 Cadillac CTS Forward Light Harness Connector
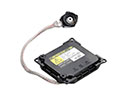 2007 Cadillac CTS Hid Bulb Ballast
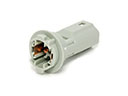 2007 Cadillac CTS Light Socket
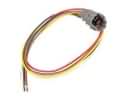 2007 Cadillac CTS Rear Light Harness Connector