OEM 2009 Cadillac Escalade Intake Manifold

Engine Intake Manifold
  • Select Vehicle by Model
  • Select Vehicle by VIN
Select Vehicle by Model
Make
Model
Year
or
Select Vehicle by VIN
For the most accurate results, select vehicle by your VIN (Vehicle Identification Number).

2 Intake Manifolds found

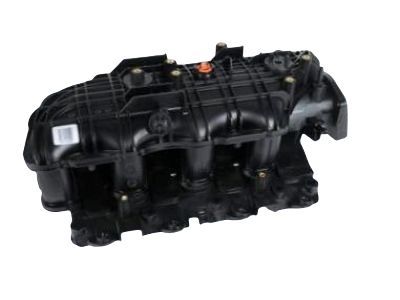
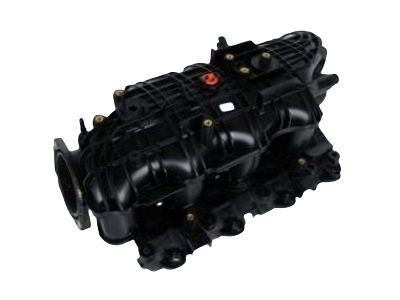
  • 2009 Cadillac Escalade Intake Manifold - 12620308
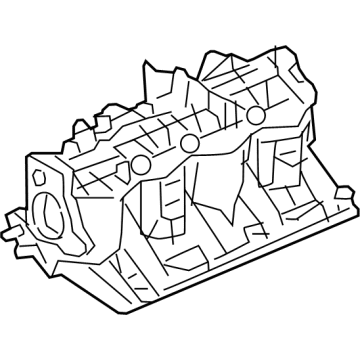
    2009 Cadillac Escalade Intake Manifold Diagram - 12620308
    View related parts

    2009 Cadillac Escalade Intake Manifold
    Part Number: 12620308

    $216.35 MSRP: $351.12
    You Save: $134.77 (39%)
    ADD TO CART
    Product Specifications
    • Other Name: Manifold, Engine Fuel Intake Manifold; Manifold
    • Replaces: 12597598
    • Item Weight: 17.00 Pounds
    • Item Dimensions: 29.8 x 19.0 x 13.1 inches
    • Condition: New
    • Fitment Type: Direct Replacement
    • SKU: 12620308
    • Warranty: This genuine part is guaranteed by GM's factory warranty.
    More Info
    Fits the following 2009 Cadillac Escalade Submodels:
    • Hybrid, Hybrid Platinum | 8 Cyl 6.0 L FULL HYBRID EV-FLEX (FHEV), 8 Cyl 6.0 L FULL HYBRID EV-GAS (FHEV)
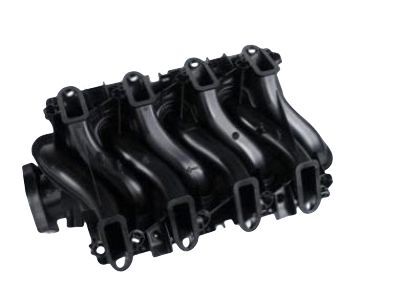
  • 2009 Cadillac Escalade Intake Manifold - 12597600
    2009 Cadillac Escalade Intake Manifold Diagram - 12597600
    View related parts

    2009 Cadillac Escalade Intake Manifold
    Part Number: 12597600

    $147.82 MSRP: $356.39
    You Save: $208.57 (59%)
    Ships in 1-2 Business Days
    ADD TO CART
    Product Specifications
    • Other Name: Manifold, Engine Fuel Intake Manifold; Manifold
    • Item Weight: 16.60 Pounds
    • Item Dimensions: 28.9 x 19.0 x 13.3 inches
    • Condition: New
    • Fitment Type: Direct Replacement
    • SKU: 12597600
    • Warranty: This genuine part is guaranteed by GM's factory warranty.
    More Info
    Fits the following 2009 Cadillac Escalade Submodels:
    • Base, Luxury, Platinum, Premium | 8 Cyl 6.2 L FLEX

2009 Cadillac Escalade Intake Manifold

With a comprehensive array of OEM 2009 Cadillac Escalade Intake Manifold, from fuel pumps to door handles, our website is a one-stop-shop for your needs. All our genuine 2009 Cadillac Escalade Intake Manifold are backed by the manufacturer's warranty and are offered at competitive prices in the market. Rest assured, you can shop with complete confidence.

2009 Cadillac Escalade Intake Manifold Parts Questions & Experts Answers

  • Q: How to replace the intake manifold on 2009 Cadillac Escalade?
    A: The Intake Manifold replacement process requires execution of the high voltage service disconnect procedure followed by the disconnection of the battery ground cable. Disassemble the Intake Manifold by removing the air cleaner outlet duct followed by the engine harness retainer nut and retainer from the stud and locator pin. Technicians need to detach electrical connections from the evaporative emission (EVAP) canister purge solenoid , manifold absolute pressure (MAP) sensor , ignition coil harness , left side fuel injectors , throttle actuator , right side fuel injectors , and engine coolant temperature (ECT) sensor . First disconnect the generator control module electrical connector before elevating the engine harness branches into position. Shutdown the quick connect stopper of the evap canister purge tube while also disconnecting the fuel feed line quick connect stopper. The vehicle's positive crankcase ventilation (PCV) hose needs removal before the Intake Manifold bolts (512) are loosened then the Intake Manifold (500) can be taken out. Identify the cylinder head passages for debris prevention while discarding and cleaning all Intake Manifold gaskets (514). Remove the upper Intake Manifold cover nut followed by the upper Intake Manifold cover along with the MAP Sensor retainer and MAP Sensor. Discard the MAP Sensor seal throughout this step. Disconnect the quick connect fitting of the evap tube from the Intake Manifold and dislodge the evap canister purge solenoid retainer to remove the Throttle Body with gasket. Start by removing Fuel Rail bolts before lifting the Fuel Rail evenly to extract the injectors while discarding the Fuel Injector lower o-ring seals. To install new Fuel Injector lower o-ring seals on the injectors apply clean engine oil for lubrication then place the injectors into the Fuel Rail assembly. Use a torque wrench to tighten Fuel Rail bolts to 10 nm (89 lb in). Follow these steps to install a new Throttle Body Gasket and then add the Throttle Body together with its bolts/nuts which must be tightened to 10 nm (89 lb in). After installing the evap tube and purge solenoid you should connect the evap tube quick connect fitting before lubricating the MAP Sensor seal with clean engine oil and putting in the MAP Sensor with its new seal and retainer. First tighten the upper Intake Manifold cover's nut then install new Intake Manifold gaskets (514) all the while removing cylinder head passage covers before placing the Intake Manifold (500). Apply a 5 mm (0.20 in) band of threadlock gm p/n 12345382 to the Intake Manifold bolts (512), install them finger tight, and then tighten them to specifications: design the bolt torque sequence at 5 nm (44 lb in) for the initial run followed by a final torque to 10 nm (89 lb in). After installing the pcv hose you should connect the fuel feed line quick connect fitting and the evap canister purge tube quick connect fitting. Unravel the engine harness branches before connecting the engine harness electrical connector to the ect sensor and securing the engine harness clip on the generator bracket with a bolt torqued to 9 nm (80 lb in). The generator control module electrical connector and engine harness electrical connectors get connected to the right side fuel injectors while a clip gets installed to the ignition coil bracket stud. Tear the cpa retainer seal fitting before you attach the ignition coil harness and the engine harness electrical connectors to left side fuel injectors. The MAP Sensor receives power from the engine wiring harness and the evap canister purge solenoid from the engine harness. Install the engine harness retainer to its stud and locator pin while tightening the retainer nut to a torque of 5 nm (44 lb in) and securing the air cleaner outlet duct. Complete the procedure by connecting the ground cable to the battery and conducting the necessary high voltage service connect.

Related 2009 Cadillac Escalade Parts