ChevyParts
My Garage
My Account
Cart
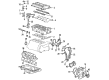
OEM 2009 Chevrolet Cobalt Timing Chain
Engine Timing Chain- Select Vehicle by Model
- Select Vehicle by VIN
Select Vehicle by Model
orMake
Model
Year
Select Vehicle by VIN
For the most accurate results, select vehicle by your VIN (Vehicle Identification Number).
1 Timing Chain found

2009 Chevrolet Cobalt Timing Chain, Green Line Part Number: 24461834
$90.14 MSRP: $217.34You Save: $127.20 (59%)Ships in 1-2 Business DaysProduct Specifications- Other Name: Chain, Engine Timing
- Replaces: 90537338
- Item Weight: 1.40 Pounds
- Item Dimensions: 5.8 x 2.9 x 0.7 inches
- Condition: New
- Fitment Type: Direct Replacement
- SKU: 24461834
- Warranty: This genuine part is guaranteed by GM's factory warranty.
2009 Chevrolet Cobalt Timing Chain
With a comprehensive array of OEM 2009 Chevrolet Cobalt Timing Chain, from fuel pumps to door handles, our website is a one-stop-shop for your needs. All our genuine 2009 Chevrolet Cobalt Timing Chain are backed by the manufacturer's warranty and are offered at competitive prices in the market. Rest assured, you can shop with complete confidence.
2009 Chevrolet Cobalt Timing Chain Parts and Q&A
- Q: How to replace the camshaft timing chain, sprocket, and tensioner on 2009 Chevrolet Cobalt?A: Begin the Camshaft Timing Chain and sprocket and tensioner replacement process by extracting the number 1 cylinder Spark Plug followed by clockwise Crankshaft rotation towards top dead center (TDC) exhaust position. Begin by first taking off the Camshaft cover and engine front cover. Before moving past the Timing Chain Tensioner you must release the chain tension first to prevent chain cocking. Then remove the guide assembly and bolts followed by the Timing Chain Tensioner unit. Using a 24 mm wrench stabilize the exhaust Camshaft while removing the exhaust Camshaft actuator bolt before taking the actuator off the Camshaft and Timing Chain. First remove the Timing Chain Tensioner guide bolt and guide and the fixed Timing Chain Guide access plug and all fixed Timing Chain Guide bolts and guide. Repetitions should occur for the intake Camshaft actuator removal by following the Timing Chain extraction through the cylinder head top and then the Timing Chain Crankshaft sprocket replacement. Engaging in balance shaft Timing Chain and sprocket replacement demands removal of the balance shaft drive chain tensioner bolts and tensioner and both adjustable and small balance shaft drive chain guides. The balance shaft drive chain and sprocket require removal. Installation of the balance shaft drive sprocket must begin first while maintaining correct timing to prevent engine vibration. The install process requires the balance shaft drive chain to receive proper alignment between colored links and sprocket timing marks. The technical staff needs to tighten the upper and small balance shaft drive chain guides to be at 15 nm (11 lb ft) and the adjustable guide needs to reach 10 nm (89 lb in). You should reset the Timing Chain Tensioner by pushing down on its plunger and fixing it with a paper clip. Finally install the balance shaft drive chain tensioner and keep the intake and exhaust Camshaft notches properly lined up. Position the timing mark correctly on the Timing Chain drive sprocket before setting the intake Camshaft actuator with its special colored link properly aligned. Follow the Timing Chain route from the Crankshaft sprocket while making sure its first colored link matches the noted position. The exhaust Camshaft actuator receives installation after the bolt on the adjustable Timing Chain Guide reaches its correct tension and before tightening the actuator bolts for proper alignment. Installation must start with the fixed Timing Chain Guide followed by its bolts before adding the upper Timing Chain Guide only after both colored link and timing mark alignment verification. To install the Timing Chain Tensioner assembly properly reset it first then inspect the seal for damage and make sure the threaded hole stays clean before tightening to 75 nm (55 lb ft). After releasing the tensioner through an appropriate tool you can proceed to torque the intake and exhaust Camshaft actuator bolts to their specified measurements. To complete the repair install the Timing Chain oiling nozzle then apply sealant to the Timing Chain Guide bolt access hole plug before installing it in sequence with the engine front cover and Camshaft cover and number 1 cylinder Spark Plug.
Related 2009 Chevrolet Cobalt Parts
 2009 Chevrolet Cobalt Oil Filter
 2009 Chevrolet Cobalt Oil Pan
 2009 Chevrolet Cobalt Timing Chain Tensioner
 2009 Chevrolet Cobalt Cylinder Head
 2009 Chevrolet Cobalt Engine Mount Bracket
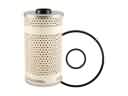 2009 Chevrolet Cobalt Fuel Water Separator Filter
 2009 Chevrolet Cobalt Harmonic Balancer
 2009 Chevrolet Cobalt Lash Adjuster
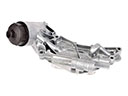 2009 Chevrolet Cobalt Oil Cooler
 2009 Chevrolet Cobalt Piston Ring
 2009 Chevrolet Cobalt Timing Belt Tensioner
 2009 Chevrolet Cobalt Timing Chain Guide