ChevyParts
My Garage
My Account
Cart
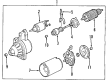
OEM Cadillac Catera Starter
Starter Ignition- Select Vehicle by Model
- Select Vehicle by VIN
Select Vehicle by Model
orMake
Model
Year
Select Vehicle by VIN
For the most accurate results, select vehicle by your VIN (Vehicle Identification Number).
2 Starters found

Cadillac Catera Starter Part Number: 90542967
$108.09 MSRP: $801.66You Save: $693.57 (87%)Ships in 1-2 Business Days
Cadillac Catera Starter Part Number: 90542532
Cadillac Catera Starter
Want to cut long-term maintenance and repair costs? Choose OEM Starter. Those parts deliver top durability you can trust. On our site, you'll find a huge catalog of genuine Cadillac Catera parts. Prices are unbeatable, so you can keep more in your pocket. Every OEM Cadillac Catera Starter includes a manufacturer's warranty. You can also get an easy return policy that keeps buying risk free. Fast delivery, get your car on the road quickly. It's simple to search, compare, and order. Stop guessing about quality or fit. Order today and save with parts that last.
Cadillac Catera Starter Parts Questions & Experts Answers
- Q: How to service and repair the starter motor on Cadillac Catera?A:Begin by disconnecting the battery negative cable then raise the vehicle before securing it on proper support. First detach all Starter motor lead elements that consist of terminal nuts (1, 2), washers, Battery Cable terminal lead and Starter solenoid terminal lead. The service requires removal of rh Catalytic Converter together with rh Engine Mount nuts prior to lowering the vehicle down. Use the universal engine support fixture (J 28467-A) alongside its engine support fixture adapters (J 28467-450) to elevate the engine's right-hand side by 38 mm (1.5 in). After raising the vehicle a second time remove the Engine Mount first from the Engine Mount bracket and front crossmember before taking out Engine Mount bracket bolts. Reposition the bracket then remove the Starter motor bolts (2 and 3) before extracting the Starter motor from its position. Secure the Starter motor in its position by using Starter motor bolts (2, 3). Torque them to 60 n.m (44 lb ft). Position the Engine Mount bracket on the vehicle's surface and install the bolts for the bracket while tightening them to 40 n.m (30 lb ft). Secure the Engine Mount between the Engine Mount bracket and front crossmember before relying the vehicle to its midpoint. An assistant helps guide the mount installation while confirming proper engagement of Engine Mount locator tab in front crossmember slot as you lower the engine. The complete reinstallation includes raising the vehicle to install two Engine Mount nuts (1,2) while tightening the upper one to 40 n.m (30 lb ft) and the lower one to 55 n.m (41 lb ft). Insert the rh Catalytic Converter along with the Starter motor lead components which include Battery Cable terminal lead, Starter solenoid terminal lead, washers, and terminal nuts (1, 2). Tighten the Battery Cable terminal nut to 13 n.m (115 lb in) and the Starter solenoid terminal nut to 4 n.m (35 lb in). Lower the vehicle then connect the negative cable of the battery.

Related Cadillac Catera Parts
 Cadillac Catera Alternator
 Cadillac Catera Alternator Bearing
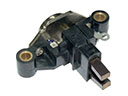 Cadillac Catera Alternator Brush
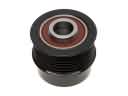 Cadillac Catera Alternator Pulley
 Cadillac Catera Battery Cable
 Cadillac Catera Fuse Box
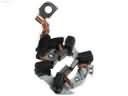 Cadillac Catera Starter Brush
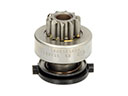 Cadillac Catera Starter Drive
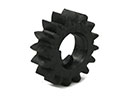 Cadillac Catera Starter Drive Gear
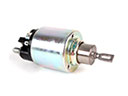 Cadillac Catera Starter Solenoid
 Cadillac Catera Voltage Regulator