ChevyParts
My Garage
My Account
Cart
OEM Cadillac DeVille Fuel Tank Filler Neck
Fuel Filler Neck- Select Vehicle by Model
- Select Vehicle by VIN
Select Vehicle by Model
orMake
Model
Year
Select Vehicle by VIN
For the most accurate results, select vehicle by your VIN (Vehicle Identification Number).
3 Fuel Tank Filler Necks found


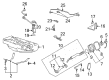
Cadillac DeVille Filler Neck Part Number: 25727012


Cadillac DeVille Filler Neck Part Number: 25644582


Cadillac DeVille Filler Pipe Part Number: 22519391
Cadillac DeVille Fuel Tank Filler Neck
Want to cut long-term maintenance and repair costs? Choose OEM Fuel Tank Filler Neck. Those parts deliver top durability you can trust. On our site, you'll find a huge catalog of genuine Cadillac DeVille parts. Prices are unbeatable, so you can keep more in your pocket. Every OEM Cadillac DeVille Fuel Tank Filler Neck includes a manufacturer's warranty. You can also get an easy return policy that keeps buying risk free. Fast delivery, get your car on the road quickly. It's simple to search, compare, and order. Stop guessing about quality or fit. Order today and save with parts that last.
Cadillac DeVille Fuel Tank Filler Neck Parts and Q&A
- Q: How to replace the Fuel Tank Filler Neck on Cadillac DeVille?A:One must start fuel filler neck replacement by draining fuel from the tank until it reaches the level of the hose. After that raise the vehicle until you can access the wheel house filler pipe opening cover properly. At the beginning of fuel filler pipe removal start by removing both the Fuel Tank filler pipe ground wire bolt and the fuel filler pipe clamp before the pipe can be taken out. The first step for installation involves placing the fuel filler pipe while following it with the fuel filler pipe clamp which needs to be tightened to 4.2 n.m (37 lb in). Set the Fuel Tank filler pipe ground wire attaching bolt at 9 n.m (80 lb in torque) then put on the wheel house filler pipe opening cover. After lowering the vehicle you should fill the tank with fuel before installing the Fuel Tank filler pipe cap. To check for leaks, turn the ignition on with engine off for two seconds before turning it off for ten seconds followed by another turning on with engine off for leak inspection. Attach the fuel injector sight shield after finishing the installation process.

Related Cadillac DeVille Parts
 Cadillac DeVille Fuel Pump
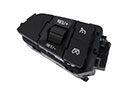 Cadillac DeVille Cruise Control Switch
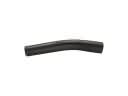 Cadillac DeVille Fuel Filler Hose
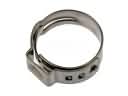 Cadillac DeVille Fuel Line Clamps
 Cadillac DeVille Fuel Pressure Sensor
 Cadillac DeVille Fuel Pump Driver Module
 Cadillac DeVille Fuel Pump Strainer
 Cadillac DeVille Fuel Pump Wiring Harness
 Cadillac DeVille Fuel Tank
 Cadillac DeVille Fuel Tank Sending Unit
 Cadillac DeVille Gas Cap
 Cadillac DeVille Throttle Cable