ChevyParts
My Garage
My Account
Cart
OEM Cadillac Escalade EXT Washer Reservoir
Windshield Washer Reservoir- Select Vehicle by Model
- Select Vehicle by VIN
Select Vehicle by Model
orMake
Model
Year
Select Vehicle by VIN
For the most accurate results, select vehicle by your VIN (Vehicle Identification Number).
2 Washer Reservoirs found

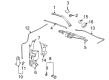
Cadillac Escalade EXT Washer Reservoir Part Number: 15942521
$50.00 MSRP: $89.28You Save: $39.28 (44%)Ships in 1-2 Business Days


Cadillac Escalade EXT Washer Reservoir Part Number: 12487670
Cadillac Escalade EXT Washer Reservoir
Want to cut long-term maintenance and repair costs? Choose OEM Washer Reservoir. Those parts deliver top durability you can trust. On our site, you'll find a huge catalog of genuine Cadillac Escalade EXT parts. Prices are unbeatable, so you can keep more in your pocket. Every OEM Cadillac Escalade EXT Washer Reservoir includes a manufacturer's warranty. You can also get an easy return policy that keeps buying risk free. Fast delivery, get your car on the road quickly. It's simple to search, compare, and order. Stop guessing about quality or fit. Order today and save with parts that last.
Cadillac Escalade EXT Washer Reservoir Parts and Q&A
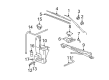
- Q: How to replace the windshield washer reservoir on Cadillac Escalade EXT?A:To replace the windshield washer solvent container you need to raise and support the vehicle to work safely. Disconnect both parts from the left front wheel area to work on the windshield repair. Use the wrench tool to disconnect hoses (1, 2) at the Washer Pump and the left side fender flange to drain washer solvent into a proper vessel. You need to disconnect power wires to reach the Hood Latch while the vehicle drops down. Take out the windshield washer solvent cap and the auxiliary battery tray if needed. Extract the windshield washer bolt from underneath the auxiliary battery tray when present and pull the washer container out through the wheelhouse opening to take out the upper windshield washer solvent bolts. Proceed to take out the windshield washer solvent unit. Move washer pumps and level indicator parts from old washer solvent container into new one before placing the windshield washer container assembly. Put the upper windshield washer container bolt onto the auxiliary battery tray if present and connect it securely. Afterwards, screw in the upper windshield washer solvent container bolts and tighten them to 9 n.m (80 lb in). Reattach the windshield washer solvent cap while you also install the auxiliary battery tray when it exists and then properly link both electrical connectors and Washer Pump hoses (1, 2). Replace the left front wheel components by returning the wheelhouse liner and wheel assembly. Also refill the washer solvent tank with designed windshield solvent.

Related Cadillac Escalade EXT Parts
 Cadillac Escalade EXT Center Console Base
 Cadillac Escalade EXT Center Console Latch
 Cadillac Escalade EXT Dash Panel Vent Portion Covers
 Cadillac Escalade EXT Door Handle
 Cadillac Escalade EXT Door Lock Actuator
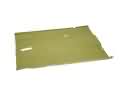 Cadillac Escalade EXT Floor Pan
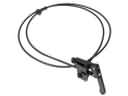 Cadillac Escalade EXT Hood Cable
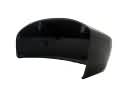 Cadillac Escalade EXT Mirror Cover
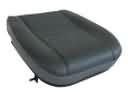 Cadillac Escalade EXT Seat Cushion Pad
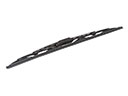 Cadillac Escalade EXT Windshield Wiper
 Cadillac Escalade EXT Wiper Arm
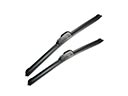 Cadillac Escalade EXT Wiper Blade