ChevyParts
My Garage
My Account
Cart
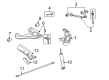
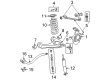
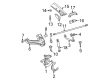
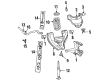
OEM Chevrolet Express 1500 Steering Knuckle
Front Steering Knuckle- Select Vehicle by Model
- Select Vehicle by VIN
Select Vehicle by Model
orMake
Model
Year
Select Vehicle by VIN
For the most accurate results, select vehicle by your VIN (Vehicle Identification Number).
7 Steering Knuckles found


Chevrolet Express 1500 Knuckle, Passenger Side Part Number: 25840782
$197.36Ships in 1-2 Business Days
Chevrolet Express 1500 Knuckle, Passenger Side Part Number: 18060698
$109.65 MSRP: $179.47You Save: $69.82 (39%)
Chevrolet Express 1500 Knuckle, Passenger Side Part Number: 85544427
$190.20 MSRP: $323.83You Save: $133.63 (42%)Ships in 1-2 Business DaysChevrolet Express 1500 Knuckle, Driver Side Part Number: 85544426
$186.78 MSRP: $293.89You Save: $107.11 (37%)Ships in 1-2 Business DaysChevrolet Express 1500 Knuckle, Driver Side Part Number: 25840780

Chevrolet Express 1500 Knuckle, Passenger Side Part Number: 18060574

Chevrolet Express 1500 Knuckle, Driver Side Part Number: 18060573
Chevrolet Express 1500 Steering Knuckle
Want to cut long-term maintenance and repair costs? Choose OEM Steering Knuckle. Those parts deliver top durability you can trust. On our site, you'll find a huge catalog of genuine Chevrolet Express 1500 parts. Prices are unbeatable, so you can keep more in your pocket. Every OEM Chevrolet Express 1500 Steering Knuckle includes a manufacturer's warranty. You can also get an easy return policy that keeps buying risk free. Fast delivery, get your car on the road quickly. It's simple to search, compare, and order. Stop guessing about quality or fit. Order today and save with parts that last.
Chevrolet Express 1500 Steering Knuckle Parts and Q&A
- Q: How to replace the steering knuckle on a 4WD on Chevrolet Express 1500?A:Start your Steering Knuckle replacement work on a 4wd vehicle by first raising the vehicle and applying support before removing both the tire and wheel. Rotate the Torsion Bars while removing the wheel drive shaft before finally taking out the Wheel Hub and bearing. First remove the outer tie rod to Steering Knuckle retaining nut then disconnect the outer tie rod from the Steering Knuckle by using the steering linkage and tie rod puller (J 24319-B). The first step requires removal of the brake hose bracket retaining bolt on the Steering Knuckle before extracting the upper Ball Joint retaining nut to separate the upper Ball Joint from the Steering Knuckle using the Ball Joint remover (J 43631) and Ball Joint separator protector adapters (J 45851). Use this same procedure to disconnect the lower Ball Joint which attaches to the Steering Knuckle by removing the lower Control Arm retaining nut. Thoroughly wipe the tapered section along with threads from the upper Ball Joint, lower Ball Joint, and tie rod end once you remove the Steering Knuckle before inspecting the knuckle's taper holes and mounting surfaces for deterioration. Embed the new Steering Knuckle into position then tighten the lower Ball Joint retaining nut to 100 nm (74 ft. Lbs.) and the upper Ball Joint retaining nut to 50 nm (37 ft. Lbs.). Both the brake hose bracket and outer tie rod should be installed onto their corresponding positions on the Steering Knuckle. Tighten the Steering Knuckle retaining bolt to 10 nm (88 inch lbs.) and secure the outer tie rod with a nut torque of 63 nm (47 inch lbs.). The Wheel Hub and bearing installation starts first followed by the wheel drive shaft and tire and wheel components. Torsion bars must be loaded next and the vehicle needs to be lowered before an alignment is performed.

Related Chevrolet Express 1500 Parts
 Chevrolet Express 1500 Alignment Bolt
 Chevrolet Express 1500 Ball Joint
 Chevrolet Express 1500 Coil Springs
 Chevrolet Express 1500 Control Arm
 Chevrolet Express 1500 Control Arm Bushing
 Chevrolet Express 1500 Shock Absorber
 Chevrolet Express 1500 Spindle
 Chevrolet Express 1500 Sway Bar Bracket
 Chevrolet Express 1500 Sway Bar Bushing
 Chevrolet Express 1500 Sway Bar Kit
 Chevrolet Express 1500 Sway Bar Link
 Chevrolet Express 1500 Torsion Bar