
Popular OEM Chevrolet Express 1500 Parts
- Body & Hardware Parts View More >
- Steering Parts View More >
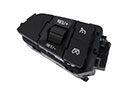
- Electrical Parts View More >
- Air & Fuel Delivery Parts View More >
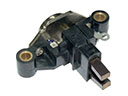
- Charging & Starting Parts View More >
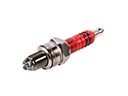
- Engine Parts View More >
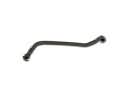
- Belts & Cooling Parts View More >
- Suspension Parts View More >
- Driveline & Axles Parts View More >
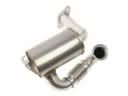
- Emission Control & Exhaust Parts View More >
- Transmission Parts View More >
- Brakes Parts View More >


Why Buy Genuine Chevrolet Express 1500 Parts From ChevyPartsGiant.com
Looking for real Chevrolet Express 1500 parts? ChevyPartsGiant.com may be a better choice to find genuine parts at wallet-friendly prices. We sell only OEM Chevrolet Express 1500 parts, ensuring perfect fit, reliability, and long-term performance. With our website, you can easily get access to the same parts found at local Chevrolet stores. All components are produced by Chevrolet and are exclusively fitted on Chevrolet Express 1500 automobiles. By shopping at our store, you can enjoy the quality of the Chevrolet factory without the high prices of brick-and-mortar facilities. We achieve this because we are an online store operating at lower costs, which we pass on to you. We also have a user-friendly platform where you can find and order genuine Chevrolet Express 1500 parts swiftly. We are here to make your process of restoring a Chevrolet Express 1500 or dealing with simple repairs quick and inexpensive. We also make it easy to obtain Chevrolet Express 1500 parts at competitive shipping prices and a team of knowledgeable staff ready to take your order. Choose ChevyPartsGiant.com to save time and money, as well as keep your Chevrolet Express 1500 in the good condition.
General Motors manufactured Chevrolet Express 1500 vehicles for commercial use by plumbing and cable industries from 1996 until 2014. The platform adopted by General Motors received rear-wheel drive configuration that provided drivers with optional traction control for improved control across varied operational conditions. Customers who bought the Chevrolet Express 1500 could select between a 4.3-liter V6 or a 5.3-liter V8 engine which provided sufficient power for their heavy-cargo and towing requirements. Engine compartment adjustments in Express 1500 led engineers to make the interior space larger and relocate the front axle 10 inches forwards for superior safety and comfort. Vehicle performance improved due to the four-speed automatic transmission system which executed clean gear shifts effortlessly. Chevrolet Express 1500 equipped all of its models with standard airbags regardless of their gross vehicle weight rating. Manufacturers upgraded the Chevrolet Express 2003 with new dashboards along with ergonomic design improvements as well as additional engine choices. Using original manufacturer parts for maintenance enables Chevrolet Express 1500 car owners to achieve both reliability and compatibility through components that strictly follow vehicle factory specifications.
Chevrolet Express 1500 groups issues into fuel delivery, fuel level sensing, and engine sealing. On fuel delivery, Express 1500 may misfire and set a light. Stuck closed fuel injector cuts flow and starves a cylinder. Run cleaning procedures, then replace the failed fuel injector if recovery fails. For fuel level sensing, Express 1500 can show erratic readings and unexpected empty warnings. A worn sensor in the fuel pump module misreports volume and confuses range. Install a new fuel pump on high mileage vans and verify gauge calibration. For engine sealing, Express 1500 may leak coolant or oil near the intake. A failed intake manifold gasket allows air and fluid crossover. Replace the intake manifold gasket, correct warped surfaces, and bleed the cooling system. After repairs, perform a complete scan and road test on the Express 1500. Confirm no misfire counts, steady trims, and clean oil on the Express 1500. Follow Chevrolet service data for torque and routing. Verify charging voltage and grounds on Chevrolet modules. Use quality fuel, monitor trims, and keep software on Chevrolet updated. Finish with maintenance notes that match Chevrolet schedules and local conditions.
Chevrolet Express 1500 Parts and Q&A
- Q: How to Replace an Alternator on Chevrolet Express 1500?A:In order to change the generator, take out the air cleaner assembly and fan shroud at the top radiator. Disconnect the negative battery cable/generator electrical connector. Drop the drive belt, the positive battery cable, and the generator bolts. Install the generator again, fix it and reconnect cables and other parts.
- Q: How to replace the air filter on Chevrolet Express 1500?A:The replacement of air filter involves unclips on the cover and lifts up the top of the air cleaner housing. Take off and check the air filter against dust or dirt, clean or change where necessary. Lastly, put the air filter back and fasten the top cover.
- Q: How to replace the water pump on 4.8L, 5.3L, and 6.0L engines on Chevrolet Express 1500?A:To change the water pump of 4.8L, 5.3L, and 6.0L engines, drain the cooling system, take off the air cleaner assembly, fan clutch and accessory drive belt. Take off hose and water pump bolts and fit the new water pump with gaskets. Retighten hoses and reconnect parts, and fill cooling system.


