ChevyParts
My Garage
My Account
Cart
OEM Chevrolet Lumina Seat Motor
Car Seat Motor- Select Vehicle by Model
- Select Vehicle by VIN
Select Vehicle by Model
orMake
Model
Year
Select Vehicle by VIN
For the most accurate results, select vehicle by your VIN (Vehicle Identification Number).
2 Seat Motors found


Chevrolet Lumina Seat Track, Driver Side Part Number: 22138358

Chevrolet Lumina Motor Assembly Part Number: 16739533
Chevrolet Lumina Seat Motor
Our website offers an extensive catalog of genuine Chevrolet Lumina Seat Motor at unbeatable prices. Every OEM Chevrolet Lumina Seat Motor comes with a manufacturer's warranty, an easy return policy, and rapid delivery service. Don't miss out on this great opportunity!
Chevrolet Lumina Seat Motor Parts Questions & Experts Answers
- Q: How to replace the front seat motor on Chevrolet Lumina?A: Begin the front seat adjuster motor replacement by taking out the seat. The next step requires removal of the six-way power seat adjuster. The first step involves removing wires from the front vertical gearnut motor together with the rear vertical gearnut motor and horizontal adjuster motor during disassembly. Depress the nut which connects the motor support bracket front to the inboard adjuster before extracting it partially from its positions with adjuster and gear-nut drives (3, 13). The completion of support bracket with motors attached requires disconnection of the front vertical drive cable and rear vertical drive cable and horizontal drive cable from the motors. As a first step remove the metal from grommet end(s) that secured motor to support then proceed to separate the motors. You should drill through the top end of the grommet with an 8 mm (3/16-inch) drill bit. Insert the grommet onto the motor support bracket prior to rivet a 3/16-inch fastener into the grommet to keep the motor securely attached. The drive cables must connect to motors after installation of the motor on the inboard adjuster with a securing nut and following the connection of motor feed wires. Reinstall both the front seat together with the six-way power seat adjuster.

Related Chevrolet Lumina Parts
 Chevrolet Lumina Bumper
 Chevrolet Lumina Car Speakers
 Chevrolet Lumina Center Console Base
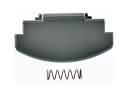 Chevrolet Lumina Center Console Latch
 Chevrolet Lumina Cup Holder
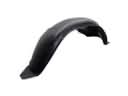 Chevrolet Lumina Fender Splash Shield
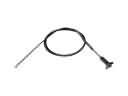 Chevrolet Lumina Fuel Door Release Cable
 Chevrolet Lumina Lift Support
 Chevrolet Lumina Seat Switch
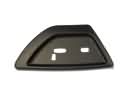 Chevrolet Lumina Seat Switch Panel
 Chevrolet Lumina Side View Mirrors
 Chevrolet Lumina Tailgate Latch