ChevyParts
My Garage
My Account
Cart
OEM Chevrolet Metro Distributor
Ignition Distributor- Select Vehicle by Model
- Select Vehicle by VIN
Select Vehicle by Model
orMake
Model
Year
Select Vehicle by VIN
For the most accurate results, select vehicle by your VIN (Vehicle Identification Number).
1 Distributor found

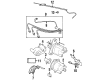
Chevrolet Metro Distributor Assembly Part Number: 91172595
Chevrolet Metro Distributor
Want to cut long-term maintenance and repair costs? Choose OEM Distributor. Those parts deliver top durability you can trust. On our site, you'll find a huge catalog of genuine Chevrolet Metro parts. Prices are unbeatable, so you can keep more in your pocket. Every OEM Chevrolet Metro Distributor includes a manufacturer's warranty. You can also get an easy return policy that keeps buying risk free. Fast delivery, get your car on the road quickly. It's simple to search, compare, and order. Stop guessing about quality or fit. Order today and save with parts that last.
The Distributor of Chevrolet Metro vehicles has the responsibility of providing the correct high voltage current from the ignition coil to the spark plugs the right sequence. Chevrolet Metro models from the past have been using mechanical distributors with breaker points as the type and these types call for some maintenance since they contain some wearing parts. In time, improvements resulted in the usage of electronic distributors that require Hall Effect sensors instead of mechanical parts and do not require frequent servicing. It has been used different styles of distributors installed in Chevrolet Metro vehicles within using dual points with electronic ignition systems. The main distinction lies in the triggering mechanisms: mechanical systems use breaker points while electronic systems implement the use of sensor for efficiency. Thus, with advancement in technology, distributor less ignition system including the coil on plug (COP) has replaced the distributor to great extent which can be considered as a great deal of advancement in Chevrolet Metro's ignition system.
Chevrolet Metro Distributor Parts and Q&A
- Q: How to service and repair the distributor on Chevrolet Metro?A:In order to service and repair the Distributor, one should proceed and check out the resistance of camshaft position (CMP) sensor between its two terminals in the Distributor connector with the aid of the digital multimeter (J 39200); replace the cmp sensor if the resistance is outside the will specify range of 185-325 ohms. Then you should withdraw the Distributor rotor from the Distributor housing, remove the cmp sensor cover from the cmp sensor and then opened the two screws that hold the cmp sensor in place on the Distributor housing. If need be, take off the two Distributor flange bolts and the Distributor housing of the Cylinder Head. Check the corrosion and wear on the Distributor housing, the end play of the shaft, and the signal rotor for damage; if the defects are located, change the Distributor housing assembly. Also check the rotor for wear or crack, Distributor cap for carbon tracking, arcing or crack, and Distributor shaft o-ring seal is worn around tear, changing any component if required. Installation starts with installing the cmp sensor to the Distributor housing and tightening it using two screws without full tightening. Then install the cmp sensor cover to the cmp sensor and align the signal rotor ridge with the ridge on the cmp sensor by rotating the signal rotor. Adjust the air gap of the signal rotor (0.2 - 0.4 mm, 0.008-0.016 in) by shifting cmp sensor relative to signal rotor and tighten cmp sensor retaining screws to 5 n.m (44 lb in). As for cranking the engine after the Distributor was removed, make sure to replace it as required. Mount the Distributor rotor onto the Distributor housing proceed to mount the Distributor housing onto the Cylinder Head and align the marks made during the earlier steps and mount the two Distributor flange bolts loosely. Then, install the new Distributor Cap seal on the Distributor Cap and fasten the cap with two screws and join the Distributor electrical connector. Lastly, adjust the ignition timing of 1.0l engine as needed.

Related Chevrolet Metro Parts
 Chevrolet Metro Antenna
 Chevrolet Metro Body Control Module
 Chevrolet Metro Camshaft Position Sensor
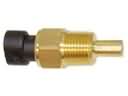 Chevrolet Metro Coolant Temperature Sensor
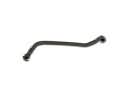 Chevrolet Metro Crankcase Breather Hose
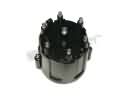 Chevrolet Metro Distributor Cap
 Chevrolet Metro Fuel Pump Relay
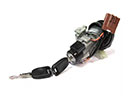 Chevrolet Metro Igniter
 Chevrolet Metro Ignition Coil
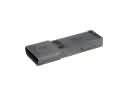 Chevrolet Metro Ignition Control Module
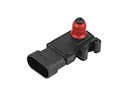 Chevrolet Metro MAP Sensor
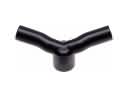 Chevrolet Metro PCV Valve Hose