ChevyParts
My Garage
My Account
Cart
OEM GMC Savana 2500 Valve Body
Trans Valve Body- Select Vehicle by Model
- Select Vehicle by VIN
Select Vehicle by Model
orMake
Model
Year
Select Vehicle by VIN
For the most accurate results, select vehicle by your VIN (Vehicle Identification Number).
7 Valve Bodies found


GMC Savana 2500 Valve Body Part Number: 24251431
$220.31 MSRP: $371.51You Save: $151.20 (41%)


GMC Savana 2500 Valve Body Part Number: 24275873
$650.96 MSRP: $1104.66You Save: $453.70 (42%)Ships in 1-3 Business Days
GMC Savana 2500 Valve Body Part Number: 24044648
$943.11 MSRP: $1457.42You Save: $514.31 (36%)Ships in 1-3 Business Days
GMC Savana 2500 Valve Body Part Number: 24240953
$132.19 MSRP: $221.50You Save: $89.31 (41%)Ships in 1-2 Business DaysGMC Savana 2500 Valve Body Part Number: 24042443
$825.70 MSRP: $1301.72You Save: $476.02 (37%)
GMC Savana 2500 Valve Body Part Number: 24042439
$973.35 MSRP: $1535.09You Save: $561.74 (37%)
GMC Savana 2500 Valve Body Part Number: 24042435
$889.58 MSRP: $1372.81You Save: $483.23 (36%)
GMC Savana 2500 Valve Body
Want to cut long-term maintenance and repair costs? Choose OEM Valve Body. Those parts deliver top durability you can trust. On our site, you'll find a huge catalog of genuine GMC Savana 2500 parts. Prices are unbeatable, so you can keep more in your pocket. Every OEM GMC Savana 2500 Valve Body includes a manufacturer's warranty. You can also get an easy return policy that keeps buying risk free. Fast delivery, get your car on the road quickly. It's simple to search, compare, and order. Stop guessing about quality or fit. Order today and save with parts that last.
GMC Savana 2500 Valve Body Parts Questions & Experts Answers
- Q: How to replace the control valve body in a 4L60-E/4L65-E/4L70-E automatic transmission on GMC Savana 2500?A:You must start by taking out the fluid level indicator before lifting the vehicle. You should remove the Oil Pan with its gasket and the filter as next steps. A small screwdriver unlocks and rotates the tcc pwm solenoid. This allows easy unscrewing of its retaining bolt. You can reach the tcc solenoid retaining bolts and components (68 and 66) when you remove the tcc pwm solenoid from its spot. Keep the o-ring seal intact. Separate the harness before removing bolt (64) and spring assembly (63), then disconnect all Valve Body bolts. Slowly lower this part after detaching the control body from the manual valve link. You first put the checkballs (1-7) in the Valve Body before entering the control Valve Body through the transmission case while attaching the manual valve link. Secure the manual valve link correctly before manually tightening the bolt (M6 X 1.0 X 47.5) at the middle of the Valve Body to keep it positioned. Use your fingers to install and lightly tighten 15 bolts including 12 Valve Body bolts (62), 2 bolts (59), and 3 bolts (120) into their specified locations. Secure the transmission connecting cables to the Valve Body before installing the tcc solenoid valve and its bolts (68). Tighten these bolts to 8-14 nm (6-10 lb ft) while avoiding excessive force. Check if all bolts are positioned correctly in the Valve Body. Use a spiral pattern starting from the center to tighten all bolts until they reach 8-14 nm (6-10 lb ft). Insert the tcc pwm solenoid valve (396) alongside its retaining piece (395) into position. Fasten the wiring harness into place and link all electrical components (1-6) together. Finish the job by adding the Oil Pan and filter then lower the car to fill the transmission with dexron(R) vi fluid up to its specified level. A scan tool should be used to reset tap values according to manufacturers' instructions because this process involves the ecm or pcm units that could modify transmission response.

Related GMC Savana 2500 Parts
 GMC Savana 2500 Automatic Transmission Filter
 GMC Savana 2500 Automatic Transmission Input Shaft Seal
 GMC Savana 2500 Automatic Transmission Seal
 GMC Savana 2500 Automatic Transmission Shifter
 GMC Savana 2500 Flywheel
 GMC Savana 2500 Shift Cable
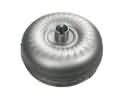 GMC Savana 2500 Torque Converter
 GMC Savana 2500 Transfer Case
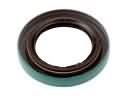 GMC Savana 2500 Transfer Case Seal
 GMC Savana 2500 Transmission Assembly
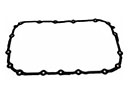 GMC Savana 2500 Transmission Gasket
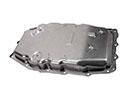 GMC Savana 2500 Transmission Pan