ChevyParts
My Garage
My Account
Cart
OEM GMC Savana 3500 Transfer Case
Speed Transfer Case- Select Vehicle by Model
- Select Vehicle by VIN
Select Vehicle by Model
orMake
Model
Year
Select Vehicle by VIN
For the most accurate results, select vehicle by your VIN (Vehicle Identification Number).
1 Transfer Case found

GMC Savana 3500 Transfer Case Part Number: 24246930
GMC Savana 3500 Transfer Case
Want to cut long-term maintenance and repair costs? Choose OEM Transfer Case. Those parts deliver top durability you can trust. On our site, you'll find a huge catalog of genuine GMC Savana 3500 parts. Prices are unbeatable, so you can keep more in your pocket. Every OEM GMC Savana 3500 Transfer Case includes a manufacturer's warranty. You can also get an easy return policy that keeps buying risk free. Fast delivery, get your car on the road quickly. It's simple to search, compare, and order. Stop guessing about quality or fit. Order today and save with parts that last.
GMC Savana 3500 Transfer Case Parts and Q&A
- Q: What tools are necessary to disassemble the transfer case on GMC Savana 3500?A:Several tools needed to disassemble the Transfer Case include slide hammer (J 2619-01) and holding fixture (J 3289-20) and split plate bearing puller (J 22912-01) and slide hammer with bearing adapter (J 23907) and bushing and bearing remover - 3-4 inch (J 26941) and case spreader (J 45358) and mainshaft support bushing/bearing remover (J 45548). For Transfer Case disassembly you will require slide hammer (J 2619-01), holding fixture (J 3289-20), split plate bearing puller (J 22912-01), slide hammer with bearing adapter (J 23907) as well as bushing and bearing remover - 3-4 inch (J 26941) and case spreader (J 45358) and mainshaft support bushing/bearing remover (J 45548). Attach the assembly fixture (J 45759) to the Transfer Case through adapter studs for mounted case disassembly operations. Weld the assembly fixture (J 45759) to a holding fixture (J 3289-20) set up on a stable workbench before securing the stack with a pivot pin. The process to drain Transfer Case fluid requires removal of both drain and fill plugs. The procedure requires front output shaft seal removal followed by encoder motor assembly extraction and Vehicle Speed Sensor (VSS) removal and finally rear output shaft seal removal. Use the case spreader to shear the sealer between the case halves before removing the Transfer Case retaining bolts together with washers while noting down the brackets' original positions. Apply the case spreader (J 45358) to break the sealer binding between case halves before separating the front from the rear halves of the case. Remove sequentially the shift fork shaft spring together with the rear sun gear planetary Differential assembly and the chain containing drive and driven sprockets. You must mark how the chain and sprockets fit together to keep their wear patterns when reusing them. Attack the remaining components starting with the lockup shift assembly and progressing through the Oil Pump assembly before finally removing the shift detent lever assembly but maintain straight alignment of the shift detent lever shaft assembly throughout the process. To finish the task remove the mainshaft rear support bushing with slide hammer (J 2619-01) and mainshaft support bushing/bearing remover (J 45548) and use the bushing and bearing remover (J 26941) together with slide hammer with bearing adapter (J 23907) to eliminate the rear bearing for the front output shaft.
Related GMC Savana 3500 Parts
 GMC Savana 3500 Automatic Transmission Filter
 GMC Savana 3500 Automatic Transmission Input Shaft Seal
 GMC Savana 3500 Automatic Transmission Seal
 GMC Savana 3500 Automatic Transmission Shifter
 GMC Savana 3500 Flywheel
 GMC Savana 3500 Shift Cable
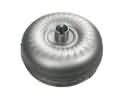 GMC Savana 3500 Torque Converter
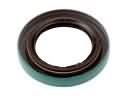 GMC Savana 3500 Transfer Case Seal
 GMC Savana 3500 Transmission Assembly
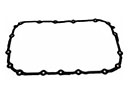 GMC Savana 3500 Transmission Gasket
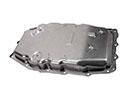 GMC Savana 3500 Transmission Pan
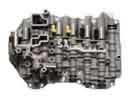 GMC Savana 3500 Valve Body