Make sure this part fits

GM 12458556
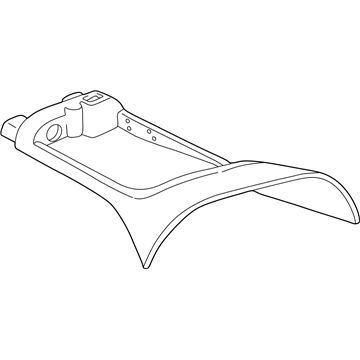
Lower Cover

1997-2004 Chevrolet Corvette

Customer Questions & Expert Answers (4)
GM 12458556 Lower Cover
  • Part Description
    Console, Floor Console
  • Position
    Front
  • Manufacturer
    General Motors
Make sure this part fits
$372.25 MSRP: $556.54
You Save: $184.29 (34%)
Ships in 1-3 Business Days
1
ADD TO CART
  • Vehicle Fitment

    Year Make Model Trim Engine
    1997-2004 Chevrolet Corvette50th Anniversary Edition, 50th Anniversary Edition Pace Car, Base, Indianapolis 500 Pace Car, Z068 Cyl 5.7 L GAS
    Warning: California's Proposition 65
  • Customer Questions & Expert Answers

    Q:
    Is this 12458556 designed for my car? Posted by ChevyPartsGiant Specialist
    A:
    Please Select Your Vehicle model to see if part number 12458556 is suitable before ordering.
    Posted by ChevyPartsGiant Specialist
    Q:
    How to replace the Center Console on Chevrolet Corvette? Posted by Customer
    A:
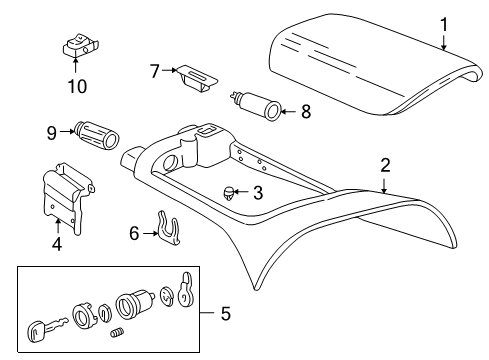
    To replace the console, take off the folding top stowage compartment lid extension panel (convertible) and open the console door. Pull up the rear of the electronic traction control, ride control switch to release the retaining clips; If not released properly, get into the recess at the back of the switch with the end of a screwdriver and apply a gentle pull upward. Pull off the electrical connector and the LED connector from the wiring harness connector and now remove the switch. With a small flat-bladed screwdriver, remove the console retaining nut covers, the nuts retaining front and rear of the console and the IP accessory trim plate. Lift the rear of the console slightly and pull it rearward to separate the front from under the IP accessory trim plate, and disconnect the electrical connector for the electrical accessory plug as well as unscrew the console electrical accessory plug retainer from the plug housing attached to the console. The electrical accessory plug housing must be removed and the electrical connector removed from the fuel door release, rear lift window release (export) switch then the switch is removed by turning the console over and using small flat bladed screwdriver to release the switch tabs. To install the new console first install the fuel door release, rear lift window release (export) switch to console by aligning and securing, then connection of the electrical connector at the switch. Install the elect. accessory plug housing, with the cover plug in place and screw elect. accessory plug retainer to hrsg until firm. Connect the electrical connector to the electrical accessory plug in such a way that the front of the console must be fixed under the rear of the IP accessory trim plate; then, fixing the front of the console under the trim plate, loosely fit console retaining nuts. Mount the console closest to optimum appearance with the IP accessory trim plate and the floor extension carpet, giving the retaining nuts a tight 10 N.m (89 lb in). Connect the electrical connector to electronic traction control, ride control switch and the LED connector to the wiring harness connector . Insert the electronic traction control, ride control switch front retaining tab under the edge of the IP accessory trim plate, lower rear of switch to position while exerting force to ensure retention clips. Finally, close the console door and replace the folding top stowage compartment lid extension panel (convertible).
    Posted by ChevyPartsGiant Specialist
    Q:
    How to Ensure Proper Installation of the Center Console on Chevrolet Corvette? Posted by Customer
    A:
    To replace console, first remove the folding top stowage compartment lid panels (convertible) and open the console door. Exerting a pulling force on the rear of the electronic traction control, ride control switch to drive out the retaining clips; if it does not release, insert into the recess at the rear end of the switch, very carefully a screwdriver and then gently pull up. Pull out the electrical connector and the LED connector from the wiring harness connector as well as the switch. The first step to loosening these consoles is using a small flat bladed screwdriver, remove the console retaining nut covers, followed by the nuts retaining both the rear and front of console and the ip accessory trim plate. Rise the rear of the console a little bit and pull it to the rear direction to release the front of the console from under the trim plate, IP accessory and then remove the electrical connector from the electrical accessory plug and unscrew the console electrical accessory plug retainer from the console electrical accessory plug housing. Unsncrew the electrical accessory plug housing and remove the electrical connector from the fuel door release, rear lift window release (export) switch then release the switch by turning the console over and using small flat bladed screwdriver to release the switches tabs. In the process of installing the new-console, install the fuel door release, rear lift window release (export) switch by aligning it, and fasten it to the console and attach the electrical connector to the switch. Snap the electrical accessory plug housing into place with the cover plug in it, and attach the electrical accessory plug retainer to the housing screwing it in until it is tight. Connect the electrical connector to the electrical accessory plug ensure that the front is installed under the rear of the IP accessory trim plate, and insert the front of the console under the trim plate and loosely install the console retaining nuts. Mount the console to the best appearance in relation to the IP accessory trim plate and the floor extension carpet and tighten the retaining nuts to the 10 N.m (89 lb in) figure. Tape the electrical connector to the electronic traction control, ride control switch, and the LED connector to the wiring harness connector. Install the electronic traction control, ride control switch front retaining tab under the edge of the IP accessory trim plate, and the rear of the switch into position, and use the press release clips into place. Finally, close the console door and retract the folding top stowage compartment lid extension panel (convertible).
    Posted by ChevyPartsGiant Specialist
    Q:
    What is the first step in the installation process for the 2001 Chevrolet Corvette? Posted by Customer
    A:
    Install the fuel door release, rear lift window release (export) switch to the console, aligning and securing it, then connect the electrical connector to the switch.
    Posted by ChevyPartsGiant Specialist
    See expert answers on similar Center Console
    If you have any questions about this product, please don't hesitate to ask us. We will be happy to help you!

OEM GM Lower Cover 12458556 Designed for Proper Fit and Performance

Original OEM GM parts deliver superior quality and meet all performance standards needed for optimal automotive operation. The authentic part identified by 12458556 Lower Cover is available in the market under the name GM Center Console Base, Center Console. This genuine product has a full warranty coverage from the manufacturer available at all authorized GM dealers throughout the United States. This part 12458556 Lower Cover fits certain Chevrolet Corvette models.
The original GM component designated by manufacturer part number 12458556 maintains top performance when functioning as the Console, Floor Console unit at its Front. The component 12458556 is constructed from durable material and its dimensions span 26.9 x 23.0 x 8.9 inches while weighing 2.30 Pounds. The Direct Replacement component is ready in New condition to ensure full compatibility with your vehicle system. The part 12458556 has available replacement options. GM manufacturer provides a warranty that ensures reliable operation of this product. The Shipping Policy and Return Policy pages outline complete details regarding shipping procedures and return processes.
If you want to save money in the long run on maintenance and repairs, you should choose OEM products because they're of the top level of durability. Are you on the quest of finding GM parts, our site is worth a visit. We stock an endless selection of high-quality GM components including things like ignition coils all the way through to fan shrouds and all at prices that can not be matched. You have nothing to worry about because all our OEM parts are covered with a manufacturer warranty, which guarantees superior quality and value.