Make sure this part fits

GM 88894016
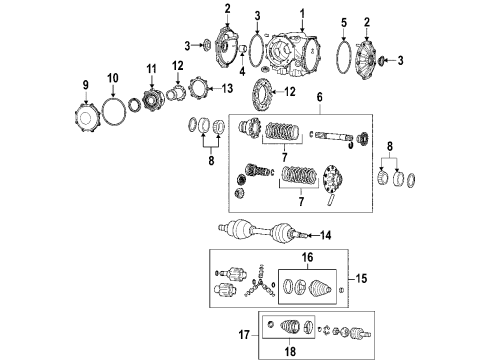
Drive Shaft

2000-2004 Chevrolet Corvette

Customer Questions & Expert Answers (4)
GM 88894016 Drive Shaft
  • Part Description
    Shaft; Driveshaft
  • Manufacturer
    General Motors
  • Manufacturer's Notes
    This part is discontinued.
Make sure this part fits
  • Vehicle Fitment

    Year Make Model Trim Engine
    2000-2004 Chevrolet Corvette50th Anniversary Edition, 50th Anniversary Edition Pace Car, Base, Z068 Cyl 5.7 L GAS
    Warning: California's Proposition 65
  • Customer Questions & Expert Answers

    Q:
    Is 88894016 compatible with my car? Posted by ChevyPartsGiant Specialist
    A:
    Please Select Your Vehicle model to see if part number 88894016 is suitable before ordering.
    Posted by ChevyPartsGiant Specialist
    Q:
    How to Service and Repair the Drive Shaft on Chevrolet Corvette? Posted by Customer
    A:
    The procedure for drive/propeller shaft service and repair starts with obtaining two essential components: hydraulic clutch separator (J 36221) along with transmission support fixture (J 42055). Start by disconnecting the negative Battery Cable then take off the console with shift control knob along with their associated components. Access the shift control boot by gentle prying and then take out the ip accessory trim plate. The service begins by disconnecting the pushrod of the clutch master cylinder from its position on the clutch pedal after removing both the left ip lower insulator panel and shift control assembly. During the hoisting process of the vehicle support the system before clipping the clutch actuator cylinder hose and protecting both hose ends. The next procedure requires the removal of rear tires and wheel assemblies and catalytic converters and driveline tunnel closeout panel. Do the following sequence of removal steps on both sides of the vehicle: first support the lower Control Arm then disconnect the outer Tie Rod End followed by removing the shock absorber lower mounting bolt and lower Ball Joint. The sequence should be replicated on both the vehicle's sides. And then install the transmission support fixture (J 42055) onto a transmission jack before disconnecting wiring harnesses and brake pipe clip retainers from the rear suspension crossmember. First detach the rear transaxle mount to Rear Crossmember nuts then proceed with lowering the rear suspension crossmember. Uninstall the transaxle mount bracket to Differential bolts along with the transaxle mount with bracket. Secure the Differential wheel drive shafts after safely releasing them and fasten them to the underbody structure. Remove all electrical connectors before inspecting that the wiring harness does not touch the driveline. The engine gets engine support from a straight jack and also the removal of bolts which connect the driveline support assembly to the engine flywheel housing. A helper should help you loosen the driveline from the engine before you lower it while guiding the tilt angle. A lifting device(props up the driveline to reduce transmission jack weight. After this the Transmission Support Fixture(J 42055) can be detached and the driveline placed on a workbench. Begin by removing the clutch actuator cylinder and rear exhaust hangers next to eliminating the transmission to driveline support assembly bolts/studs. Finally, use a pry tool to disconnect the driveline support assembly from the transmission but ensure to guide the transmission shift rod through the opening space.
    Posted by ChevyPartsGiant Specialist
    Q:
    How to replace the wheel axle shafts on Chevrolet Corvette? Posted by Customer
    A:
    To change the axle shafts, start by placing the transmission into park (A/T)/neutral (M/T) and set the parking brake. Lift and place properly, the vehicle, take off the tyre and wheel assembly. Push a drift or a punch into the brake rotor cooling fins in the brake caliper to prevent the wheel and hub bearing from turning and pull off the Spindle Nut retaining the rear Axle Shaft to the hub. Start by releasing the parking brake and then take out the rear transverse spring. They don't loosen the outer tie rod jam nut. On the contrary, remove the outer Tie Rod End from the knuckle and move it to the rear of the vehicle. Remove the Wheel Speed Sensor's electrical connector and the Parking Brake Cable from the parking brake lever, and then move the cable towards the rear. Mount the Axle Shaft remover (J 42129) onto the Wheel Hub and tighten wheel nuts, start working on separating the Axle Shaft off the Wheel Hub and the bearing. Remove the lower Ball Joint from the suspension knuckle and completely disengage the Axle Shaft; make sure to support it until it's taken off. Position the Axle Shaft remover (J 42128), extension (J 29794), and slide hammer (J 2619-01), and attach the Axle Shaft remover (J 42128) to the rear beveled surface of the Axle Shaft inner joint housing even. Before unscrewing the Axle Shaft from the rear axle Differential, using the assembled tools screw it off the other side then remove the Axle Shaft from the vehicle and the Axle Shaft remover (J 42129) from the Wheel Hub. For installation, align the Axle Shaft to the rear axle, differential output shaft and make sure the seal is not ruined and also ensure that it is attached. Use light force to attach it. Lift and position the Axle Shaft into the hub and wheel and bearing while leaving it partially extended for more clearance. Mount the lower Ball Joint to the suspension knuckle, install the Parking Brake Cable into the bracket and mount the lever. Then you should reconnect the Wheel Speed Sensor electrical connector and the outer Tie Rod End to the suspension knuckle and install the rear transverse spring then set the parking brake. Install a drift or punch into the brake rotor cooling fins to the caliper; then, start to install the Axle Shaft retaining nut with your hands, slowly tighten the Axle Shaft retaining nut in order to draw the Axle Shaft to the Wheel Hub and bearing and tighten the nut as well as the drive axle spindle to the 160 nm (118 ft. Lbs.). Remove the drift or punch, disengage the parking brake, put the tire and wheel assembly, and lower the vehicle.
    Posted by ChevyPartsGiant Specialist
    Q:
    What electrical connectors need to be disconnected for the 2004 Chevrolet Corvette? Posted by Customer
    A:
    The Vehicle Speed Sensor (VSS) electrical connector, wiring harness retainer from the differential rear cover, and transmission harness 20-way connector.
    Posted by ChevyPartsGiant Specialist
    See expert answers on similar Drive Shaft
    If you have any questions about this product, please don't hesitate to ask us. We will be happy to help you!

OEM GM Drive Shaft 88894016 Designed for Proper Fit and Performance

Original OEM GM parts deliver superior quality and meet all performance standards needed for optimal automotive operation. The authentic part identified by 88894016 Drive Shaft is available in the market under the name GM Axle Shaft, Drive Shaft. This genuine product has a full warranty coverage from the manufacturer available at all authorized GM dealers throughout the United States. This part 88894016 Drive Shaft fits certain Chevrolet Corvette models.
The original GM component designated by manufacturer part number 88894016 maintains top performance when functioning as the Shaft; Driveshaft unit. The component 88894016 is constructed from durable material. The Direct Replacement component is ready in New condition to ensure full compatibility with your vehicle system. This component receives the designation of Shaft, Propeller. The part 88894016 has available replacement options. GM manufacturer provides a warranty that ensures reliable operation of this product. The Shipping Policy and Return Policy pages outline complete details regarding shipping procedures and return processes.
If you want to save money in the long run on maintenance and repairs, you should choose OEM products because they're of the top level of durability. Are you on the quest of finding GM parts, our site is worth a visit. We stock an endless selection of high-quality GM components including things like ignition coils all the way through to fan shrouds and all at prices that can not be matched. You have nothing to worry about because all our OEM parts are covered with a manufacturer warranty, which guarantees superior quality and value.