ChevyParts
My Garage
My Account
Cart
OEM 2002 Chevrolet Astro Distributor
Ignition Distributor- Select Vehicle by Model
- Select Vehicle by VIN
Select Vehicle by Model
orMake
Model
Year
Select Vehicle by VIN
For the most accurate results, select vehicle by your VIN (Vehicle Identification Number).
1 Distributor found


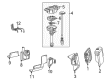
2002 Chevrolet Astro Distributor Assembly Part Number: 12598210
Product Specifications- Other Name: Distributor; Distributor, Ignition
- Replaces: 01104057, 01104078, 01104050, 1104050, 1104078, 1104057, 93441559
- Item Weight: 2.60 Pounds
- Item Dimensions: 15.8 x 8.3 x 5.2 inches
- Condition: New
- Fitment Type: Direct Replacement
- SKU: 12598210
- Warranty: This genuine part is guaranteed by GM's factory warranty.
2002 Chevrolet Astro Distributor
With a comprehensive array of OEM 2002 Chevrolet Astro Distributor, from fuel pumps to door handles, our website is a one-stop-shop for your needs. All our genuine 2002 Chevrolet Astro Distributor are backed by the manufacturer's warranty and are offered at competitive prices in the market. Rest assured, you can shop with complete confidence.
2002 Chevrolet Astro Distributor Parts and Q&A
- Q: How to service and repair the distributor on 2002 Chevrolet Astro?A: Start by removing the engine cover to service and repair the distributor. Whitish buildup around the cap terminals, cap discoloration and yellowing of rotor cap and darkening with some carbon under rotor segment is normal. replacement is only done if there are driveability concerns. Check for caps leaks, small holes or carbon tracks between the terminal traces. Take off the cap and apply a DMM by putting one lead on a cap terminal while probing all the other terminals and the central carbon ball with the second lead, rotating the base lead to the next terminal and repeating the process until all secondary terminals have been tested. replace the cap if there are readings which are not infinite. Inspect for corrosion excess on the boundaries and nail brushing to clean, and the cap to replace if there is an excess corrosion but some is normal. Check the rotor segment for excess misuse and replace the rotor when there is excess looseness. Inspect for shaft-to-bushing looseness by examining the housing for cracks and damage, putting the shaft into the housing to replace the whole housing assembly if the shaft wobbles. Finally, reinstall the engine cover.
Related 2002 Chevrolet Astro Parts
 2002 Chevrolet Astro Crankshaft Position Sensor
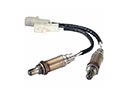 2002 Chevrolet Astro Oxygen Sensor
 2002 Chevrolet Astro Automatic Transmission Shifter
 2002 Chevrolet Astro Camshaft Position Sensor
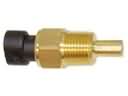 2002 Chevrolet Astro Coolant Temperature Sensor
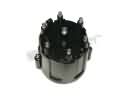 2002 Chevrolet Astro Distributor Cap
 2002 Chevrolet Astro Engine Control Module
 2002 Chevrolet Astro Headlight Switch
 2002 Chevrolet Astro Ignition Switch
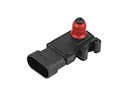 2002 Chevrolet Astro MAP Sensor
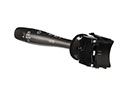 2002 Chevrolet Astro Turn Signal Switch
 2002 Chevrolet Astro Vehicle Speed Sensor