ChevyParts
My Garage
My Account
Cart
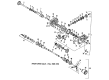
OEM 2002 Chevrolet Trailblazer CV Joint
CV Joint Axle- Select Vehicle by Model
- Select Vehicle by VIN
Select Vehicle by Model
orMake
Model
Year
Select Vehicle by VIN
For the most accurate results, select vehicle by your VIN (Vehicle Identification Number).
2 CV Joints found

2002 Chevrolet Trailblazer Inner CV Joint, Front Part Number: 26059677
$46.64 MSRP: $564.50You Save: $517.86 (92%)Ships in 1-2 Business DaysProduct Specifications- Other Name: Joint Kit, Front Wheel Drive Axle; Joint Assembly; Inner Joint; Inner Joint Assembly
- Position: Front
- Item Weight: 6.50 Pounds
- Item Dimensions: 8.7 x 6.9 x 6.8 inches
- Condition: New
- Fitment Type: Direct Replacement
- SKU: 26059677
- Warranty: This genuine part is guaranteed by GM's factory warranty.

2002 Chevrolet Trailblazer Outer CV Joint Part Number: 26059673
Product Specifications- Other Name: Joint Assembly; Outer Joint; Joint Kit, Front Axle U Joint; CV Joint
- Position: Outer
- Replaces: 26095325
- Item Weight: 7.40 Pounds
- Item Dimensions: 9.5 x 8.5 x 7.1 inches
- Condition: New
- Fitment Type: Direct Replacement
- Require Quantity: 2
- SKU: 26059673
- Warranty: This genuine part is guaranteed by GM's factory warranty.
2002 Chevrolet Trailblazer CV Joint
With a comprehensive array of OEM 2002 Chevrolet Trailblazer CV Joint, from fuel pumps to door handles, our website is a one-stop-shop for your needs. All our genuine 2002 Chevrolet Trailblazer CV Joint are backed by the manufacturer's warranty and are offered at competitive prices in the market. Rest assured, you can shop with complete confidence.
2002 Chevrolet Trailblazer CV Joint Parts Questions & Experts Answers
- Q: What Tools Are Required for Servicing and Repairing the CV Joint, Specifically for the Front Wheel Drive Shaft Inner Joint and Seal Replacement on 2002 Chevrolet Trailblazer?A: In order to service and repair the constant velocity joint, namely the front wheel drive shaft inner joint and seal replacement, the following tools are required: swage clamp tool (J 41048), drive axle seal clamp plier (J 35566), snap ring pliers (J 8059). Start by using the side cutters to remove the clamp off the boot, but be careful not cause damage to the tripot housing. Cut off the swage ring with a hand grinder and discard the tripot housing and trilobal tripot bushing attached to the halfshaft bar. Make sure the housing and the spider assembly are good and clean with all the tripot bushing thrown out. Polish off any corrosion from the transmission sealing surface using 320 grit 3m cloth allowing the housing and spider assembly to dry while being careful not to separate the tripot balls and needle rollers of the tripot spider assembly. Compress the tripot boot onto the halfshaft bar away from the spider assembly and use j 8059 to spread the spacer rings for removal of the spider assembly, along with spacer ring and the spider assembly, the second spacer ring, and tripot boot which should be discarded. Clean the half shaft bar with a wire brush, check on the needle rollers, needle bearings as well as trunnion, and check on the tripot house for wear or damage - change damaged parts where necessary with the kit. For assembly, install the new swage clamp onto the boot neck and slide the new small swage clamp and boot onto the halfshaft bar to the right position, make sure that boot neck is in the groove. To swage the clamp, place the inboard end of the halfshaft assembly in j 41048 and align inboard end of the swage clamp within it; apply on the top half of the bottom half. Presspatiently for pinch points on the boot, thenand install and tighten the bolts progressively, carefully with a finger until nearly tight, then install the boot, halfshaft bar, and swage clamp,lanmistirand bolt snug with grabs of the ratchet wrench noisily, 180 degrees at a time. Remove the bolts and separate the dies, re-swage the clamp if there are deformities. Make sure for the "lip" deformities in the swage clamp, make it sure that the convolute retainer is put together right to prevent boot harm, and install the swage clamp on the boot getting four convolutions. Put on the spacer ring and spider assembly onto the halfshaft bar, followed by the other spacer ring in the groove at the end of the halfshaft bar, ensuring that all rings are seated. Pack the boot and housing with the premeasured grease from the kit and then locate the big retaining clamp on the boot and the housing with the new trilobal tripot bushing on the spider assembly. Mount the boot onto the trilobal tripot bushing; verify the inboard stroke position for the male tripot housing assembly (dimension a: 280 mm) or female tripot housing assembly (dimension b: 228 mm), then install the large retaining clamp and boot to housing using j 35566 and remove the convolute retainer from boot.