
Popular OEM Chevrolet Trailblazer Parts
- Body & Hardware Parts View More >
- Steering Parts View More >
- Electrical Parts View More >
- Air & Fuel Delivery Parts View More >
- Engine Parts View More >
- Belts & Cooling Parts View More >
- Suspension Parts View More >
- Driveline & Axles Parts View More >
- Emission Control & Exhaust Parts View More >
- Transmission Parts View More >
- Brakes Parts View More >
- Headlights & Lighting Parts View More >


Why Buy Genuine Chevrolet Trailblazer Parts From ChevyPartsGiant.com
Looking for real Chevrolet Trailblazer parts? ChevyPartsGiant.com may be a better choice to find genuine parts at wallet-friendly prices. We sell only OEM Chevrolet Trailblazer parts, ensuring perfect fit, reliability, and long-term performance. With our website, you can easily get access to the same parts found at local Chevrolet stores. All components are produced by Chevrolet and are exclusively fitted on Chevrolet Trailblazer automobiles. By shopping at our store, you can enjoy the quality of the Chevrolet factory without the high prices of brick-and-mortar facilities. We achieve this because we are an online store operating at lower costs, which we pass on to you. We also have a user-friendly platform where you can find and order genuine Chevrolet Trailblazer parts swiftly. We are here to make your process of restoring a Chevrolet Trailblazer or dealing with simple repairs quick and inexpensive. We also make it easy to obtain Chevrolet Trailblazer parts at competitive shipping prices and a team of knowledgeable staff ready to take your order. Choose ChevyPartsGiant.com to save time and money, as well as keep your Chevrolet Trailblazer in the good condition.
Beginning in 2001 the Chevrolet Trailblazer started its legacy until its revival in 2020 when the latest version introduced major product transformations. The current subcompact Chevrolet Trailblazer offers two turbocharged gasoline engine options: a 1.2L LIH inline-three and a 1.3L L3T inline-three, both engineered to deliver a balance of power and fuel efficiency. The 2012–2020 global Chevrolet Trailblazer (not sold in the U.S.) was built on a truck-based frame and used a five-link rear suspension system to improve stability and off-road performance. In contrast, the 2020 U.S. Chevrolet Trailblazer is a unibody crossover. The GM Hydra-Matic 9T65 automatic transmission in the vehicle uses nine speeds to perform gear shifts that enhance both speed and driving responses. The trailblazer originally came with a 4-speed automatic transmission yet the new design from 2011 introduced a 6-speed automatic gear system. To suit a variety of driving conditions, the modern Chevrolet Trailblazer offers all-wheel-drive on select trims and features front independent suspension for improved ride comfort and handling. All parts supplied to support Chevrolet Trailblazer vehicles originate from the Original Equipment Manufacturer leading to components which satisfy original quality specifications. Reliability and performance of the Chevrolet Trailblazer stem from the dedication to quality manufacturing which yields a dependable automobile for vehicle buyers.
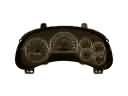
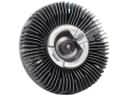
Chevrolet Trailblazer concerns cluster into fuel metering, HVAC electrical, and engine cooling management. In the fuel system, the Trailblazer shows erratic gauge readings and unreliable range. A worn level sensor inside the tank misreports fuel level to the cluster. Replacing the fuel pump module restores accurate readings and dependable starting on high mileage Trailblazer vehicles. HVAC electrical faults affect cabin airflow and blower speed control on the Trailblazer. Follow Chevrolet test plans. A failed blower motor resistor drops one or more speeds or stops operation entirely. Confirm switch function, inspect wiring, then install a new resistor and verify all speeds. Engine cooling issues arise when the Trailblazer fan clutch slips or locks at the wrong time. A failing cooling fan clutch triggers loud roar, reduced power, or a check engine light. Replace the cooling fan clutch and confirm commanded duty with a scan tool. Chevrolet service information supports fuel trims review after repairs, which confirms proper metering and sealing. Check grounds and connector corrosion at body harness splices before replacing components. Complete a final drive cycle on the Trailblazer, then verify updates using Chevrolet procedures and Trailblazer checks.
Chevrolet Trailblazer Parts Questions & Answers
- Q: How to replace the Radiator Grille Emblem/Nameplate on Chevrolet Trailblazer?A:To replace the Radiator Grille Emblem/Nameplate on the TrailBlazer LT first use tape and protect the mounting surface and make alignment marks for installation. Use a heat gun to heat the emblem/nameplate in a circular motion for approximately 30 seconds to enable smooth removal off the hood. Care should be taken with fasteners so as not to damage the vehicles. Remove the emblem/nameplate from the panel surface by using a plastic, flat bladed tool. To remove adhesives, use a 3M™ (scotch brite) molding adhesive remover disk™, (3M TM-P/N-07501), body panels, or you could use lint-free rag and Varnish Makers and Painters (VMP) naptha or a 50/50 mix of Iso propyl alcohol and water for plastic panels. When replacing the newly purchased emblem/name plate, make sure it is installed in a dust-free environment to avoid adhesion problems. Clean the installation area with a lint-free cloth using the same cleaning solution on it and dry it well. Mark the place with tape, warm the area where mounting will be to 27-41 C (80-105 F), and make sure the emblem/nameplate is 29-32 C (85-90 F). Peel off the protective liner from the back of the emblem/nameplate, position it over the marked spot, and hold it there firmly till a uniform bond is made. Finally, lower the protective tape from mounting surface.
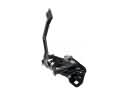
- Q: How to replace the steering wheel on Chevrolet Trailblazer?A:Starting the process requires disabling the sir system first. Pressing inward to full stop position on the Steering Column will release the inflator module and horn plunger allowing their removal. Start by detaching the Steering Wheel's electrical connector then unfasten the retaining nut which keeps the Steering Wheel coupled to its shaft. Use the Steering Wheel puller (J1859-A) together with the Steering Wheel puller adapter (J-36541-A) or Steering Wheel puller legs (J42578) to extract the Steering Wheel but maintain total avoidance of hammering against the Steering Column shaft to prevent plastic injection damages. Set the Steering Wheel onto its shaft by utilizing the retaining nut which must be secured with a torque setting of 41 nm (30 ft. Lbs.). Reconnect the Steering Wheel electrical connector before you add the horn plunger and mount the inflator module. Finally, enable the sir system.
- Q: How to replace the alternator on a 4.2L engine on Chevrolet Trailblazer?A:A driver should start the generator replacement on vehicles with 4.2l engines by disconnecting the battery negative cable followed by Drive Belt removal. Attack the engine lift hook by removing the bolt securing the air conditioning (A/C) line mounting bracket followed by the right engine lift hook bolts to extract the lift hook. Start by unbolting the generator from its mounting points using three bolts then disconnect the generator's battery positive cable's nut. Adhere the generator's battery positive cable using the provided nut by tightening it to 9 n.m (80 lb in). Fasten the generator using three bolts which require a torque of 50 n.m (37 lb ft). Screw in the engine lift hook with 2 bolts while tightening both fasteners to 50 n.m (37 lb ft). Fasten the a/c line bracket onto the lift hook then lock it with a bolt before tightening to 10 n.m (89 lb in). Complete the process by placing back the Drive Belt then reattach the battery negative cable.
- Q: How to replace the front bumper fascia on Chevrolet Trailblazer?A:The first step to change the front Bumper fascia of a trailblazer involves removing the grille along with two bolts (11589125) which maintain the upper fascia connection to the headlamp housing panel. Next, use push-pin (11589126) to disconnect the top of the fascia. You should put the vehicle on proper support before removing the 3 push-pins (11589127) that connect the fascia to its support rods. Remove the fog lamps and air deflector before unfastening the 4 push-pins (11589128) at the bottom of the fascia from the headlamp housing panel. You should pull the fascia straight forward from the wheelhouse opening by releasing the body side attachment tabs. When installing the fascia position the vehicle part with body side attachment tabs completely seated before attaching the 4 push-pins (11589128) to the headlamp housing panel base. Proceed by first attaching the 3 push-pins (11589127) which hook up the fascia to its support rods then fix the push-pins (11589127) and air deflector and the fog lamps assembly. Lower the vehicle then secure the 2 bolts (11589125) at the upper fascia section to the headlamp housing panel by tightening them to 10 n.m (89 lb in). Mount the push-pin (11589126) to retain the central section of the fascia upper edge before returning the grille.


