ChevyParts
My Garage
My Account
Cart
OEM 2002 Chevrolet Trailblazer Timing Chain
Engine Timing Chain- Select Vehicle by Model
- Select Vehicle by VIN
Select Vehicle by Model
orMake
Model
Year
Select Vehicle by VIN
For the most accurate results, select vehicle by your VIN (Vehicle Identification Number).
1 Timing Chain found


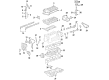
2002 Chevrolet Trailblazer Timing Chain Part Number: 12571725
$77.80 MSRP: $187.59You Save: $109.79 (59%)Ships in 1-2 Business DaysProduct Specifications- Other Name: Chain, Engine Timing
- Replaces: 24100062
- Item Weight: 1.40 Pounds
- Item Dimensions: 6.3 x 5.2 x 0.6 inches
- Condition: New
- Fitment Type: Direct Replacement
- SKU: 12571725
- Warranty: This genuine part is guaranteed by GM's factory warranty.
2002 Chevrolet Trailblazer Timing Chain
With a comprehensive array of OEM 2002 Chevrolet Trailblazer Timing Chain, from fuel pumps to door handles, our website is a one-stop-shop for your needs. All our genuine 2002 Chevrolet Trailblazer Timing Chain are backed by the manufacturer's warranty and are offered at competitive prices in the market. Rest assured, you can shop with complete confidence.
2002 Chevrolet Trailblazer Timing Chain Parts and Q&A
- Q: What tools are required to replace the timing chain, sprockets, or tensioner on 2002 Chevrolet Trailblazer?A: A Torque Angle Meter and Camshaft Holding Tool may be used to replace the timing chain, sprockets or tensioner. Disassemble camshaft cover and engine front cover and take the tension off the timing chain. Install and take out different parts in the correct order, aligning and tightening bolts. Lastly, fit engine front cover and camshaft cover.
Related 2002 Chevrolet Trailblazer Parts
 2002 Chevrolet Trailblazer Oil Filter
 2002 Chevrolet Trailblazer Oil Pan
 2002 Chevrolet Trailblazer Crankshaft
 2002 Chevrolet Trailblazer Crankshaft Gear
 2002 Chevrolet Trailblazer Crankshaft Seal
 2002 Chevrolet Trailblazer Cylinder Head
 2002 Chevrolet Trailblazer Intake Valve
 2002 Chevrolet Trailblazer Oil Pan Gasket
 2002 Chevrolet Trailblazer Rocker Arm
 2002 Chevrolet Trailblazer Timing Chain Guide
 2002 Chevrolet Trailblazer Timing Cover
 2002 Chevrolet Trailblazer Variable Timing Sprocket