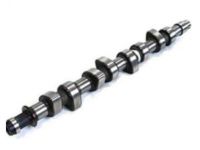
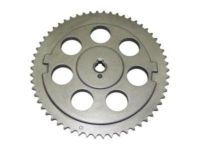
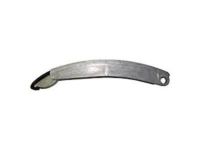
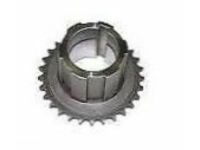
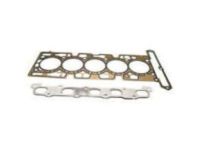
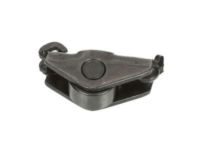
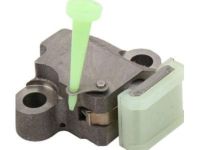
Make sure this part fits

GM 12571725
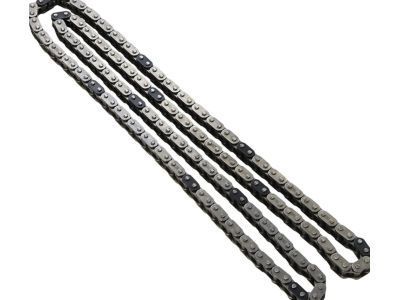
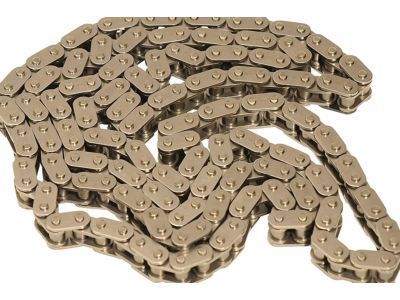
Timing Chain

2002-2012 GM

Customer Questions & Expert Answers (16)
GM 12571725 Timing Chain
  • Part Description
    Chain, Engine Timing
  • Replaces
    24100062
  • Manufacturer
    General Motors
Make sure this part fits
$90.75 MSRP: $155.86
You Save: $65.11 (42%)
Ships in 1-2 Business Days
1
ADD TO CART
  • Related Parts
  • Product Specifications
  • Vehicle Fitment
  • Customer Questions & Expert Answers
  • Product Specifications

    BrandGenuine GM
    Manufacturer Part Number12571725
    Part DescriptionChain, Engine Timing
    Item Dimensions6.3 x 5.2 x 0.6 inches
    Item Weight1.40 Pounds
    ConditionNew
    Fitment TypeDirect Replacement
    Replaces24100062
    ManufacturerGeneral Motors
    SKU12571725
    WarrantyThis genuine GM part is guaranteed by GM's factory warranty.
    Shipping & ReturnShipping Policy Return Policy
    Warning: California's Proposition 65
  • Vehicle Fitment

    Year Make Model Trim Engine
    2004-2007 Buick RainierCXL, CXL Plus6 Cyl 4.2 L GAS
    2004-2012 Chevrolet ColoradoBase, LS, LT, Sport, Sport LS, WT, Z71, Z71 LS, Z85, Z85 LS4 Cyl 2.8 L GAS, 4 Cyl 2.9 L GAS, 5 Cyl 3.5 L GAS, 5 Cyl 3.7 L GAS
    2002-2009 Chevrolet TrailblazerBase, LS, LT, LTZ, North Face6 Cyl 4.2 L GAS
    2002-2006 Chevrolet Trailblazer EXTLS, LT, North Face6 Cyl 4.2 L GAS
    2004-2012 GMC CanyonSL, SLE, SLT, WT, Z71 Fleet, Z71 SL, Z71 SLE, Z85 SL, Z85 SLE4 Cyl 2.8 L GAS, 4 Cyl 2.9 L GAS, 5 Cyl 3.5 L GAS, 5 Cyl 3.7 L GAS
    2002-2009 GMC EnvoySLE, SLT6 Cyl 4.2 L GAS
    2002-2006 GMC Envoy XLSLE, SLT6 Cyl 4.2 L GAS
    2004-2005 GMC Envoy XUVSLE, SLT6 Cyl 4.2 L GAS
    2006-2010 Hummer H3Base, X5 Cyl 3.5 L GAS, 5 Cyl 3.7 L GAS
    2002-2004 Oldsmobile BravadaBase6 Cyl 4.2 L GAS
  • Customer Questions & Expert Answers

    Q:
    Is this 12571725 designed for my car? Posted by ChevyPartsGiant Specialist
    A:
    Please Select Your Vehicle model to see if part number 12571725 is suitable before ordering.
    Posted by ChevyPartsGiant Specialist
    Q:
    What tools are required to replace the timing chain, sprockets, or tensioner on Buick Rainier? Posted by Customer
    A:
    The tools with which it is necessary to replace the Timing Chain, sprockets, or tensioner are: torque angle meter (J 36660-A) and camshaft holder tool (J 44221). Take the camshaft cover and the engine front cover off as the first step. Release tension on the Timing Chain by rolling the tensioner shoe in and insert a tee into the tensioner to lock the shoe there. Throw the top chain guide bolts and the top chain guide, along with the exhaust camshaft position actuator bolt and actuator, the intake camshaft sprocket bolt and sprocket, the Timing Chain, and the crankshaft sprocket. Then, take out the cylinder head access hole plugs, Timing Chain tensioner shoe bolt, Timing Chain tensioner shoe, Timing Chain tensioner guide bolts, guide, Timing Chain tensioner bolts and the tensioner. For the installation, secure the Timing Chain tensioner with bolts which should be tightened to 25 n.m (18 lb ft), before you can install the Timing Chain tensioner guide and shoe that should be tightened at 10 n.m (89 lb in) and 26 n.m (19 lb ft). Fasten the cylinder holes access plugs, tightening them to the limit of 5 n.m (44 lb in). Use the camshaft holding tool (J 44221) position the camshaft flats up and number 1 piston on tdc and install the crankshaft sprocket. Install the intake camshaft sprocket into the Timing Chain and fit in the head such that the dark link came into contact with the timing score on the sprocket and fed the chain down through the head. Mount the Timing Chain into the crankshaft sprocket making sure that the dark link goes in direction with the timing mark. Mount the intake camshaft sprocket onto the intake camshaft and thereafter, washer and bolt. Put the exhaust camshaft actuator in the Timing Chain with the dark piece and the timing mark. Then put the actuator on the exhaust camshaft making sure that it is fully advanced during the process. Tighten the exhaust camshaft actuator bolt to 25 n.m (18 lb ft) for one turn and finally use the torque angle meter (J 36660-A) with an additional 135 degrees. Tighten the intake camshaft sprocket bolt to a total angle of 20 n.m (15 ft lb) on the first pass and additional 100 degrees on the second one with the use of the torque angle meter (J 36660-A). Remove the tee from the Timing Chain tensioner, the camshaft holding tool (J 44221), making sure that the dark lines of the chain fuck together with the marks of the sprockets. Lastly, fit the top chain guide with threadlock in bolt threads and torque the top chain guide bolts to 10 n.m (89 lb in) and refit the engine front cover and camshaft cover.
    Posted by ChevyPartsGiant Specialist
    Q:
    How to replace the timing chain and sprockets on Chevrolet Colorado? Posted by Customer
    A:
    Start the repair by getting together these essential tools: a set of tools needed includes camshaft holding tool (J 44221) alongside angle meter (J 45059). Camshaft holding tool (J 44221) and angle meter (J 45059). Begin by removing the #1 cylinder spark plug, camshaft cover, camshaft position (CMP) sensor, and engine front cover. Rotate the Crankshaft clockwise until the #1 piston is at top dead center (TDC) on the compression stroke, ensuring the word delphi on the exhaust camshaft position actuator is parallel with the cylinder head to cam cover mating surface. Position the camshaft holding tool (J 44221) behind the camshafts then release Timing Chain tension through the tensioner shoe's inward motion while placing a tee into the tensioner for maintenance. Remove and discard the exhaust camshaft position actuator bolt then discard the actuator followed by the intake camshaft sprocket bolt and the intake camshaft sprocket. Take off the Timing Chain and Crankshaft sprocket. For installation, ensure the #1 piston is at tdc with the Crankshaft Timing Chain sprocket pin straight up. The first installation step involves fitting the Crankshaft sprocket followed by the intake camshaft sprocket. At this point align the dark link portion of the Timing Chain with the intake camshaft sprocket timing mark. Slide the Timing Chain through the cylinder head opening after positioning it on the Crankshaft sprocket and align dark link with timing mark. After installing the intake camshaft onto the sprocket, users should add the new intake camshaft sprocket bolt and apply torque of 20 n.m (15 lb ft) while using the angle meter (J 45059) to achieve another 100 degrees of tightening. Perform the following steps before installing the exhaust camshaft actuator: advance the camshaft actuator to its fullest position and line up the dark link with the timing mark on the actuator sprocket. Install the exhaust camshaft actuator to the exhaust shaft using a 25 mm (1 in) wrench on the camshaft hex for alignment purposes. Secure the component with a new bolt and tighten to 25 n.m (18 lb ft) while also adding 135 degrees using the angle meter (J 45059). Use a new bolt to fix the Timing Chain Tensioner confirmation tee. After removing the camshaft holding tool (J 44221) place the dark links directly on the sprocket marks. Finally, reinstall the engine front cover, camshaft position (CMP) sensor, camshaft cover, and #1 cylinder spark plug.
    Posted by ChevyPartsGiant Specialist
    Q:
    How to replace the camshaft timing chain and sprocket on Chevrolet Colorado? Posted by Customer
    A:
    To replace the Camshaft Timing Chain and sprocket, begin by removing the #1 cylinder spark plug, the Camshaft cover, the Camshaft position (CMP) sensor, and the engine front cover. Rotate the Crankshaft clockwise until the #1 piston is at top dead center (TDC) on the compression stroke. Use Camshaft holding tool (J 44221) behind camshafts to release Timing Chain tension through tensioner shoe movement followed by shoe stabilization with a tee. Disassemble the vehicle by removing the exhaust Camshaft position actuator bolt then discarding the actuator followed by the intake Camshaft sprocket bolt then its sprocket before removing the Timing Chain and Crankshaft sprocket. For installation, ensure the #1 piston is at tdc with the Crankshaft sprocket pin straight up. Begin installation by mounting the Crankshaft sprocket and then the intake Camshaft sprocket. Ensure proper alignment occurs between the dark link Timing Chain segment and the intake Camshaft sprocket timing mark. Through the cylinder head opening feed the Timing Chain into position with the dark link facing the timing mark of the Crankshaft sprocket. Use the angle meter (J 45059) while installing a new intake Camshaft sprocket bolt to apply 80-degree torque in addition to 20 nm (15 lb ft). Before placing the exhaust Camshaft actuator in position advance the Camshaft actuator fully while synchronizing the dark link with the timing mark that appears on the actuator sprocket. To align the Camshaft use a 25 mm (1 in) wrench on its hex while installing the actuator onto the exhaust Camshaft with a new bolt tightened to 25 nm (18 lb ft) along with a 135-degree turn using an angle meter (J 45059). First remove the tee from the Timing Chain Tensioner after uninstalling the Camshaft holding tool (J 44221) and confirm that Timing Chain dark links match sprocket marks. Finally, reinstall the engine front cover, the Camshaft position (CMP) sensor, the Camshaft cover, and the #1 cylinder spark plug.
    Posted by ChevyPartsGiant Specialist
    Q:
    How to replace the camshaft timing chain, sprocket, and tensioner on Chevrolet Trailblazer? Posted by Customer
    A:
    To replace the camshaft Timing Chain, sprocket, and tensioner, start by removing the camshaft cover and the engine front cover. Remove tension from the Timing Chain by shifting the tensioner shoe toward, and fasten it with a tee. Next, take the exhaust camshaft position actuator bolt and the actuator out, then take out the intake camshaft sprocket bolt, and sprocket, and the s chain and crankshaft sprocket. Remove the cylinder head access hole plugs, tightening the Timing Chain Tensioner shoe bolt and shoe, the tensioner guide bolts, the guide, the tensioner bolts, and the tensioner. For installing, one would have to tighten the Timing Chain Tensioner with a bolt spare count to 25 nm (18 lb ft), tighten the tensioner guide with a bolt spore count of 10 nm (89 lb in) and lastly tighten the tension snow bolt spared count of 26 nm (19 lb ft). Install the cylinder head access hole plugs with a torque of 5 nm (44 lb in). The camshaft holding tool (J 44221) is to be used with the camshaft flats facing up, and the number 1 piston on top dead center, with the crank at 12 o'clock. Nonetheless, install the crankshaft sprocket and the intake camshaft sprocket into the Timing Chain, aligning the dark link of such Timing Chain with the timing mark on the part of the intake camshaft sprocket. Feed the Timing Chain down the opening in the head, put it onto the crankshaft sprocket, and line up the dark link with the timing mark. Rotation and holding the camshaft hex for alignment might require the removal of the camshaft holding tool (J 44221). Mount the intake camshaft with the intake camshaft sprocket, sprocket washer, and bolt. Mount the exhaust camshaft actuator into the Timing Chain, and ensure that the dark link is aligned with the timing mark on the actuator and then mount the actuator onto the exhaust camshaft. You are to apply a pulling force on the exhaust camshaft actuator bolt so as to apply a torque that is stated in the text to a value of 25 nm (18 lb ft) during the first pass and a torque angle from the latter torque angle meter (J 36660-A) during the final pass subject to value that 135 degree. It is important to tighten the intake camshaft sprocket bolt to 20 nm (15 ft. Lb.) on the first pass and then an additional 100 degrees on the final pass using the torque angle meter (J 36660-A). Take off the tee of Timing Chain Tensioner to restore tension, remove the camshaft holding tool (J 44221). Make sure the dark lines on the chain align the marks on the sprockets, and install the engine front cover and the camshaft cover.
    Posted by ChevyPartsGiant Specialist
    Q:
    How to Service and Repair the Timing Chain on GMC Canyon? Posted by Customer
    A:
    To replace the Timing Chain and sprockets, one should start by removing the Camshaft cover followed by the remove the exhaust Camshaft position (CMP) sensor and the intake Camshaft position (CMP) sensor and finally, it is advised to remove the engine front cover. Rotate the Crankshaft clockwise until the #1 Piston is at top dead center (TDC) on the compression stroke, ensuring the word delphi on the exhaust Camshaft position actuator is parallel with the cylinder head to cam cover mating surface. Attach the j44221 Camshaft holding tool (J44221) to the rear of camshafts; loosen the tension on the Timing Chain by sliding the tensioner shoe in, and slip a tee in the tensioner to keep the shoe in place. Extract and throw away the exhaust Camshaft position actuator bolt, intake Camshaft sprocket bolt, and intake Camshaft sprocket, then remove the exhaust Camshaft position actuator. Then, take out the Timing Chain and the Crankshaft sprocket, clean and check the Timing Chain and sprocket. For installation, ensure the #1 Piston is at tdc, install the Crankshaft sprocket onto the Crankshaft snout, and align the darkened link of the Timing Chain with the timing mark on the intake Camshaft sprocket. Feed the Timing Chain through the holes in the cylinder head while installing it on the Crankshaft sprocket aligning the dark link to the timing mark. Put the output Camshaft sprocket into position on the output (exhaust) Camshaft, the book shows the sprockets installed upside down compared to everything else in this job. The cam drive through is a series of similar looking links of chain bracketed in, and in the book, there is one you install here later. Replace a new intake cam sprocket bolt tighten to 20 nm (15 ft. Lbs.) and position it with the j 45059 angle meter (J 45059) by 100 degrees. Make sure the Camshaft actuator is fully advanced prior to installing the exhaust Camshaft actuator, aligning dark link of the Timing Chain to timing mark on the exhaust Camshaft position actuator sprocket. Mount the exhaust Camshaft actuator on the exhaust Camshaft, fasten it with a new bolt tightened to 25 nm (18 ft. Lbs.) and using the j 45059 to further turn it 135 degrees. Take off the tee from the Timing Chain Tensioner to restore tension, remove the j 44221 from camshafts, and see if the dark links on the Timing Chain fit the marks on the sprockets. Lastly, replace the engine front cover, intake and exhaust Camshaft position (CMP) sensors and such Camshaft cover.
    Posted by ChevyPartsGiant Specialist
    Q:
    What tools are required to replace the timing chain, sprockets, or tensioner on GMC Envoy? Posted by Customer
    A:
    The Timing Chain, sprockets, or tensioner replacement will require the following tools: torque angle meter (J 36660-A) and camshaft holding tool (J 44221). First, remove the camshaft cover and the engine front cover. Relax the tension for Timing Chain by moving the shoe of the tensioner inward and position a tee at the tensioner to hold the shoe back. Displace the top chain guide bolts and top chain guide, then exhaust camshaft position actuator bolt and actuator, then intake camshaft sprocket bolt and sprocket. Then strip the Timing Chain off, crankshaft sprocket, cylinder head access hole plugs, Timing Chain Tensioner shoe bolt, tensioner shoe, Timing Chain Tensioner guide bolts, Timing Chain Tensioner guide, Timing Chain Tensioner bolts and Timing Chain Tensioner. For installation secure the Timing Chain Tensioner by bolting it at 25 nm (18 ft. Lbs.) after which secure the Timing Chain Tensioner guide and shoe at 10 nm (89 inch lbs.) and 26 nm (19ft. Lbs.) respectively. Desociate the cylinder head access hole plugs, securing it using 5 nm (44 inch lbs.). Use the camshaft holding tool (J 44221) with camshaft flats up and running the number 1 piston is at top dead center and install the crankshaft sprocket as well as the intake camshaft sprocket into the Timing Chain making sure the dark link overlaps the timing marks. Feed the Timing Chain down through the head opening and pick it up to the crankshaft sprocket, aligning with the timing mark. Mount the intake camshaft sprocket on the intake camshaft with the washer/bolt, tighten the bolt to 20 nm (15 ft. Lbs.) then use torque angle meter (J 36660-A); an additional 100 degrees of torque. Install the exhaust camshaft actuator into the Timing Chain with the direction of the dark link proceeding in line with the timing mark and fasten it on the exhaust camshaft using the actuator bolt, screwing it initially to 25 nm (18 ft. Lbs) and then utilize the torque angle meter (J 36660-A) for another pass further by 135 degrees. Take off the tee from the Timing Chain Tensioner, and then camshaft holding tool (J 44221), keeping the dark lines on the chain in alignment with the marks on the sprockets. Finally, install top chain guide with threadlock gm p/n 12345496 on bolt threads, secure top chain guide bolts to 10 nm (89 inch lbs.), and replace the engine front cover and camshaft cover.
    Posted by ChevyPartsGiant Specialist
    Q:
    How to replace the timing chain and sprockets on GMC Canyon? Posted by Customer
    A:
    To replace the Timing Chain and sprockets, you should first remove the camshaft cover, then remove camshaft position (CMP) sensor and the engine front cover. Rotate the Crankshaft clockwise until the #1 Piston is at top dead center (TDC) on the compression stroke, ensuring the word delphi on the exhaust camshaft position actuator is parallel with the cylinder head to cam cover mating surface. The camshaft holding tool (J 44221) should be installed to the back of the camshafts, take the tension off of the Timing Chain by moving the tension shoe down and place a tee in the tensioner holding the shoe stationary. Remove and discard the exhaust camshaft position actuator bolt, take away the exhaust camshaft position actuator and the other intake camshaft sprocket bolt and finally the intake camshaft sprocket. Next, extract the Timing Chain, as well as the sprocket from the Crankshaft, then wash and examine the Timing Chain and the sprockets. For installation, ensure the #1 Piston is at tdc, then install the Crankshaft sprocket onto the Crankshaft snout. Mention the dark link of the Timing Chain with the timing of the intake camshaft according to the sprocket, allowing the chain down through the cylinder head to and attach it to the Crankshaft sprocket, align the dark link according to the timing. Mount the intake camshaft sprocket on the intake camshaft and fasten it using new bolt tightened to 20 nm (15 ft. Lbs) and then fasten it additional 100 degrees by using the angle meter (J 450.59). Make sure the camshaft actuator is advanced fully before you put the exhaust camshaft actuator in position, ensuring that you align the dark link with the timing mark of the actuator sprocket. Mount the exhaust cam actuator to the exhaust cam and bolt it with a new bolt that is tightened to 25 nm (18 ft. Lbs.)and then rotate the bolt an additional 135 degrees using the angle meter (J 450.59). Deny the tee from the Timing Chain tensioner in order to have a tension, next remove the camshaft holding tool (J 44221) from the camshafts. Make sure to align the dark links on the Timing Chain to the marks on the sprockets, and finally, attach the engine front cover, the camshaft position (CMP) sensor, and the camshaft cover.
    Posted by ChevyPartsGiant Specialist
    Q:
    What should be done after installing the timing chain tensioner for the 2006 Buick Rainier? Posted by Customer
    A:
    Install the cylinder head access hole plugs, tightening them to 5 Nm (44 inch lbs.).
    Posted by ChevyPartsGiant Specialist
    See expert answers on similar Timing Chain
    Q:
    What should be ensured before installation for the 2008 Chevrolet Colorado? Posted by Customer
    A:
    Ensure the #1 piston is at TDC with the crankshaft pin straight up.
    Posted by ChevyPartsGiant Specialist
    See expert answers on similar Timing Chain
    Q:
    What should be done after installing the Camshaft Holding Tool for the 2006 Chevrolet Colorado? Posted by Customer
    A:
    Release the tension on the timing chain by moving the tensioner shoe in, then place a tee into the tensioner to hold the shoe in place.
    Posted by ChevyPartsGiant Specialist
    See expert answers on similar Timing Chain
    Q:
    What should be done after installing the timing chain tensioner shoe for the 2002 Chevrolet Trailblazer? Posted by Customer
    A:
    Tighten its bolt to 26 Nm (19 ft. lbs.).
    Posted by ChevyPartsGiant Specialist
    See expert answers on similar Timing Chain
    Q:
    How should the cylinder head access hole plugs be installed for the 2004 Chevrolet Trailblazer? Posted by Customer
    A:
    Tighten to 5 Nm (44 inch lbs.).
    Posted by ChevyPartsGiant Specialist
    See expert answers on similar Timing Chain
    Q:
    What is the procedure for installing the crankshaft sprocket and intake camshaft sprocket for the 2003 GMC Envoy? Posted by Customer
    A:
    Install the crankshaft sprocket and the intake camshaft sprocket into the timing chain, aligning the dark link of the timing chain with the timing mark on the intake camshaft sprocket.
    Posted by ChevyPartsGiant Specialist
    See expert answers on similar Timing Chain
    Q:
    What is the first step to replace the camshaft timing chain and sprocket for the 2010 GMC Canyon? Posted by Customer
    A:
    Begin by removing the #1 cylinder spark plug, the camshaft cover, the camshaft position (CMP) sensor, and the engine front cover.
    Posted by ChevyPartsGiant Specialist
    See expert answers on similar Timing Chain
    Q:
    What is the torque specification for securing the timing chain tensioner for the 2008 GMC Envoy? Posted by Customer
    A:
    Secure the timing chain tensioner with bolts tightened to 25 N.m (18 lb ft).
    Posted by ChevyPartsGiant Specialist
    See expert answers on similar Timing Chain
    If you have any questions about this product, please don't hesitate to ask us. We will be happy to help you!

OEM GM 12571725, Excellent Performance and Perfect Fitment

To ensure reliability, purchase GM part # 12571725 Timing Chain. It is sometimes referred to as GM Timing Chain. Choosing OEM parts is the optimal decision for guaranteeing superior quality and perfect performance. These components undergo stringent quality checks and are carefully constructed to comply with GM's factory specifications, ensuring a smooth installation process.

ChevyPartsGiant.com is a leading supplier of genuine GM parts such as GM 12571725 Timing Chain. Our website boasts an extensive inventory of OEM GM parts, available at highly competitive prices in the market. Should you require any new genuine GM parts, rest assured we will deliver them swiftly and efficiently to your doorstep. Furthermore, all our parts come with the assurance of a manufacturer's warranty. For detailed Chevy parts information, click here.
Choose ChevyPartsGiant for discounted prices, exceptional service and fast delivery