ChevyParts
My Garage
My Account
Cart
OEM 2004 Chevrolet Trailblazer Timing Chain
Engine Timing Chain- Select Vehicle by Model
- Select Vehicle by VIN
Select Vehicle by Model
orMake
Model
Year
Select Vehicle by VIN
For the most accurate results, select vehicle by your VIN (Vehicle Identification Number).
1 Timing Chain found


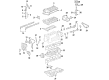
2004 Chevrolet Trailblazer Timing Chain Part Number: 12571725
$77.80 MSRP: $187.59You Save: $109.79 (59%)Ships in 1-2 Business DaysProduct Specifications- Other Name: Chain, Engine Timing
- Replaces: 24100062
- Item Weight: 1.40 Pounds
- Item Dimensions: 6.3 x 5.2 x 0.6 inches
- Condition: New
- Fitment Type: Direct Replacement
- SKU: 12571725
- Warranty: This genuine part is guaranteed by GM's factory warranty.
2004 Chevrolet Trailblazer Timing Chain
With a comprehensive array of OEM 2004 Chevrolet Trailblazer Timing Chain, from fuel pumps to door handles, our website is a one-stop-shop for your needs. All our genuine 2004 Chevrolet Trailblazer Timing Chain are backed by the manufacturer's warranty and are offered at competitive prices in the market. Rest assured, you can shop with complete confidence.
2004 Chevrolet Trailblazer Timing Chain Parts Questions & Experts Answers
- Q: What tools are required to replace the timing chain, sprockets, or tensioner on 2004 Chevrolet Trailblazer?A: To replace the Timing Chain, sprockets, or tensioner, the following tools are required: torque angle meter (J 36660-A) and camshaft holding tool (J 44221). Start the procedure by removing the camshaft cover along with the engine front cover. Crank the tensioner shoe in and slide a tee between the tensioner to keep the shoe maintained in this position. Start by taking out the top chain guide bolts and the top chain guide before continuing with the exhaust camshaft position actuator bolt and actuator and the intake camshaft sprocket bolt and sprocket. Begin by unpacking these components from the engine: Timing Chain, crankshaft sprocket, cylinder head access hole plugs, Timing Chain tensioner shoe bolt, tensioner shoe, Timing Chain tensioner guide bolts, Timing Chain tensioner guide, Timing Chain tensioner bolts, and Timing Chain Tensioner. For installation, secure the Timing Chain Tensioner with bolts, tightening them to 25 nm (18 ft. Lbs.), then install the Timing Chain Tensioner guide and shoe, tightening to 10 nm (89 inch lbs.) and 26 nm (19 ft. Lbs.) respectively. Install and tighten cylinder head access hole plugs to 5 nm (44 inch lbs.). Position the camshaft holding tool (J 44221) so its flats face upwards while keeping the number 1 cylinder at top dead center before you install the crankshaft sprocket. Feed the Timing Chain through the head opening with the dark link aligned to the intake camshaft sprocket timing mark. Fit the Timing Chain onto the crankshaft sprocket but ensure the timing mark aligns with the dark link. The technician might need to uninstall the camshaft holding tool (J 44221) to manually rotate the camshaft for pin alignment with the camshaft sprocket. Begin by placing the intake camshaft sprocket on its appropriate position on the intake camshaft before adding the washer and bolt. To install the exhaust camshaft actuator onto its position, first connect the Timing Chain to match the dark link with the timing mark and then install the actuator on top of the exhaust camshaft by rotating it clockwise before bolt tightening. Perform a clockwise rotation of the camshaft actuator until the component stops to achieve maximum advanced position for safe engine installation. Tighten the exhaust camshaft actuator bolt to 25 nm (18 ft. Lbs.) use a torque angle meter (J 36660-A) for the second pass to produce an additional 135° of rotation. Tighten the intake camshaft sprocket bolt to 20 nm (15 ft. Lbs.) first tighten the bolt to 25 nm (18 ft. Lbs.) with a standard torque wrench then finish tightening the bolt to an additional 100° using the torque angle meter (J 36660-A). After removing the tee you can restore tension to the Timing Chain before taking out the camshaft holding tool (J 44221). The dark lines of the chain should match the sprocket marks before installing the top chain guide using threadlock gm p/n 12345496 on the threaded bolt points where you secure it with 10 nm (89 ft. Lbs.) torque. Finish the installation process by putting on the engine front cover alongside the camshaft cover.
Related 2004 Chevrolet Trailblazer Parts
 2004 Chevrolet Trailblazer Oil Filter
 2004 Chevrolet Trailblazer Oil Pan
 2004 Chevrolet Trailblazer Crankshaft
 2004 Chevrolet Trailblazer Crankshaft Gear
 2004 Chevrolet Trailblazer Crankshaft Seal
 2004 Chevrolet Trailblazer Cylinder Head
 2004 Chevrolet Trailblazer Intake Valve
 2004 Chevrolet Trailblazer Oil Pan Gasket
 2004 Chevrolet Trailblazer Rocker Arm
 2004 Chevrolet Trailblazer Timing Chain Guide
 2004 Chevrolet Trailblazer Timing Cover
 2004 Chevrolet Trailblazer Variable Timing Sprocket