ChevyParts
My Garage
My Account
Cart
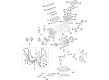
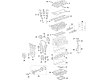
OEM Chevrolet Timing Chain
Engine Timing Chain- Select Vehicle by Model
- Select Vehicle by VIN
Select Vehicle by Model
orMake
Model
Year
Select Vehicle by VIN
For the most accurate results, select vehicle by your VIN (Vehicle Identification Number).
66 Timing Chains found


Chevrolet Timing Chain Part Number: 12458911
$56.00 MSRP: $87.74You Save: $31.74 (37%)Product Specifications- Other Name: Chain Kit, Engine Timing; Timing Gear Set; Timing Drive Package


Chevrolet Timing Chain Part Number: 10114177
$112.41 MSRP: $176.87You Save: $64.46 (37%)Ships in 1-3 Business DaysProduct Specifications- Other Name: Chain, Engine Timing


Chevrolet Timing Chain Part Number: 55569250
$47.81 MSRP: $74.88You Save: $27.07 (37%)Ships in 1-3 Business DaysProduct Specifications- Other Name: Chain, Engine Timing

Chevrolet Chain Part Number: 55573876
$15.36 MSRP: $24.05You Save: $8.69 (37%)Ships in 1-3 Business DaysProduct Specifications- Other Name: Chain Assembly-Oil Pump Drive; Chain, Engine Oil Pump

Chevrolet Timing Chain Part Number: 24506090
$69.34 MSRP: $118.06You Save: $48.72 (42%)Ships in 1-2 Business DaysProduct Specifications- Other Name: Chain, Engine Timing

Chevrolet Chain Part Number: 12668567
$48.85 MSRP: $76.52You Save: $27.67 (37%)Ships in 1-3 Business DaysProduct Specifications- Other Name: Chain Assembly-Oil Pump Drive; Chain, Engine Oil Pump
Chevrolet Chain Part Number: 12666093
$34.07 MSRP: $53.38You Save: $19.31 (37%)Ships in 1-3 Business DaysProduct Specifications- Other Name: Chain Assembly-Oil Pump Drive; Chain, Engine Oil Pump

Chevrolet Timing Chain Part Number: 91177420
$63.77 MSRP: $99.89You Save: $36.12 (37%)Ships in 1-3 Business DaysProduct Specifications- Other Name: Chain, Timimg 1ST (On Esn); Chain, Engine Timing
- Replaces: 91174420

Chevrolet Timing Chain Part Number: 14022647
$87.49 MSRP: $148.95You Save: $61.46 (42%)Product Specifications- Other Name: Chain, Engine Timing
Chevrolet Timing Chain Part Number: 12671642
$50.22 MSRP: $78.67You Save: $28.45 (37%)Ships in 1-3 Business DaysProduct Specifications- Other Name: Chain, Engine Timing
Chevrolet Chain Part Number: 12656073
$21.47 MSRP: $33.64You Save: $12.17 (37%)Ships in 1-3 Business DaysProduct Specifications- Other Name: Chain Assembly-Oil Pump Drive

Chevrolet Timing Chain Part Number: 25190533
$109.39 MSRP: $171.35You Save: $61.96 (37%)Ships in 1-2 Business DaysProduct Specifications- Other Name: Chain, Engine Timing
- Replaces: 25187088
Chevrolet Timing Chain Part Number: 12704385
$26.84 MSRP: $42.03You Save: $15.19 (37%)Ships in 1-3 Business DaysProduct Specifications- Other Name: Chain, Engine Timing

Chevrolet Timing Chain Part Number: 12694716
$39.97 MSRP: $62.63You Save: $22.66 (37%)Ships in 1-3 Business DaysProduct Specifications- Other Name: Chain, Engine Timing; Secondary Chain; Chain; Chain, Engine Oil Pump
- Replaces: 12647896
Chevrolet Chain Part Number: 12684151
$37.88 MSRP: $59.32You Save: $21.44 (37%)Ships in 1-3 Business DaysProduct Specifications- Other Name: Chain, Engine Crankshaft And Camshaft Balancer; Balance Shaft Chain; Timing Chain; Chain, Engine Crankshaft

Chevrolet Timing Chain Part Number: 55515943
$30.22 MSRP: $47.32You Save: $17.10 (37%)Product Specifications- Other Name: Chain, Engine Timing
- Replaces: 55489217
Chevrolet Chain Part Number: 12663795
$45.94 MSRP: $71.96You Save: $26.02 (37%)Ships in 1-3 Business DaysProduct Specifications- Other Name: Chain, Engine Crankshaft And Camshaft Balancer; Balance Shaft Chain; Timing Chain


Chevrolet Timing Chain Part Number: 89060443
$104.13 MSRP: $163.10You Save: $58.97 (37%)Ships in 1-3 Business DaysProduct Specifications- Other Name: Chain Kit, Engine Timing; Timing Gear Set; Timing Drive Package

Chevrolet Chain Part Number: 12636528
$34.12 MSRP: $53.45You Save: $19.33 (37%)Ships in 1-3 Business DaysProduct Specifications- Other Name: Chain Assembly-Oil Pump Drive; Chain, Engine Oil Pump

Chevrolet Timing Chain Part Number: 55489211
$15.27 MSRP: $23.91You Save: $8.64 (37%)Ships in 1-3 Business DaysProduct Specifications- Other Name: Chain, Engine Timing
| Page 1 of 4 |Next >
1-20 of 66 Results
Chevrolet Timing Chain
Choose OEM Timing Chain, you're making the optimal decision for superior quality and perfect performance. You can feel confident because each component goes through stringent quality checks. Every part is carefully built to comply with Chevrolet's factory specifications. You'll enjoy a smooth, worry-free installation that fits just right. At ChevyPartsGiant.com, you'll find it easy to get top-quality OEM Chevrolet Timing Chain. You can shop at highly competitive prices and protect your budget. All our genuine Chevrolet parts include a dependable manufacturer's warranty. You'll also appreciate our straightforward return policy and swift delivery services for extra convenience.
Chevrolet Timing Chain Parts and Q&A
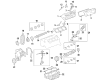
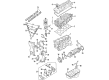
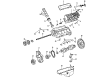
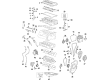
- Q: How to replace the camshaft timing chain and sprocket on Chevrolet Colorado?A:To replace the Camshaft Timing Chain and sprocket, begin by removing the #1 cylinder spark plug, the Camshaft cover, the Camshaft position (CMP) sensor, and the engine front cover. Rotate the Crankshaft clockwise until the #1 piston is at top dead center (TDC) on the compression stroke. Use Camshaft holding tool (J 44221) behind camshafts to release Timing Chain tension through tensioner shoe movement followed by shoe stabilization with a tee. Disassemble the vehicle by removing the exhaust Camshaft position actuator bolt then discarding the actuator followed by the intake Camshaft sprocket bolt then its sprocket before removing the Timing Chain and Crankshaft sprocket. For installation, ensure the #1 piston is at tdc with the Crankshaft sprocket pin straight up. Begin installation by mounting the Crankshaft sprocket and then the intake Camshaft sprocket. Ensure proper alignment occurs between the dark link Timing Chain segment and the intake Camshaft sprocket timing mark. Through the cylinder head opening feed the Timing Chain into position with the dark link facing the timing mark of the Crankshaft sprocket. Use the angle meter (J 45059) while installing a new intake Camshaft sprocket bolt to apply 80-degree torque in addition to 20 nm (15 lb ft). Before placing the exhaust Camshaft actuator in position advance the Camshaft actuator fully while synchronizing the dark link with the timing mark that appears on the actuator sprocket. To align the Camshaft use a 25 mm (1 in) wrench on its hex while installing the actuator onto the exhaust Camshaft with a new bolt tightened to 25 nm (18 lb ft) along with a 135-degree turn using an angle meter (J 45059). First remove the tee from the Timing Chain Tensioner after uninstalling the Camshaft holding tool (J 44221) and confirm that Timing Chain dark links match sprocket marks. Finally, reinstall the engine front cover, the Camshaft position (CMP) sensor, the Camshaft cover, and the #1 cylinder spark plug.
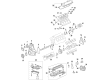
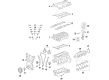
- Q: How to replace the timing chain and sprockets on Chevrolet S10?A:To replace the Timing Chain and sprockets, one has to remove the engine front cover and the Crankshaft position sensor reluctor ring. Install a 7/16-20 x 1 inch bolt into the end of the Crankshaft to rotate the engine. Make sure it is not the Crankshaft balancer bolt or more than 1 inch long as to not damage it. Turn the Crankshaft until there is a timing mark on both sprockets that match up and the number 4 cylinder is at the top dead center (TDC) of the compression stroke. Second, remove the camshaft sprocket bolts and then the camshaft sprocket and the camshaft Timing Chain, respectively. It is necessary to remove the Crankshaft sprocket using the Crankshaft gear remover (J 5825-A), and after that you should also remove the Crankshaft balancer key. After cleaning all components in cleaning solvent wiping with compressed air inspect cam shaft Timing Chain and sprockets for wear or damage. For installation, the Crankshaft balancer key should be inserted in the Crankshaft key way but should be parallel or minor inclined. Mount the keyway of Crankshaft sprocket aligned to balancer key and use the Crankshaft gear installer (J 5590) to install the Crankshaft sprocket. Mount the camshaft sprocket with its marking at the 6 o'clock position and the Crankshaft sprocket on the 12 o'clock position. Tighten the camshaft sprocket bolts to 25 nm (18 ft. Lbs.) and reinstall the Crankshaft position sensor reluctor ring, aligning the keyway up with the balancer key and utilizing the Crankshaft gear installer (J 5590) to push in on it up until it seated all the way on the Crankshaft. Lastly, unscrew the bolt from the Crankshaft and mount the engine front cover on.


Related Chevrolet Parts
 Chevrolet Oil Filter
 Chevrolet Crankshaft
 Chevrolet Timing Cover
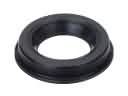 Chevrolet Camshaft Seal
 Chevrolet Engine Mount Bracket
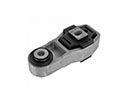 Chevrolet Engine Mount Torque Strut
 Chevrolet Intake Valve
 Chevrolet Motor And Transmission Mount
 Chevrolet Rocker Arm
 Chevrolet Rod Bearing
 Chevrolet Valve Cover Grommet
 Chevrolet Variable Timing Sprocket
Browse Chevrolet Timing Chain by Models
S10 Colorado C10 Tahoe Cruze Malibu Camaro Equinox Impala SS SSR Avalanche Silverado 1500 Silverado 2500 HD Caprice Cobalt Suburban Traverse Blazer HHR Sonic Tracker Volt El Camino K10 Spark Trax Trailblazer Astro Cavalier Corvette C20 Beretta C1500 C2500 C30 C3500 Celebrity City Express Corsica Express 1500 Express 2500 Express 3500 G10 G20 G30 K1500 K20 K2500 K30 K3500 K5 Blazer Lumina Monte Carlo Prizm S10 Blazer Uplander Venture Lumina APV Silverado 3500 Suburban 1500 Trailblazer EXT Avalanche 2500 C10 Suburban C1500 Suburban C20 Suburban C2500 Suburban Captiva Sport Cruze Limited Impala Limited K10 Suburban K1500 Suburban K20 Suburban K2500 Suburban R10 R10 Suburban R1500 Suburban R20 R20 Suburban R2500 R2500 Suburban R30 R3500 Silverado 1500 Classic Silverado 1500 LD Silverado 2500 HD Classic Silverado 3500 Classic Silverado 3500 HD Suburban 2500 Suburban 3500 HD V10 V10 Suburban V1500 Suburban V20 V20 Suburban V2500 Suburban V30 V3500