ChevyParts
My Garage
My Account
Cart
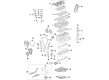
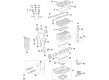
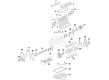
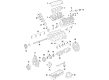
OEM Chevrolet Rod Bearing
Engine Connecting Rod Bearing- Select Vehicle by Model
- Select Vehicle by VIN
Select Vehicle by Model
orMake
Model
Year
Select Vehicle by VIN
For the most accurate results, select vehicle by your VIN (Vehicle Identification Number).
91 Rod Bearings found


Chevrolet Connecting Rod Bearing Part Number: 12643667
$10.51 MSRP: $17.32You Save: $6.81 (40%)Ships in 1-2 Business DaysProduct Specifications- Other Name: Bearing Kit, Engine Connecting Rod; Rod Bearing; Bearing; Bearings

Chevrolet Connecting Rod Bearing Part Number: 12657438
$12.31 MSRP: $19.55You Save: $7.24 (38%)Ships in 1-3 Business DaysProduct Specifications- Other Name: Bearing Kit, Connecting Rod; Bearing Set
- Replaced by: 12668645

Chevrolet Bearings Part Number: 19257826
$22.00 MSRP: $36.24You Save: $14.24 (40%)Product Specifications- Other Name: Bearing Kit, Connecting Rod; Rod Bearing; Bearing Kit, Engine Connecting Rod


Chevrolet Bearings, Black Part Number: 97386927
$27.31 MSRP: $42.77You Save: $15.46 (37%)Ships in 1-3 Business DaysProduct Specifications- Other Name: Bearing Kit, Engine Crankshaft Main; Main Bearing; Bearing Kit, Engine Crankshaft
- Replaces: 97250411


Chevrolet Connecting Rod Bearing Part Number: 12656818
$8.20 MSRP: $12.85You Save: $4.65 (37%)Ships in 1-3 Business DaysProduct Specifications- Other Name: Bearing Kit, Engine Connecting Rod; Rod Bearing; Bearings


Chevrolet Connecting Rod Bearing, Blue Part Number: 12625467
$21.92 MSRP: $34.33You Save: $12.41 (37%)Product Specifications- Other Name: Bearing, Engine Connecting Rod; Rod Bearing; Bearing

Chevrolet Connecting Rod Bearing Part Number: 12693566
$15.93 MSRP: $28.44You Save: $12.51 (44%)Product Specifications- Other Name: Bearing Kit, Engine Connecting Rod; Rod Bearing; Bearings
Chevrolet Connecting Rod Bearing Part Number: 12698279
$8.27 MSRP: $12.94You Save: $4.67 (37%)Ships in 1-3 Business DaysProduct Specifications- Other Name: Bearing Kit, Engine Connecting Rod; Rod Bearing
Chevrolet Bearing Part Number: 19317286
$16.95 MSRP: $26.55You Save: $9.60 (37%)Ships in 1-3 Business DaysProduct Specifications- Other Name: Bearing Kit, Connecting Rod; Rod Bearing; Bearing Kit, Engine Connecting Rod

Chevrolet Bearing Set Part Number: 93184458
$43.93 MSRP: $68.80You Save: $24.87 (37%)Ships in 1-3 Business DaysProduct Specifications- Other Name: Bearing Kit, Connecting Rod; Rod Bearing; Bearings; Bearing Kit, Engine Connecting Rod


Chevrolet Connecting Rod Bearing Part Number: 55490517
$7.83 MSRP: $12.28You Save: $4.45 (37%)Product Specifications- Other Name: Bearing-Connect Rod Upper; Rod Bearing; Bearing, Engine Connecting Rod
- Replaced by: 40009490
Chevrolet Connecting Rod Bearing Part Number: 55511850
$6.71 MSRP: $10.50You Save: $3.79 (37%)Product Specifications- Other Name: Bearing Kit, Engine Connecting Rod; Rod Bearing

Chevrolet Connecting Rod Bearing, Green Part Number: 12625468
$25.04 MSRP: $39.22You Save: $14.18 (37%)Ships in 1-3 Business DaysProduct Specifications- Other Name: Bearing, Engine Connecting Rod; Rod Bearing; Bearing

Chevrolet Bearing Set Part Number: 25182264
$4.59 MSRP: $7.18You Save: $2.59 (37%)Ships in 1-3 Business DaysProduct Specifications- Other Name: Bearing, Engine Connecting Rod; Rod Bearing
- Replaces: 96992635

Chevrolet Bearing Part Number: 55588335
$29.00 MSRP: $45.42You Save: $16.42 (37%)Ships in 1-3 Business DaysProduct Specifications- Other Name: Bearing Kit, Engine Connecting Rod; Rod Bearing

Chevrolet Rod Bearings Part Number: 89017700
$16.09 MSRP: $25.21You Save: $9.12 (37%)Ships in 1-2 Business DaysProduct Specifications- Other Name: Bearing Kit, Connecting Rod; Rod Bearing; Connecting Rod Bearing; Bearing Set; Bearings; Bearing Kit, Engine Connecting Rod; Bearing, Engine Connecting Rod
- Replaces: 12480819, 12537418, 89017565, 18005399
Chevrolet Bearing Part Number: 19317284
$16.95 MSRP: $26.55You Save: $9.60 (37%)Ships in 1-3 Business DaysProduct Specifications- Other Name: Bearing Kit, Connecting Rod; Rod Bearing; Bearing Kit, Engine Connecting Rod
Chevrolet Bearing Part Number: 19317285
$16.95 MSRP: $26.55You Save: $9.60 (37%)Ships in 1-3 Business DaysProduct Specifications- Other Name: Bearing Kit, Connecting Rod; Rod Bearing; Bearing Kit, Engine Connecting Rod
Chevrolet Bearing Part Number: 19317290
$16.95 MSRP: $26.55You Save: $9.60 (37%)Ships in 1-3 Business DaysProduct Specifications- Other Name: Bearing Kit, Connecting Rod; Rod Bearing; Bearing Kit, Engine Connecting Rod

Chevrolet Bearing Set Part Number: 93742708
$31.52 MSRP: $49.38You Save: $17.86 (37%)Ships in 1-3 Business DaysProduct Specifications- Other Name: Bearing Kit, Connecting Rod; Rod Bearing; Bearing Kit, Engine Connecting Rod
- Replaces: 93742277
| Page 1 of 5 |Next >
1-20 of 91 Results
Chevrolet Rod Bearing
Want to cut long-term maintenance and repair costs? Choose OEM Rod Bearing. Those parts deliver top durability you can trust. On our site, you'll find a huge catalog of genuine Chevrolet parts. Prices are unbeatable, so you can keep more in your pocket. Every OEM Chevrolet Rod Bearing includes a manufacturer's warranty. You can also get an easy return policy that keeps buying risk free. Fast delivery, get your car on the road quickly. It's simple to search, compare, and order. Stop guessing about quality or fit. Order today and save with parts that last.
Chevrolet Rod Bearing Parts Questions & Experts Answers
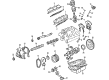
- Q: How to replace the connecting rod bearing on Chevrolet Impala?A:Begin the connecting Rod Bearing replacement by removing both the Oil Pan and all spark plugs from the cylinders that will receive service. Service the connecting rod while it sits at bottom dead center (BDC) position through Crankshaft rotation before removing connecting rod cap screws to take out connecting rod parts and lower connecting Rod Bearing but maintain bearing relationship for future installation. Take out the lower connecting Rod Bearing from the connecting rod cap assembly. Place the installing guide (J 41507) onto the connecting rod before using it to push the rod upward until you can reach the upper connecting Rod Bearing. Remove this bearing afterward. Measure the bearing clearance while inspecting the wiped-down bearings. During installation refrain from using tools to scrape, shim or file the bearing inserts and maintain clean and dry conditions for connecting rod cap bolt holes as well as mating surfaces. Dip connecting rod cap bolts into engine oil and apply clean engine oil to the bearing surface before installing the upper connecting Rod Bearing. Pull down Piston and connecting rod using the connecting rod assembly guide (J 41507) to remove upper connecting Rod Bearing and guide. Fit the lower connecting Rod Bearing to the connecting rod cap prior to setting the connecting rod cap into place. Fott the connecting rod cap bolts to 27 nm (20 ft. Lbs.) torque then apply the torque angle meter (J 45059) for an additional 50-degree bolt rotation. To check for binding use a prying motion to move the connecting rod while inspecting for necessary connecting rod cap bolt retightening. Check the connecting rod side clearance after which reinsert the spark plugs and Oil Pan before conducting tests for oil pressure and leak detection.
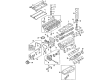
- Q: How to replace the rod bearing in an engine on Chevrolet Malibu?A:In order to assimilate the Piston, connecting rod, and bearing, remove the Oil Pan and Cylinder Head. For a ring ridge, turn the Crankshaft to the bottom of the stroke while the Piston is down; put a cloth on the top and use a ridge reamer to reset the ring ridge. Then turn Crankshaft to the top of the stroke take off the cloth and debris and you must mark the connecting rods and cap when reassembling. Then loosen the connecting rod nuts and cap, disposing of the bolts and nuts in the discard lot, and pull the connecting rod and Piston from the engine block using the connecting rod guides (J-43966-1). Clean with hot water and detergent or light honing and swab the cylinder bores with oil and clean dry cloth. For installation, oil the Piston and Piston rings, cylinder bore, and other bearing surfaces with engine oil and place the Piston in its original bore using the connecting rod guides (J-43966-1)and tap the top lighltly with a wooden hammer handle. Make sure the stamped mark on the Piston points forward to the front of the engine, press the Piston Ring compressor (EN-47836) against the engine block until all Piston rings have inserted into the cylinder bore, and install the connecting rod caps on the original rods, positioning the numbers that indicate marking. Replace new connecting rod bolts and nuts tightening them evenly to 25 nm (18 lb ft) bikini lifting car first pass then with the angle meter (J 45059) tighten it additionally 100 degrees on the ultimate pass. Check the connecting rod side clearance using a feeler gauge and it should be 0,070-0,370 mm (0,0027-0,0145 in). Finally, install the Cylinder Head and the Oil Pan also.
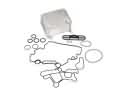
- Q: How to service and repair the connecting rod bearing on Chevrolet Tracker?A:To service and repair the connecting Rod Bearing, start by removing the Cylinder Head from the cylinder block, the Oil Pan, and the oil pump strainer. Use a ridge reamer to remove any ridge and carbon from the overall top of the cylinder bore to avoid damage to engine Piston ring lands. Mark each cylinder number on the pistons, connecting rods, and connecting Rod Bearing caps. Remove the 2 nuts and the connecting-Rod Bearing cap, then a piece of hose over connecting rod studs to protect the Crankshaft and the cylinder wall when this Piston and connecting rod are removed from the cylinder bore. Disassembling and inspecting the Piston and connecting rod assembly and choosing the suitable connecting Rod Bearing and Piston. Put on a light coat of clean engine oil on the pistons, the rings, the inside walls of the cylinder bore, connecting rod bearings, and crank pins. Install another piece of hose over the connecting rod studs once more, to prevent damage in the installation process. Ensure that the arrow mark on the top of the Piston is on the Crankshaft pulley side, then with the Piston ring compressor (J8037), compress the Piston rings and install the Piston and connecting rod into the cylinder bore. Tap on the Piston head with a hammer handle taking the Piston ring compressor (J8037) held against the top of the cylinder block so that all Piston rings are seated. Remove the hose pieces from the connecting rod bolts, and put on the connecting Rod Bearing cap, and fasten it with 2 nuts by tightening them on to 35 nm (26 ft. Lbs.). Lastly, reinstall the engine Oil Pan and the Cylinder Head onto the cylinder block.


Related Chevrolet Parts
 Chevrolet Engine Oil Cooler
 Chevrolet Oil Pan Gasket
 Chevrolet Crankshaft Seal
 Chevrolet Engine Mount Bracket
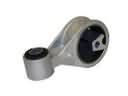 Chevrolet Engine Torque Strut Mount
 Chevrolet Motor And Transmission Mount
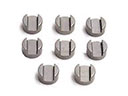 Chevrolet Rocker Guide
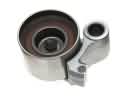 Chevrolet Timing Belt Idler Pulley
 Chevrolet Timing Belt Tensioner
 Chevrolet Valve Cover Grommet
 Chevrolet Valve Stem Oil Seal
 Chevrolet Variable Timing Sprocket
Browse Chevrolet Rod Bearing by Models
Nova S10 Colorado C10 Tahoe Cruze Malibu Camaro Equinox Impala SS SSR Avalanche Silverado 1500 Silverado 2500 HD Caprice Cobalt Suburban Traverse Blazer HHR Sonic Tracker Volt El Camino K10 Spark Trax Trailblazer Astro Cavalier Corvette C20 Aveo Beretta C1500 C2500 C30 C3500 Celebrity City Express Corsica Express 1500 Express 2500 Express 3500 G10 G20 G30 K1500 K20 K2500 K30 K3500 K5 Blazer Lumina Metro Monte Carlo Prizm S10 Blazer Sprint Uplander Venture Lumina APV Silverado 3500 Suburban 1500 Trailblazer EXT Avalanche 2500 Aveo5 C10 Suburban C1500 Suburban C20 Suburban C2500 Suburban Captiva Sport Cruze Limited Impala Limited K10 Suburban K1500 Suburban K20 Suburban K2500 Suburban R10 R10 Suburban R1500 Suburban R20 R20 Suburban R2500 R2500 Suburban R30 R3500 Silverado 1500 Classic Silverado 2500 HD Classic Silverado 3500 Classic Silverado 3500 HD Spectrum Suburban 2500 Suburban 3500 HD V10 V10 Suburban V1500 Suburban V20 V20 Suburban V2500 Suburban V30 V3500