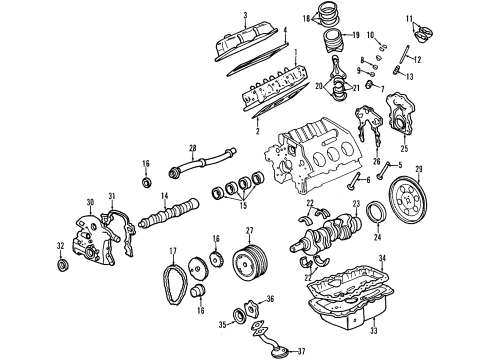
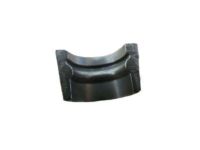
Make sure this part fits

GM 89017700
Rod Bearings

1984-2009 GM

Customer Questions & Expert Answers (15)
GM 89017700 Rod Bearings
  • Part Description
    Bearing Kit, Connecting Rod; Rod Bearing
  • Replaces
    12480819, 12537418, 89017565, 18005399
  • Manufacturer
    General Motors
Make sure this part fits
$15.78 MSRP: $24.72
You Save: $8.94 (37%)
Ships in 1-2 Business Days
1
ADD TO CART
  • Related Parts
  • Product Specifications
  • Vehicle Fitment
  • Customer Questions & Expert Answers
  • Product Specifications

    BrandGenuine GM
    Manufacturer Part Number89017700
    Part DescriptionBearing Kit, Connecting Rod; Rod Bearing
    Other NamesConnecting Rod Bearing; Bearing Set; Bearings; Bearing Kit, Engine Connecting Rod; Bearing, Engine Connecting Rod
    Item Dimensions4.0 x 4.0 x 2.2 inches
    Item Weight0.40 Pounds
    ConditionNew
    Fitment TypeDirect Replacement
    Replaces12480819, 12537418, 89017565, 18005399
    ManufacturerGeneral Motors
    SKU89017700
    WarrantyThis genuine GM part is guaranteed by GM's factory warranty.
    Shipping & ReturnShipping Policy Return Policy
    Warning: California's Proposition 65
  • Vehicle Fitment

    Year Make Model Trim Engine
    1992-1993, 1984-1990 Buick CenturyCustom, Estate, Estate Wagon, Limited, Olympia Limited, Special, T-Type6 Cyl 3.0 L GAS, 6 Cyl 3.3 L GAS, 6 Cyl 3.8 L GAS
    1984-1990 Buick ElectraLimited, Park Avenue, Park Avenue Ultra, T-Type6 Cyl 3.0 L GAS, 6 Cyl 3.8 L GAS, 6 Cyl 4.1 L GAS
    2005-2009 Buick LaCrosseCX, CXL6 Cyl 3.8 L GAS
    1992-2005, 1984-1986 Buick LeSabreCollector's Edition, Custom, Limited6 Cyl 3.0 L GAS, 6 Cyl 3.8 L GAS, 6 Cyl 4.1 L GAS
    2006-2008 Buick LucerneCX, CXL6 Cyl 3.8 L GAS
    1992-2005 Buick Park AvenueBase, Ultra6 Cyl 3.8 L GAS
    1988-1990 Buick ReattaBase6 Cyl 3.8 L GAS
    1992-2004, 1984-1987 Buick Regal25th Anniversary Edition, Base, Custom, GNX, Gran Sport, Grand National, GS, GSE, Limited, LS, LSE, Olympic Gold Edition, T-Type6 Cyl 3.8 L GAS, 6 Cyl 4.1 L GAS
    1995-1999, 1992-1993, 1984-1990 Buick RivieraBase, Luxury, T-Type6 Cyl 3.8 L GAS, 6 Cyl 4.1 L GAS
    1992-1993, 1986-1988 Buick SkylarkCustom, Gran Sport, Limited6 Cyl 3.0 L GAS, 6 Cyl 3.3 L GAS
    View More
  • Customer Questions & Expert Answers

    Q:
    Is 89017700 compatible with my car? Posted by ChevyPartsGiant Specialist
    A:
    Please Select Your Vehicle model to see if part number 89017700 is suitable before ordering.
    Posted by ChevyPartsGiant Specialist
    Q:
    How to replace the connecting rod bearing on Buick LeSabre? Posted by Customer
    A:
    To replace the connecting Rod Bearing, you should remove Oil Pan and the connecting rod caps, rotating the Crankshaft as needed for access. Check for the wear on the connecting rods and main bearing bores, and gouges, embedded foreign material, uneven side-to-side look, checking for bent Crankshaft or tapered bearing journals. Check outer surfaces for wear, overheating, and looseness, and the thrust surfaces for wear and grooving. Torque the bearing cap to spec, measure the bore for taper and out of round, and do not have these conditions. Examine the bearing cap bolts (1 and 2) and replace them if they are stretched by doing a comparison with new bolts. In order to identify the right way of replacing inserts size; takes the bearing clearance measure either by method a or method b, where method a is rated preferred for its reliability. Method a consists of using a micrometer to measure Crankshaft journal diameter then averaging them all and ensuring the bearing inserts are installed correctly and torqued to specification. Method b requires assembling the bearing insert with the Crankshaft, position the gaging plastic over the bearing width, position the bearing cap, tighten the bolt, take flattened gaging plastic measurements. For installation, verify that both bearing cap bolt holes and mating surfaces are clean and dry, submerge the bearing cap bolts in engine oil and insert the inserts in the bearing cap and engine block/conrolling rod making them protrude equally from the two sides. Apply gm approved lubricant to the thrust surface of the main bearing insert, lubricate the bearing surface with clean engine oil and insert the Crankshaft or connecting rod. Install the bearing cap by tapping it gently into place and tighten the bearing cap bolts to 27 nm (20 ft. Lbs.) using the torque angle meter (J 36660-A) an additional 50 degrees. Push in the Crankshaft thrust bearing with a wooden mallet, both inward and outward, check for binding in the connecting rod, measure the end play of the Crankshaft, and measure the side clearance of the connecting rod before refitting the Oil Pan.
    Posted by ChevyPartsGiant Specialist
    Q:
    How to replace the connecting rod bearing on Buick Park Avenue? Posted by Customer
    A:
    To replace the connecting Rod Bearing, take out the Oil Pan and the connecting rod caps while rotating the Crankshaft as needed for access. Check the connecting rods and main bearing bores for excessive wear, gouges, foreign material trapped and mismatched side-to-side wear, and test for a bent Crankshaft or tapered bearing jounals, if necessary. Check the outer surfaces for wear, overheat, and looseness or rotation. Measure the rubbed surfaces for wear and grooving, torque the bearing cap to specifications. Check boil to ensure, there are no taper and out of round. Check the bearing cap bolts (1 and 2) and replace all stretched ones against using new bolts. To ascertain the correct size of the replacement insert using the method of measurement, check the bearing clearance by either using method a or b, with method a being preferred for reliability. Method a consists of obtaining reading of the Crankshaft journal with a micrometer, averaging those and ensuring that the bearing inserts are correctly installed and torqued to specifications. Method b requires installing all bearing inserts and the Crankshaft and placing gauging plastic across the bearing width, seating the bearing cap and getting the flattened gauging plastic. For installation, use the j36660-a torque angle meter to make sure that the bearing cap bolt holes and the mating surfaces have no spots of dirt and water. Dip the bolts on the bearing cap in clean engine oil, insert the inserts in the bearing cap as well as the engine block or connecting rod making sure that the same have protruded on both side and the insert tags engaged. Apply gm approved lubricant to the thrust surf ace on the main bearing insert, lubricate the bearing surface with clean engine oil, and install the crank shaft or conecting rod. Gently tap the bearing cap into place with a suitable tool and install the bearing cap bolts tightening them to 27 nm (20 ft. Lbs.) and then using the j36660-a, tighten the bolts an additional 50 degrees. Therefore, seat the Crankshaft thrust bearing by tapping it in both directions by using a wooden mallet, check whether there is any binding in the connecting rod, measure the end play of the Crankshaft, measure the side clearance of the connecting rod, and finally, install the Oil Pan.
    Posted by ChevyPartsGiant Specialist
    Q:
    What additional engine repair information can be found for the service and repair of the connecting rod bearing on Buick LeSabre? Posted by Customer
    A:
    For information on repairing and servicing bearing on connecting rods, additional engine repair directions are available elsewhere. When an internal engine component is not given a special service procedure, it shows that the manufacturer has not prepared one. To do engine overhaul, important steps in unit repair include service operations, machining, cleaning, inspection and fitting, including boring and honing the cylinder, fitting connecting rod with bearings, crankshaft with bearings and camshaft bearings, disassembling the connecting rod and Piston, cylinder head, valve-related components and Oil Pump, fitting in Piston and rings and fixing thread damage, as well as valve and seat grinding tasks found during Cylinder Head assembly. Chain, belt and gears are the main parts in timing components service.
    Posted by ChevyPartsGiant Specialist
    Q:
    How to Service a Rod Bearing on Buick Regal? Posted by Customer
    A:
    In replacing the connecting Rod Bearing, first you will have to remove the Oil Pan and the Spark Plug(s) from the cylinder(s) being serviced. Has the position of the connecting rod to be serviced at bottom dead center (BDC) by rotating the Crankshaft, then take off the connecting rod cap bolts to remove the connecting rod cap together with the lower connecting Rod Bearing but remember to keep the bearings with the original connecting rod and cap for reassembling. Next, take out the lower connecting Rod Bearing from the connecting rod cap and compress the lower end of the connecting rod with the connecting rod assembly guide which is (J 41507). Through the use of the guide, push up the connecting rod and Piston for access to the upper connecting Rod Bearing; this should be dislodged. Clean off the oil from the bearings and check them, also measure the bearing clearance. For installation, oil the connecting rod cap bolts in clean engine oil, bear with clean engine oil. Install the upper connecting Rod Bearing, then use the connecting rod assembly guide (J 41507) to pull down the Piston, connecting rod, and upper connecting Rod Bearing before removing the guide.mount the lower connecting Rod Bearing onto the connecting rod cap, and the connecting rod cap, making sure that the connecting rod cap bolt holes and mating surfaces are clean and dry. Mount the connecting rod cap bolts, tightening them to 27 nm (20 ft. Lbs.) but using the electronic torque angle meter (J 36660-A) jogging them an additional 50 degrees. Examine binding by prying the connecting rod back and forth, if necessary, loose and retighten the connecting rod cap bolts. Measure the connecting rod side clearance, then re-install the Spark Plug(s) and the Oil Pan, then checking for oil pressure and leaks.
    Posted by ChevyPartsGiant Specialist
    Q:
    How to replace the connecting rod bearing on Buick Regal? Posted by Customer
    A:
    To get to the connecting Rod Bearing you have to first take off the Oil Pan and the Spark Plug(s) to the cylinder(s) being used. Put the connecting rod to be worked on at the bottom dead center by rotating the Crankshaft, then remove the connecting rod cap bolts and take off the connecting rod cap with the lower connecting Rod Bearing noting to retain the bearings with the original connecting rod and cap so that they can be reassembled together. Then, take out the lower conn. Rod bel lower conn. Rod cap, install conn. Rod assembl y guide (J41507), to conn. Rod & use conn. Rod ampion tool (J 47507) to push conn. Rod & piston up to reveal the upp. Conn. Rod-bel. Pull off the upper connecting Rod Bearing, wipe out the oil on the bearings and check them and measure the bearing clearance. Install the connecting rod cap. For installation, dip both the connecting rod cap bolts into clean engine oil and lubricate the bearing surface using clean engine oil. Install the upper connecting Rod Bearing, then use the connecting rod and piston tool (J 47507) to pull down the piston, connecting rod, and upper connecting Rod Bearing then removed the connecting rod assembly guide (J 41507). Mount the lower connecting rod to the connecting rod cap, and mount the connecting rod cap and the connecting rod cap bolts with a torque of 27 nm (20 ft. Lbs.) with the use of the electronic torque angle meter (J 36660-A) which will twist the bolts 50 degrees additional. Check for binding by prying the connecting rod in the back and forth direction; see if necessary and then loosen and retighten the connecting rod cap bolts. Check the connecting rod side clearance, then reinstall the Spark Plug(s) and the Oil Pan, and look for oil pressure and leaks.
    Posted by ChevyPartsGiant Specialist
    Q:
    What additional engine repair information is available for connecting rod bearing service and repair on Chevrolet Camaro? Posted by Customer
    A:
    For the repair and maintenance of connecting rod bearings, more information on engine repair is provided. When there is no specific procedure for service, that means the manufacturer did not provide one. These procedures usually help accomplish engine overhaul by cleaning, machining, inspections, service and joining necessary for that purpose such as cylinder boring, honing rods and bearings, fitting the Crankshaft and its bearings, replacing Camshaft bearings, disassembling the rod and Piston, disassembling the Cylinder Head and valve components, repairing threads and grinding the valves and seats. Timing components service is offered too.
    Posted by ChevyPartsGiant Specialist
    Q:
    How to replace the connecting rod bearing on Chevrolet Impala? Posted by Customer
    A:
    To dismantle the connecting Rod Bearing one will need to collect the following tools: connecting rod bolt guide set (J 5239), torque angle meter (J 36660-A), cylinder bore ridge reamer (J 24270). Start by removing the Oil Pan, and Oil Pump off the Crankshaft oil deflector. Rotate the Crankshaft together with the Piston and rod assembly to be serviced to bottom dead center (BDC), of course making sure that match marks on the connecting rod and caps are used. Remove nuts of connecting rods, cap, and also lower connecting rods bearing with caution and also install thread protector to prevent Crankshaft journal damage. Replace the lower Piston, upper connecting Rod Bearing, then push the Piston and connecting rod up the cylinder to access the top of the Piston and bolt what's called the tope Piston before installing lower Piston, lower Piston, back bearing, upper Rod Bearing, new Piston browning up from bottom, and reverse all the steps. Clean off oil from the connecting rod bearings and Crankshaft journal, then check all components. For installation, oil the top connecting Rod Bearing with new engine oil and use the j 5239 in lowering the Piston and rod assembly to crank. Install the lower connecting Rod Bearing in the cap, oil it, and install the connecting rod cap and nuts with proper torque. It is also recommended to measure the connecting rod side clearance and install Crankshaft oil deflector, Oil Pump, and Oil Pan then lower the vehicle after installation. Put on new engine oil on the Piston, rings, cylinder bore, and bearing surfaces; using the Piston ring compressor (J 8037), compress the Piston rings and fit the Piston to its original bore. Follow similar ease with the installation of the connecting rod to make sure that any component is tightened and checked for any problem before reassembling the engine.
    Posted by ChevyPartsGiant Specialist
    Q:
    How to replace the connecting rod bearing on Chevrolet Monte Carlo? Posted by Customer
    A:
    In order to replace the connecting Rod Bearing, first, remove the Oil Pan and the sparking plugs from the serviced cylinders. Position the connecting rod to be serviced at bottom dead center (BDC) through rotating the Crankshaft, then remove the bolt for Oil Pump, the Oil Pump and Oil Pump driveshaft. Now unfasten the Crankshaft oil deflector nuts and Crankshaft oil deflector, after which remove the connecting rod cap nuts, connecting rod cap and the lower connecting Rod Bearing while retaining the original bearings with the original connecting rod and cap for reassembly. Now pull out the lower connecting Rod Bearing from the connecting rod cap; then insert the connecting rod bolt guide set (J5239) to the connecting rod and turn it while pushing up to locate the upper connecting Rod Bearing which also needs to be removed. Discharge the oil from the bearings and look for its condition, and check the bearing clearance. Use clean engine oil to lubricate the bearing surface before you install the upper, connecting Rod Bearing. Pull down the Piston along with connecting rod and upper connecting Rod Bearing with the help of connecting rod bolt guide set (J 5239) then remove it and fit lower connecting Rod Bearing to connecting rod cap. Mount the connecting rod cap which also has the connecting rod cap nuts are mounted and an additional 20 nm (15 ft. Lbs.) of torque is applied before using the torque angle meter (J 45059) to turn the nuts by 75 degrees. Check binding by separating the connecting rod, use the prying joint right and left frequently sprucing up the connecting rod cap nuts as required, measure connecting rod side clearance. Mount the Crankshaft oil deflector and the nuts, tighten to 25 nm (18 ft. Lbs.), after that there is the Oil Pump driveshaft and the Oil Pump, and finally the Oil Pump bolt which will tighten to 25 nm (30 ft. Lbs.). Lastly, re-install and check for spark plugs and the Oil Pan with oil pressure and leaks.
    Posted by ChevyPartsGiant Specialist
    Q:
    What is the next step after removing the lower connecting rod bearing for the 2000 Buick Regal? Posted by Customer
    A:
    Remove the lower connecting rod bearing from the connecting rod cap, then install the Connecting Rod Assembly Guide (J41507) to the connecting rod.
    Posted by ChevyPartsGiant Specialist
    See expert answers on similar Rod Bearing
    Q:
    How do you check for binding after installation for the 2004 Buick Regal? Posted by Customer
    A:
    Check for binding by prying the connecting rod back and forth, adjusting the cap bolts if necessary.
    Posted by ChevyPartsGiant Specialist
    See expert answers on similar Rod Bearing
    Q:
    What should be done after accessing the upper connecting rod bearing for the 2004 Chevrolet Impala? Posted by Customer
    A:
    Remove the upper connecting rod bearing, wipe the oil from the bearings, inspect them, and measure the bearing clearance.
    Posted by ChevyPartsGiant Specialist
    See expert answers on similar Rod Bearing
    Q:
    How do you check for binding after installation for the 2000 Chevrolet Monte Carlo? Posted by Customer
    A:
    Check for binding by prying the connecting rod back and forth, adjusting the cap bolts if necessary.
    Posted by ChevyPartsGiant Specialist
    See expert answers on similar Rod Bearing
    Q:
    What should be removed after positioning the connecting rod for the 2003 Chevrolet Impala? Posted by Customer
    A:
    Remove the oil pump bolt, followed by the oil pump and the oil pump driveshaft.
    Posted by ChevyPartsGiant Specialist
    See expert answers on similar Rod Bearing
    Q:
    What should be done with the oil pump and driveshaft for the 2005 Chevrolet Monte Carlo? Posted by Customer
    A:
    Reinstall the oil pump driveshaft and oil pump, securing the oil pump bolt to 41 Nm (30 ft. lbs.).
    Posted by ChevyPartsGiant Specialist
    See expert answers on similar Rod Bearing
    If you have any questions about this product, please don't hesitate to ask us. We will be happy to help you!

OEM GM 89017700, Excellent Performance and Perfect Fitment

To ensure reliability, purchase GM part # 89017700 Rod Bearings. It is sometimes referred to as GM Rod Bearing. Choosing OEM parts is the optimal decision for guaranteeing superior quality and perfect performance. These components undergo stringent quality checks and are carefully constructed to comply with GM's factory specifications, ensuring a smooth installation process.

ChevyPartsGiant.com is a leading supplier of genuine GM parts such as GM 89017700 Rod Bearings. Our website boasts an extensive inventory of OEM GM parts, available at highly competitive prices in the market. Should you require any new genuine GM parts, rest assured we will deliver them swiftly and efficiently to your doorstep. Furthermore, all our parts come with the assurance of a manufacturer's warranty. For detailed Chevy parts information, click here.
Choose ChevyPartsGiant for discounted prices, exceptional service and fast delivery